How to Make a Sound Wave From a Song
Sound waves, waveforms, or audiograms add a professional touch to any video that has sound. Learn how to make a waveform with this tutorial.

Whether you're watching lyric videos, podcast snippets, or karaoke videos you’ve probably seen a waveform. Waveforms, or audiograms, are simple graphs of audio files showing its frequency and amplitude over time. The taller the waveform, the louder the sound at that frequency.
Regardless if you’ve seen them or not, waveforms (or sound waves) add a professional and eye-catching touch to any video with sound.
In this tutorial, I will show you how to make a sound wave from a song in five easy steps:
- Upload Your Audio to the Waveform Generator
- Edit Sound Wave
- (Optional) Remove Video from Audio/Song
- (Optional) Make a Sound Wave From Your Audio
- Download and Share Your Sound Wave
Step 1: Upload Your Audio to the Waveform Generator
To get started, visit Kapwing’s Waveform Generator in your browser. You can use Kapwing on any iPhone, Android, PC, or tablet and export videos up to seven minutes long for free. From here, click Get Started, then upload your audio file or paste an audio or video URL to automatically generate a Waveform in the Kapwing Studio.

Step 2: Edit Sound Wave
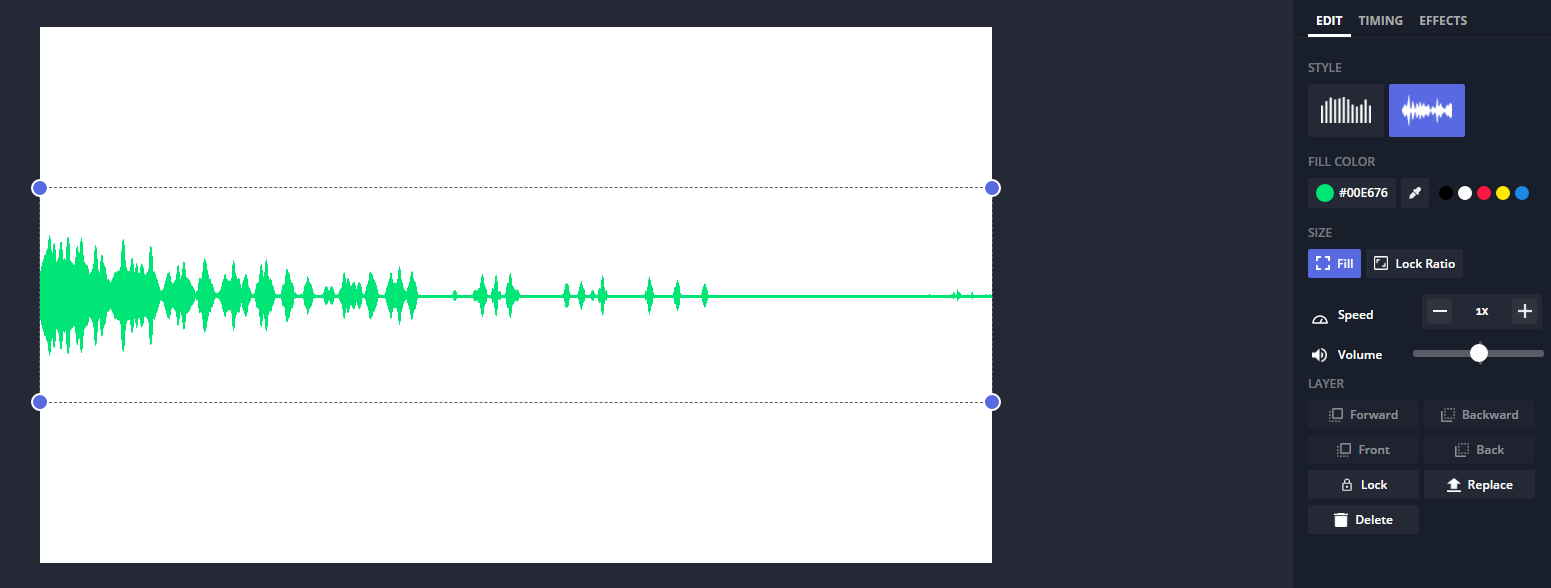
Once the sound wave/waveform has been generated, it can then be customized in terms of style, fill colors, speed, and volume.
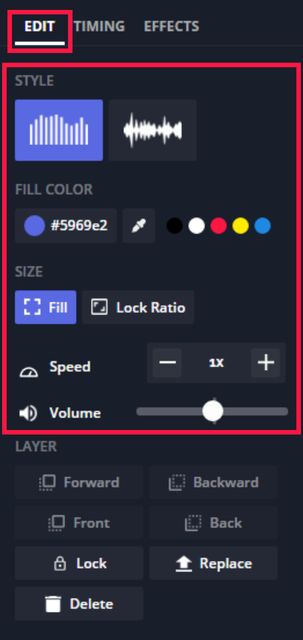
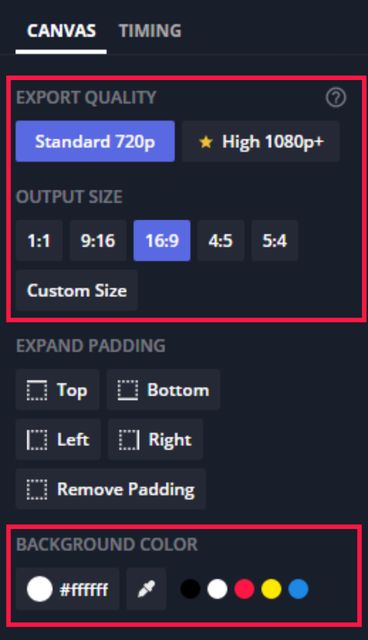
If needed, you can change the background of your sound wave. Click any blank space outside of the canvas, locate Background Color on the right side of the Studio, then choose from Kapwing's default color options or type in a hex code. You can also change your project's Export Quality.
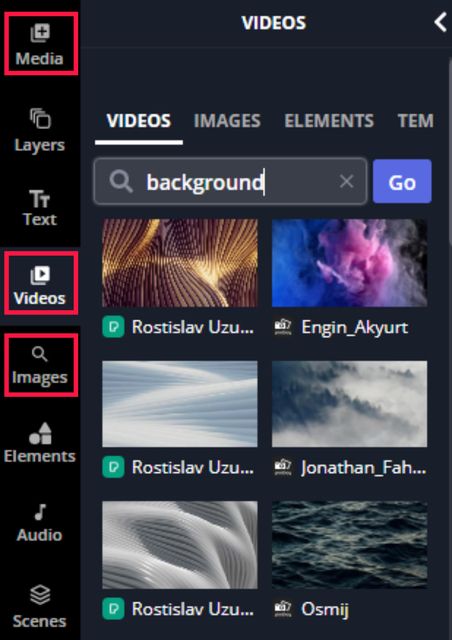
If you want to replace the blank background with an image, GIF, or video, you can do this by simply clicking on Media, Video, or Images on the right side of the studio, selecting or uploading your desired form of media, and then adding your media to the project.
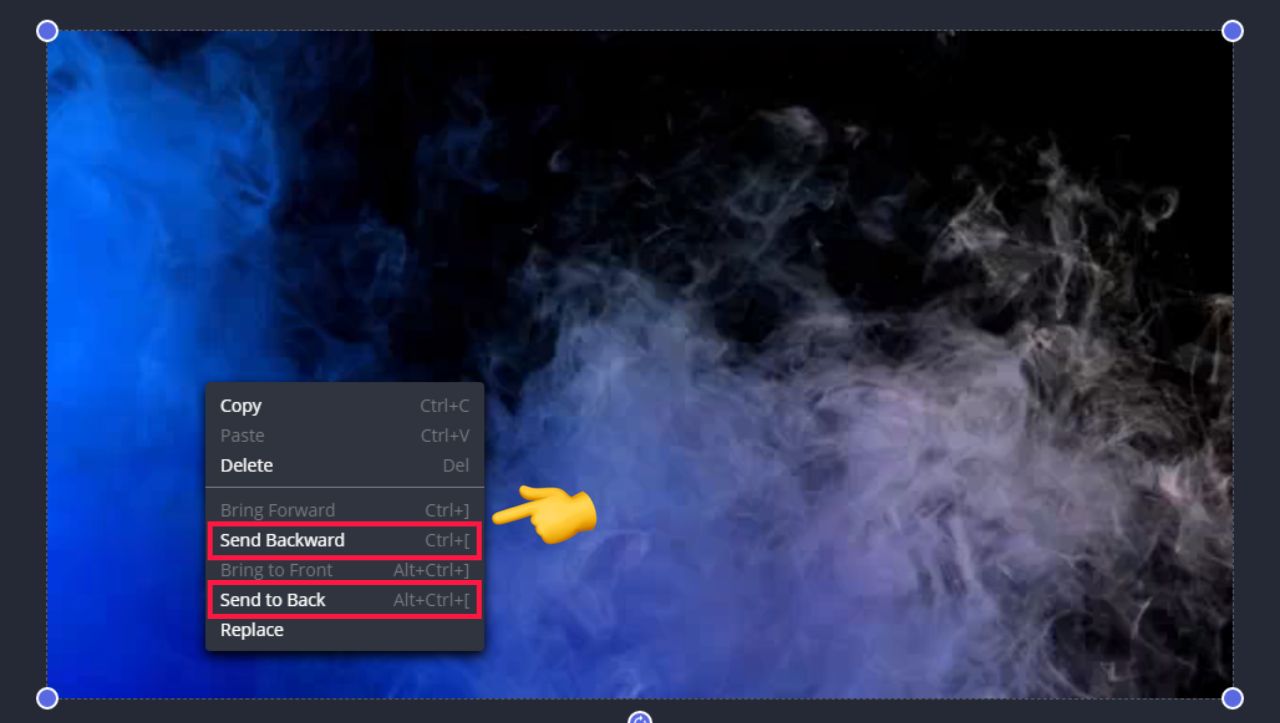
Make sure to adjust your media to the length of your audio and then right-click on your media and choose Send Backward or Send to Back to make the media your sound wave's new background.
Related Article: How to Make a Spotify Canvas Like a Pro
Step 3: (Optional): Remove Video from Your Audio/Song
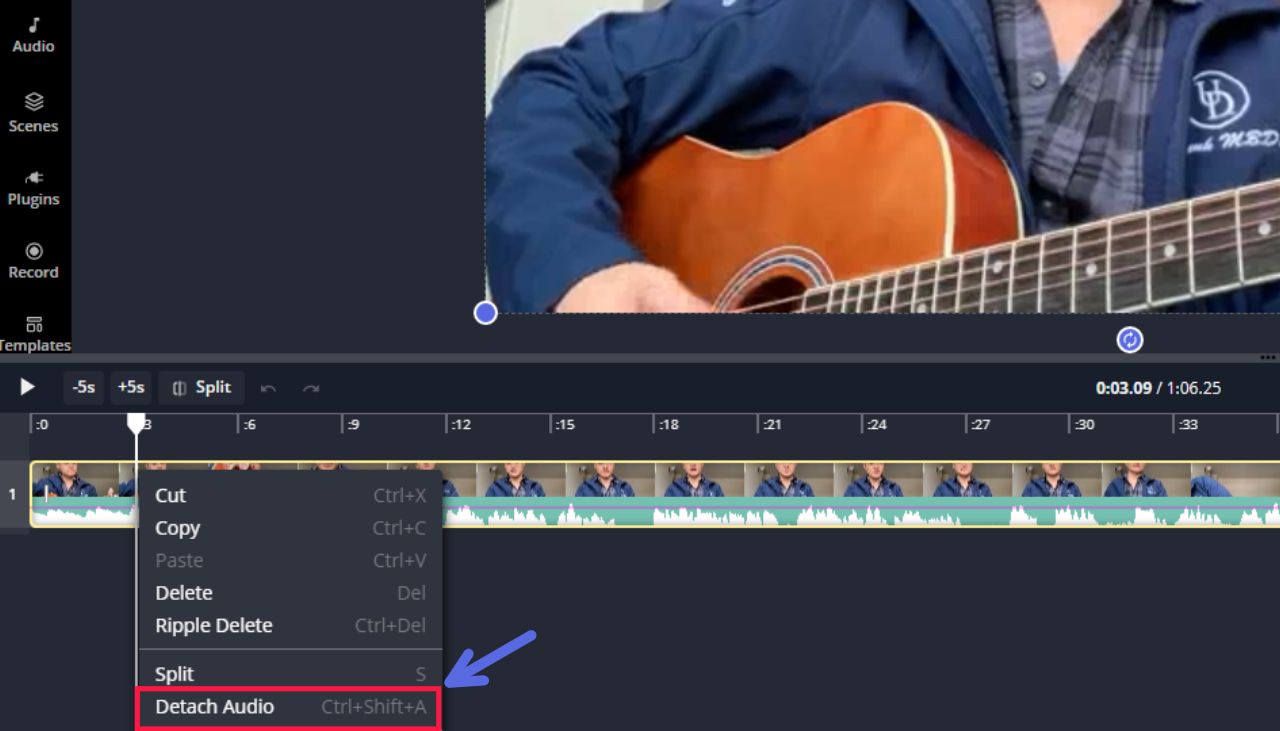
If you need to isolate audio from a video to make edits, right-click on your video on the timeline and click Detach Audio (or press the Ctrl+Shift+A keys on your keyboard). The audio and video will now be separated from each other on the timeline.
To remove your video from your project entirely, right-click on your video and select Delete. Your screen should now display a white canvas/background the size of your now deleted video with its audio still present in the timeline.
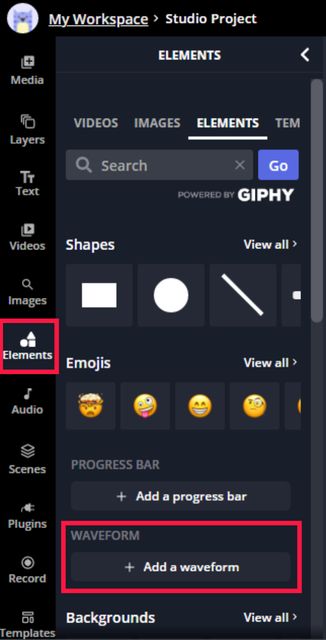
Step 4: (Optional) Make a Sound Wave From Your Audio
To manually make a sound wave from your audio, click Elements on the right side of the Kapwing studio, scroll down to the Waveform section, and then click Add a Waveform.
If you started from a blank canvas, you can press Click to Upload Audio, drag and drop your audio file to the dotted rectangle, or paste a url from a website like YouTube, TikTok, or Twitch.
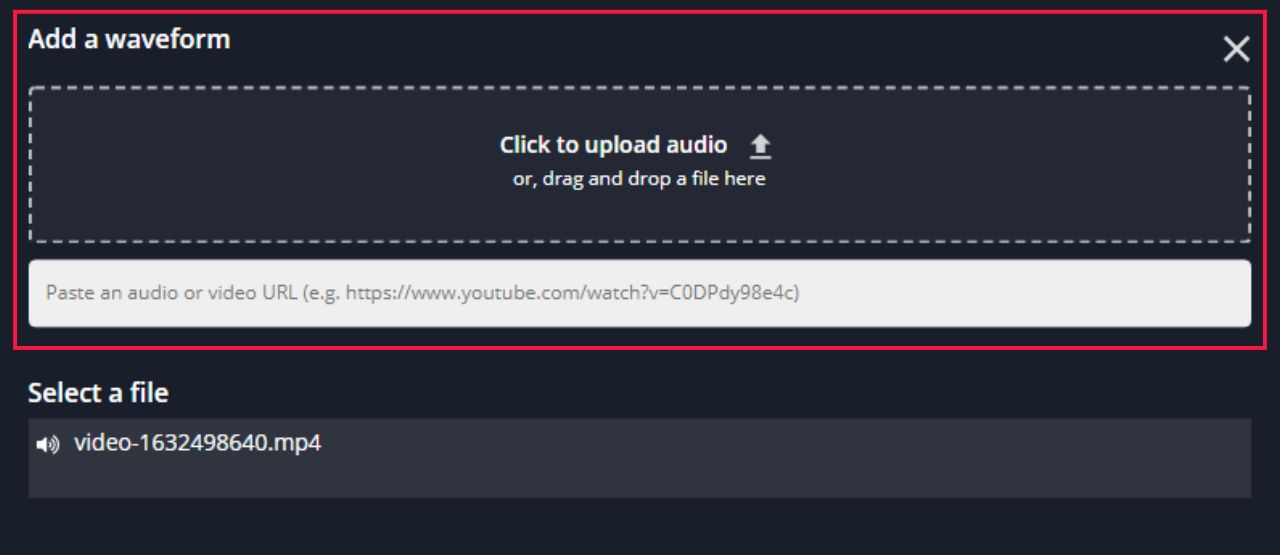
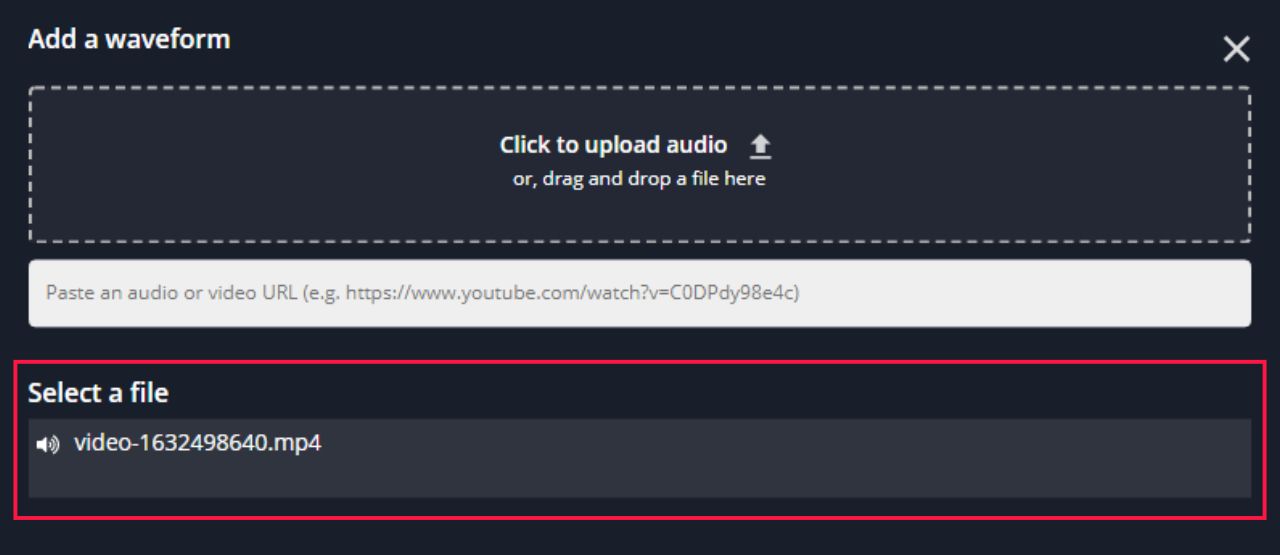
If you already uploaded your desired audio or recently removed the video from your desired song/audio, the isolated audio file will automatically appear under Select a File.
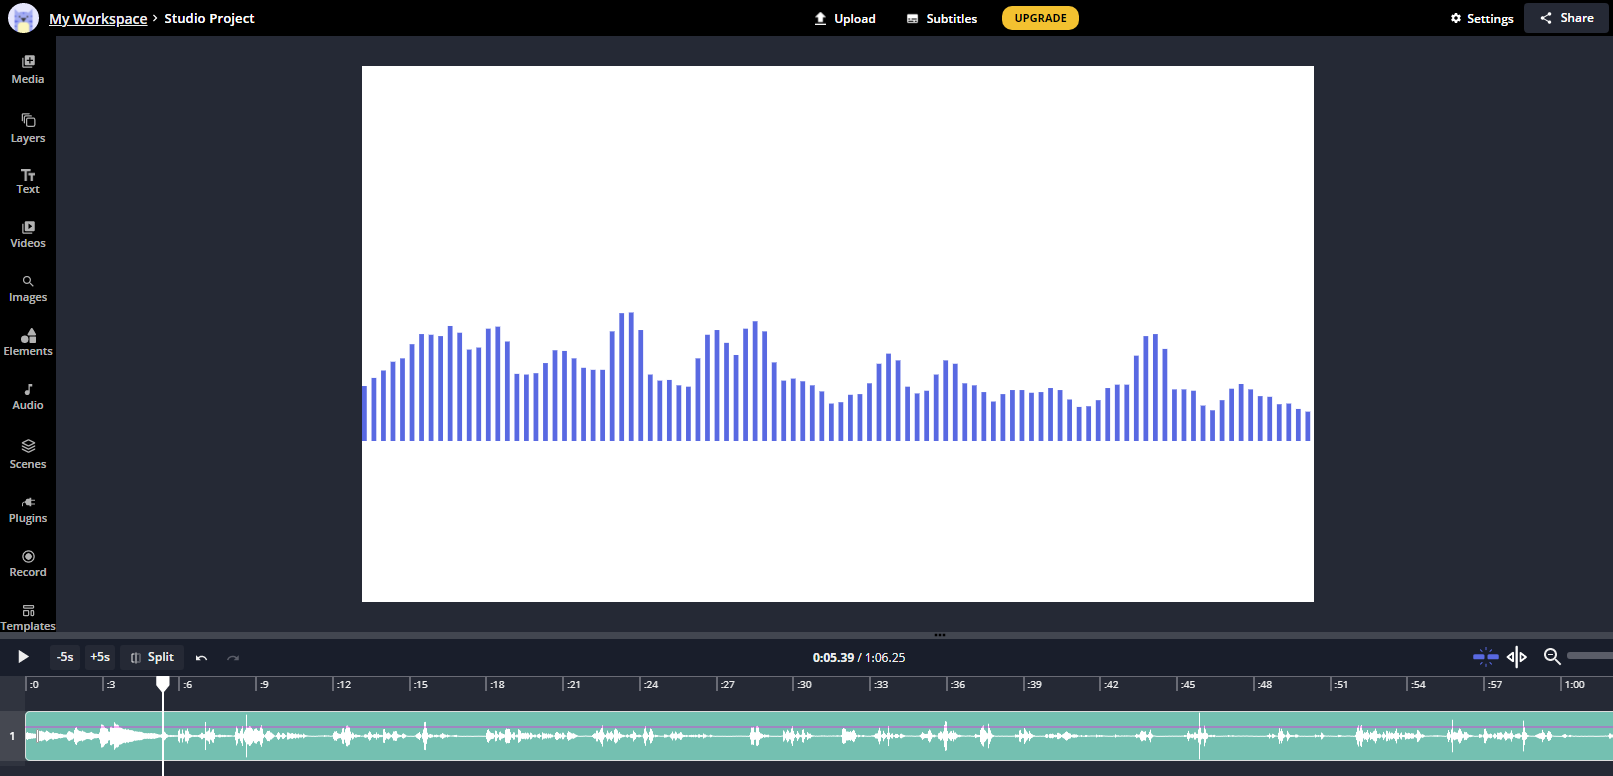
Once the audio has been uploaded or selected, an animated sound wave/waveform will then be automatically generated onto your blank canvas.
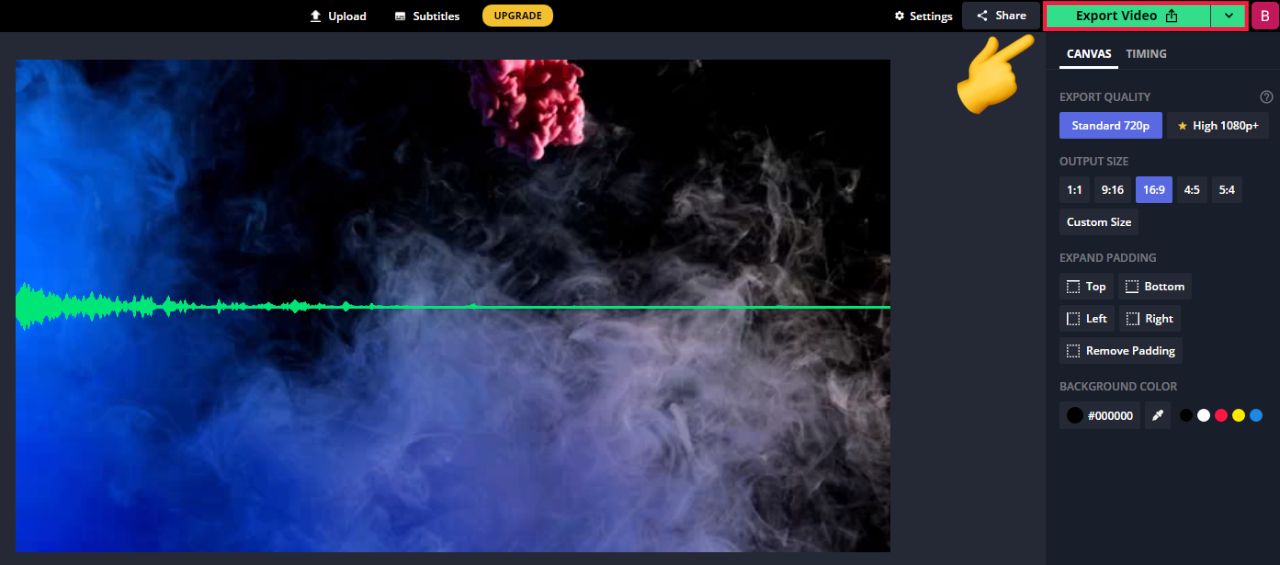
Step 5: Download and Share Your Sound Wave!
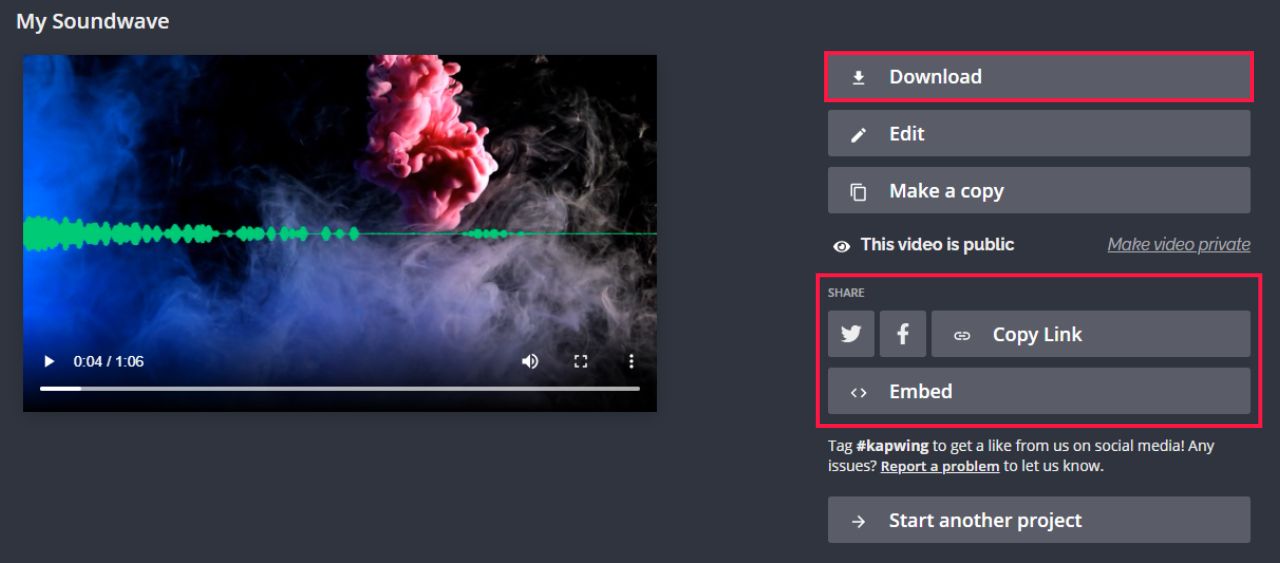
Once you're satisfied with your new sound wave, you can can download it by either immediately clicking on the green Export Video button located on the top right of your workspace or clicking the drop down arrow directly to its right to export it as a specific file format.
After rendering, you can share your video using the provided links or you can download the file to publish it directly to any desired platform. If you would like to make any changes, you can easily go back into your workspace and make any edits as needed.
If you have any feedback about Kapwing or the Kapwing Studio feel free to let us know! For more tips and tutorials on creating great digital content in 2021, check back in at the Kapwing Resources page, subscribe to our YouTube channel, or read through some articles related to audio:
- How to Upload Audio to YouTube
- How to Overlay Audio on an Image or Video
- How to Make an Audio Watermark for Videos and Music
- How to Make Audio Waveforms for Your Podcast
- Video to MP3: Convert Videos for Free Online