YouTube Thumbnail Size: How to Make Thumbnail Images for YouTube Videos
Using YouTube effectively can help you reach a wide and engaged audience, and a great way to bring attention to your YouTube videos is to use flashy, exciting thumbnail images. I'll show you how to make your thumbnails look just the way you want, with the perfect dimensions for YouTube.
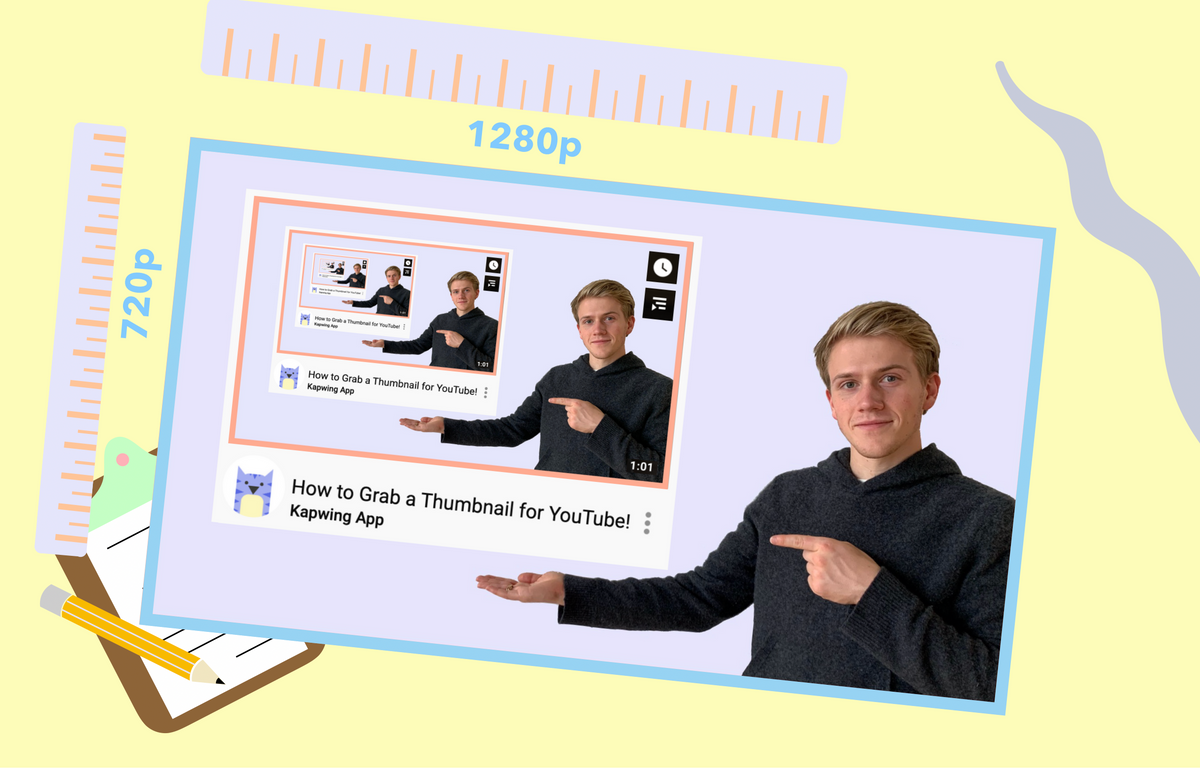
YouTube is the largest social network for video content on the web, and it's home to videos from every corner of the internet. No matter who you are or what types of videos you're making, using YouTube effectively can help you reach a wide and engaged audience. But YouTube is massively popular (nearly 5 billion videos are viewed per day!), so it can be really tough to cut through the noise and attract new viewers for your videos.
tl;dr: Use this free YouTube Thumbnail Template maker to get started creating a YouTube thumbnail with the right dimensions now.
One great way to bring attention to your YouTube videos is to use flashy, polished, and exciting thumbnail images. And while YouTube has been developing their beta version of YouTube Studio with new editing tools, there's still no way to resize and produce a custom thumbnail image using YouTube itself. You're only given 3 thumbnail options in YouTube, so if you want to resize your own picture to 1280px720p (16:9), or use a different frame from the video itself, you'll need to use another tool. Here's how to do it in 3 simple steps, for free and online:
- Upload Your Video to Kapwing
- Resize & Edit
- Process & Download!
Step 1: Upload Your Photo or Video to Kapwing
You can find your files anywhere on the Internet (Drive, DropBox, Facebook, Instagram, Twitter, TikTok) – you can even grab a thumbnail from a video that's already been published to YouTube and edit it further. All you need to do is copy the link to the photo or video.
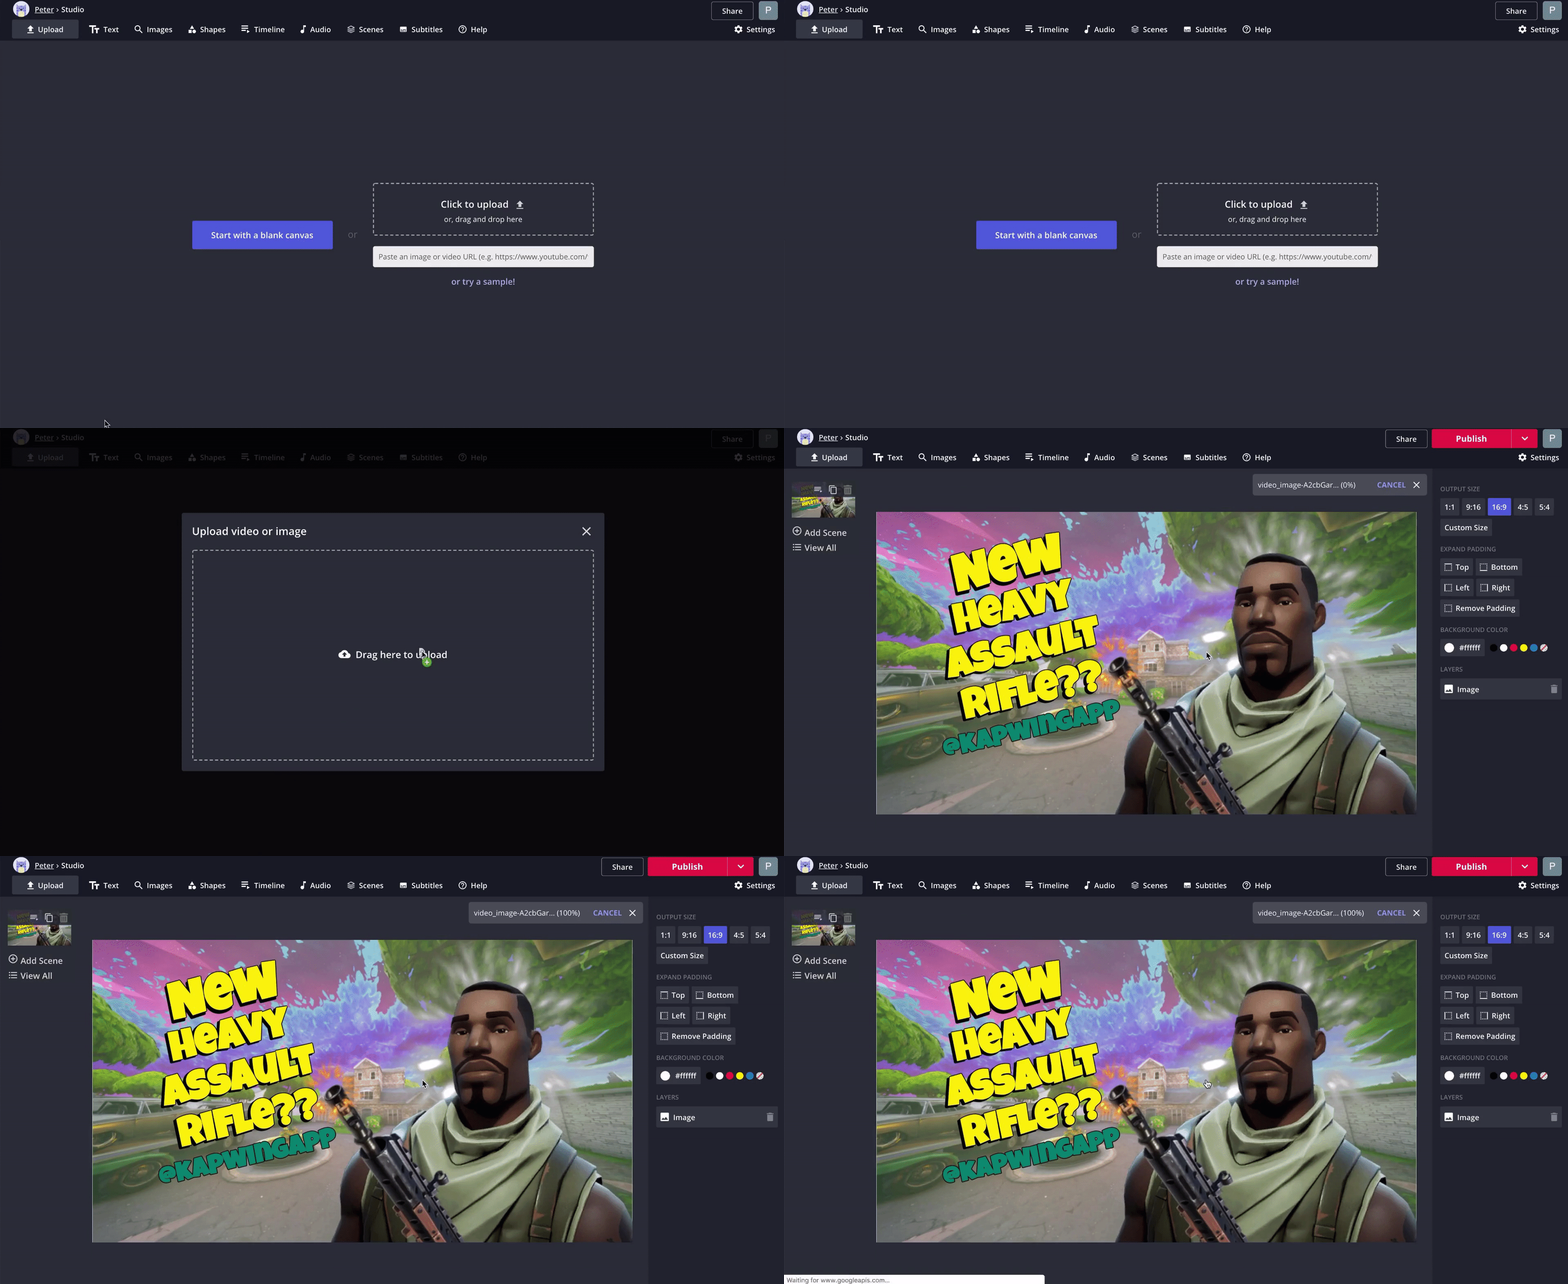
And if the video or photo you want to use is saved on your device, just make sure you know where it's located. If you're uploading files from your own computer, it's a good idea to have your file browser open, so you can click & drag your content quickly into the Kapwing Studio. If you're grabbing a frame from a video, follow the instructions here and save the video's frame to your device.
Step 2: Resize & Edit
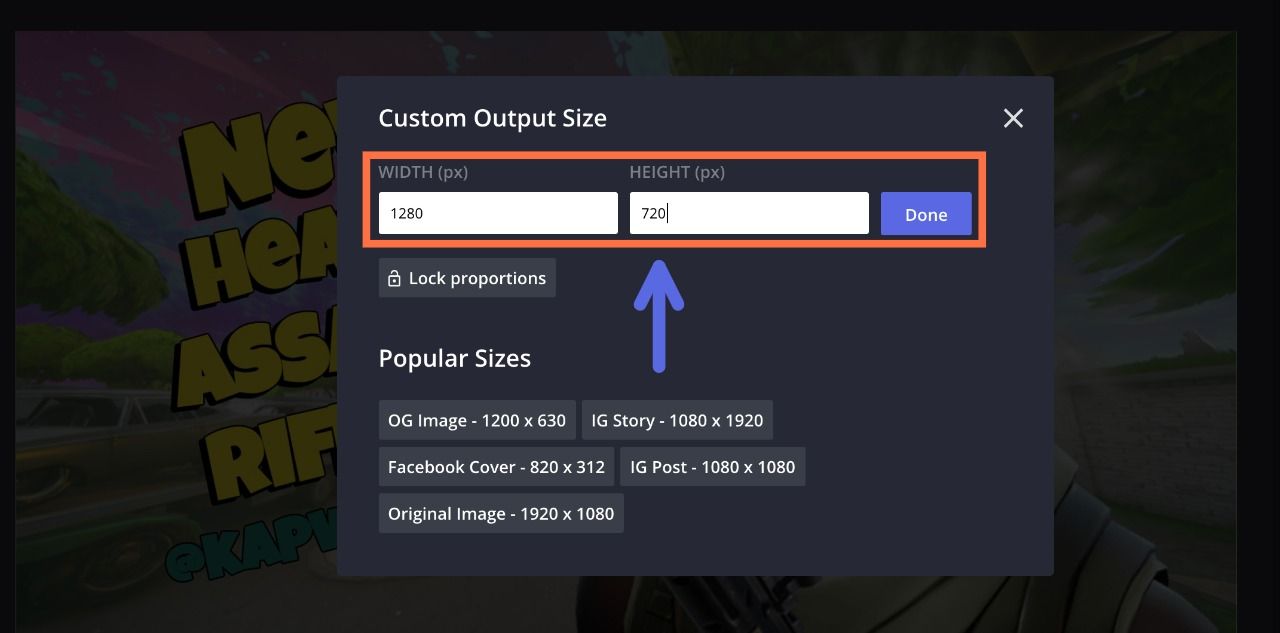
Here's where the fun begins. Head to Kapwing.com and click "Start Editing" to go to the Kapwing Studio. Here, either choose "Click to Upload" or paste the link you copied to a photo you found online. Once your picture is fully uploaded to the Studio, start by selecting "16:9" under "Output Size" in the toolbar on the right side of the Studio – this will automatically set your photo's aspect ratio to 1280x720 pixels, perfect for YouTube thumbnail images.
Now it's time to make any edits your thumbnail image needs. The easiest and most useful thing to do is to add some custom text. Just look at how many of these videos on YouTube's trending page have added text to their thumbnail pictures:
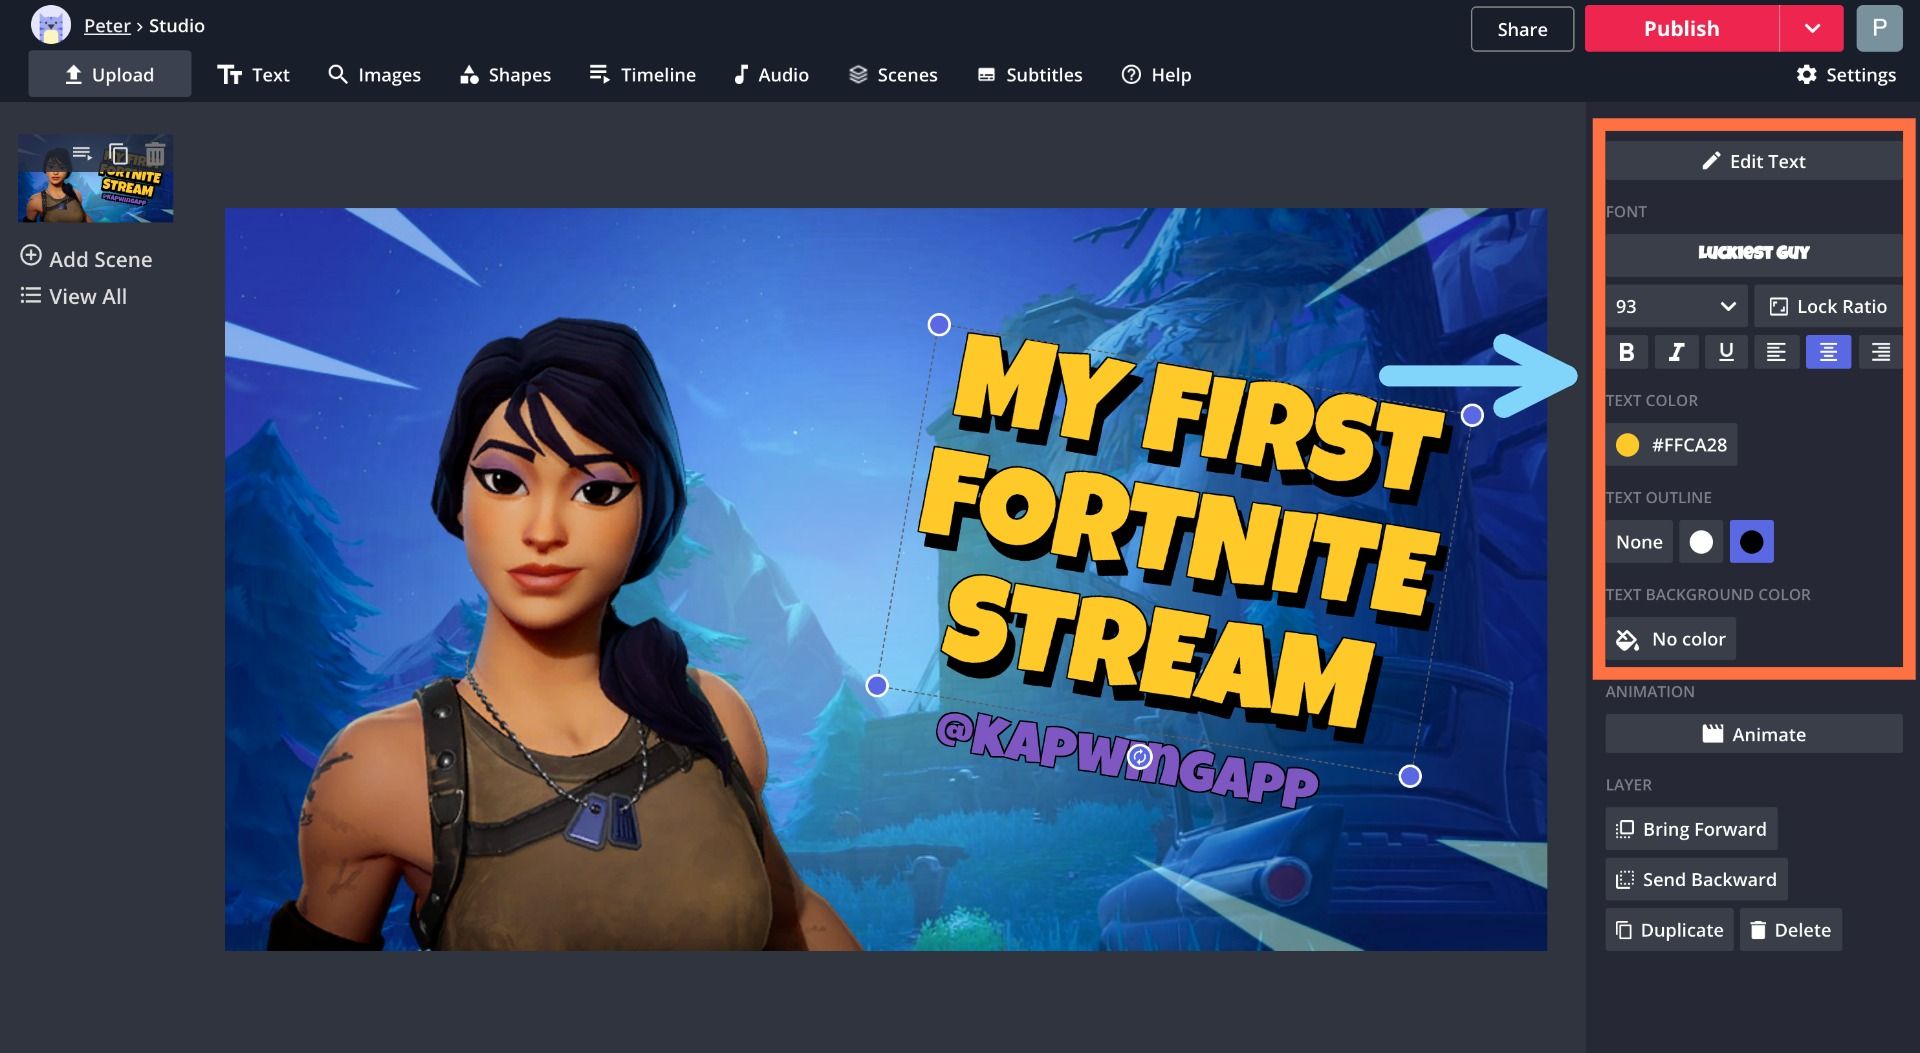
In the Kapwing Studio, click "Text" in the upper toolbar, and a new text box will be added to your thumbnail picture. You can use the tools on the right-hand side of the window to edit your text's font, color, size, position, background, and style. Add as many text boxes as you want for different 3D effects!
Step 3: Process & Download!
Once you’ve resized and edited your thumbnail, you’re ready to process it. Just click “Publish” in the top right corner of the window. Kapwing will automatically work its magic and your thumbnail picture will be ready to download in no time. Once Kapwing is done processing, simply click “Download." If you're using a mobile device, select "Download," then press and hold on the picture to save it to your camera roll. Your photo is now on your device and ready for you to share anywhere.
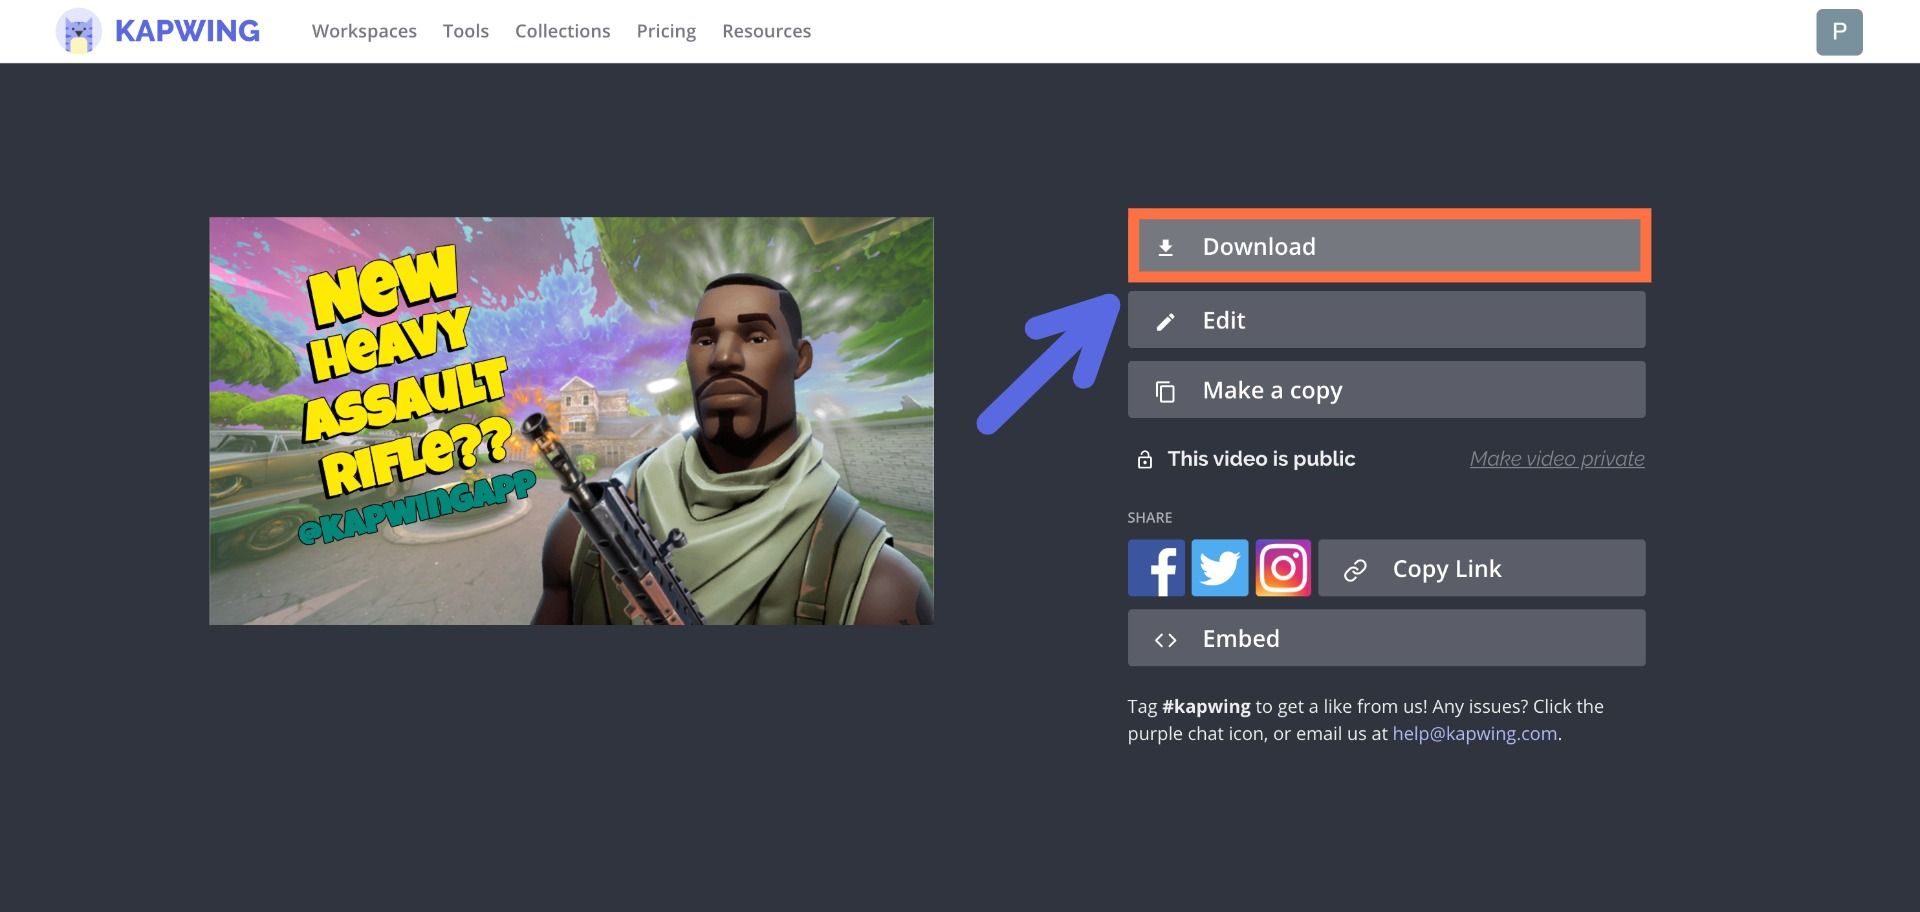
Uploading Your Thumbnail Image to YouTube:
Once you've downloaded your thumbnail image, you still need to know what to do with it. If you're going to use it for a video you're about to publish to YouTube, go through the standard upload protocol: hit the upload button at the top of the window (it looks like a camera), drag & drop or browse for your video file, add your title, description, & tags. Then, select "Custom Thumbnail" near the bottom of the screen, and find the snapshot you pulled using Kapwing in your file browser.
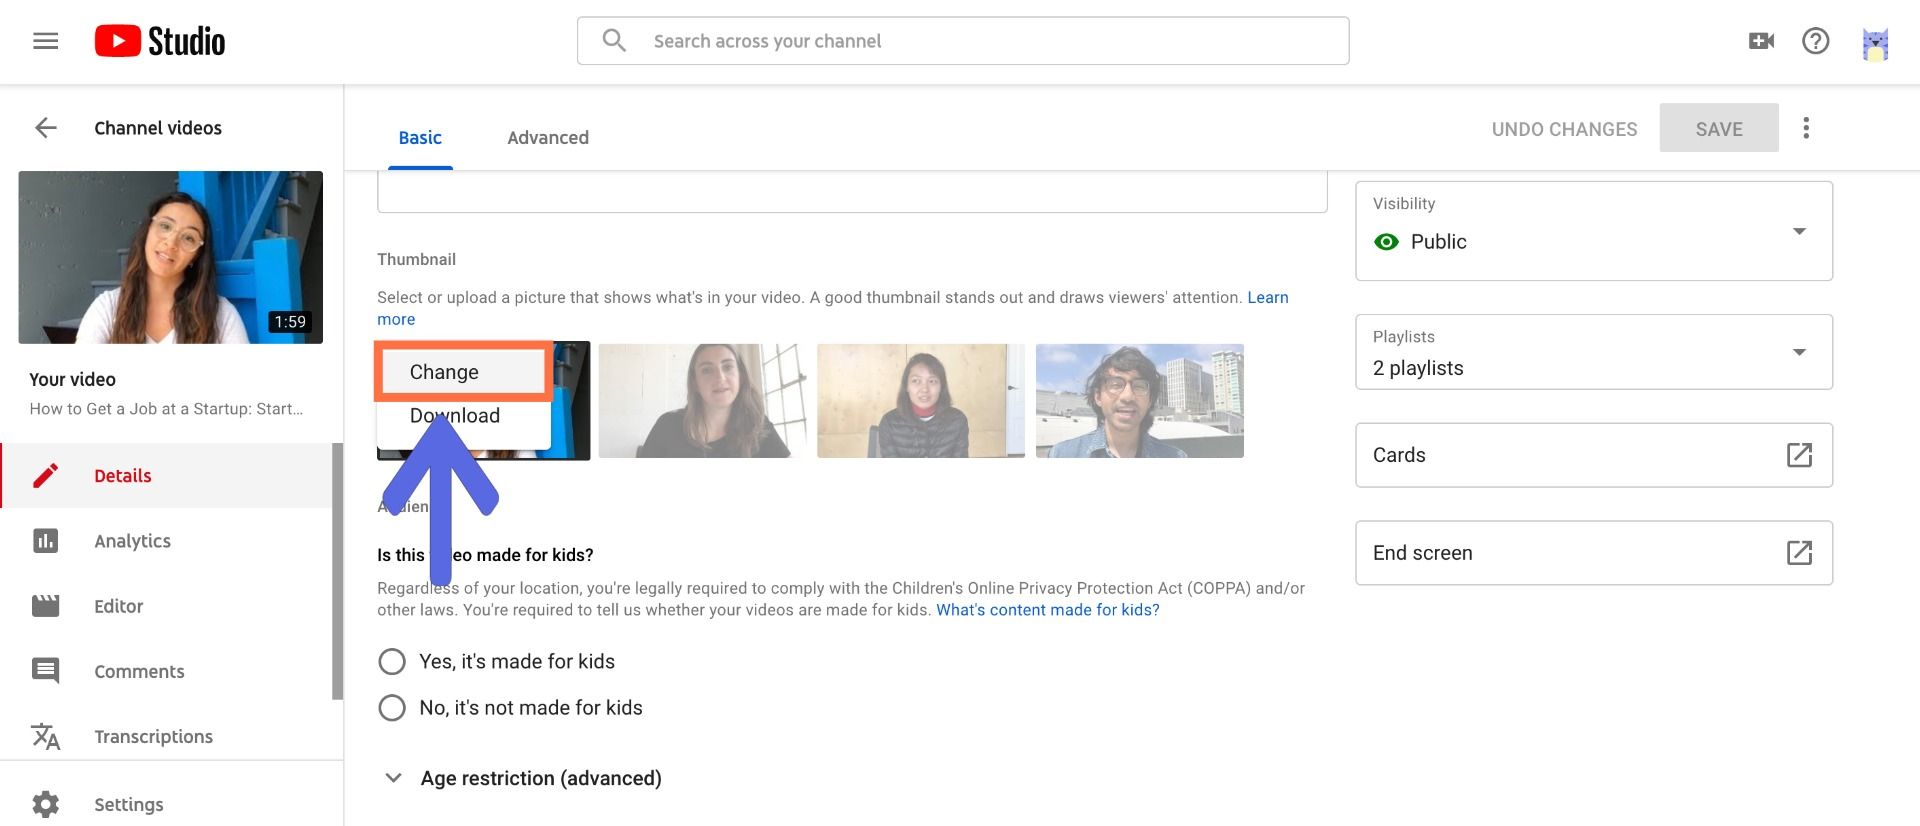
If you want to change the thumbnail on a video you've already uploaded, go to your video and click "Edit Video" under the player. Under the "Thumbnail" section, click the left-most option and choose the file you made using Kapwing in your file browser.
Remember to tag us @KapwingApp whenever you share your content on social media– we love to see what our creators are passionate about! And be sure to subscribe to the Kapwing Resources library – we’re constantly writing new tutorial and features to help you make the most out of Kapwing.
Related Articles:
• Make Custom Fortnite Thumbnails for Free
• How to Make Custom Instagram Story Highlight Covers
• How to Make a Custom Twitch Offline Banner for Free
• How to Make YouTube Channel Art
• How to Make Facebook Event Banners


