How to Use the Instagram Green Screen Effect
In this article, I'm covering everything you need to know about Instagram's green screen effect and how to replace a video background in Kapwing.
Instagram's green screen unlocks the magic of Hollywood's staple effect for superimposing subjects on backgrounds. Virtually travel to faraway destinations or arrive at the set of a classic film with a few taps.
I'm dreaming of snapping videos while strolling on the beach, but in the meantime a virtual background will do! If this is your first time hearing about the green screen effect, or you're unsure of its capabilities, I've got you covered. We'll walk through how to use the green screen, and uncover its possibilities for your next post. Let's get started!
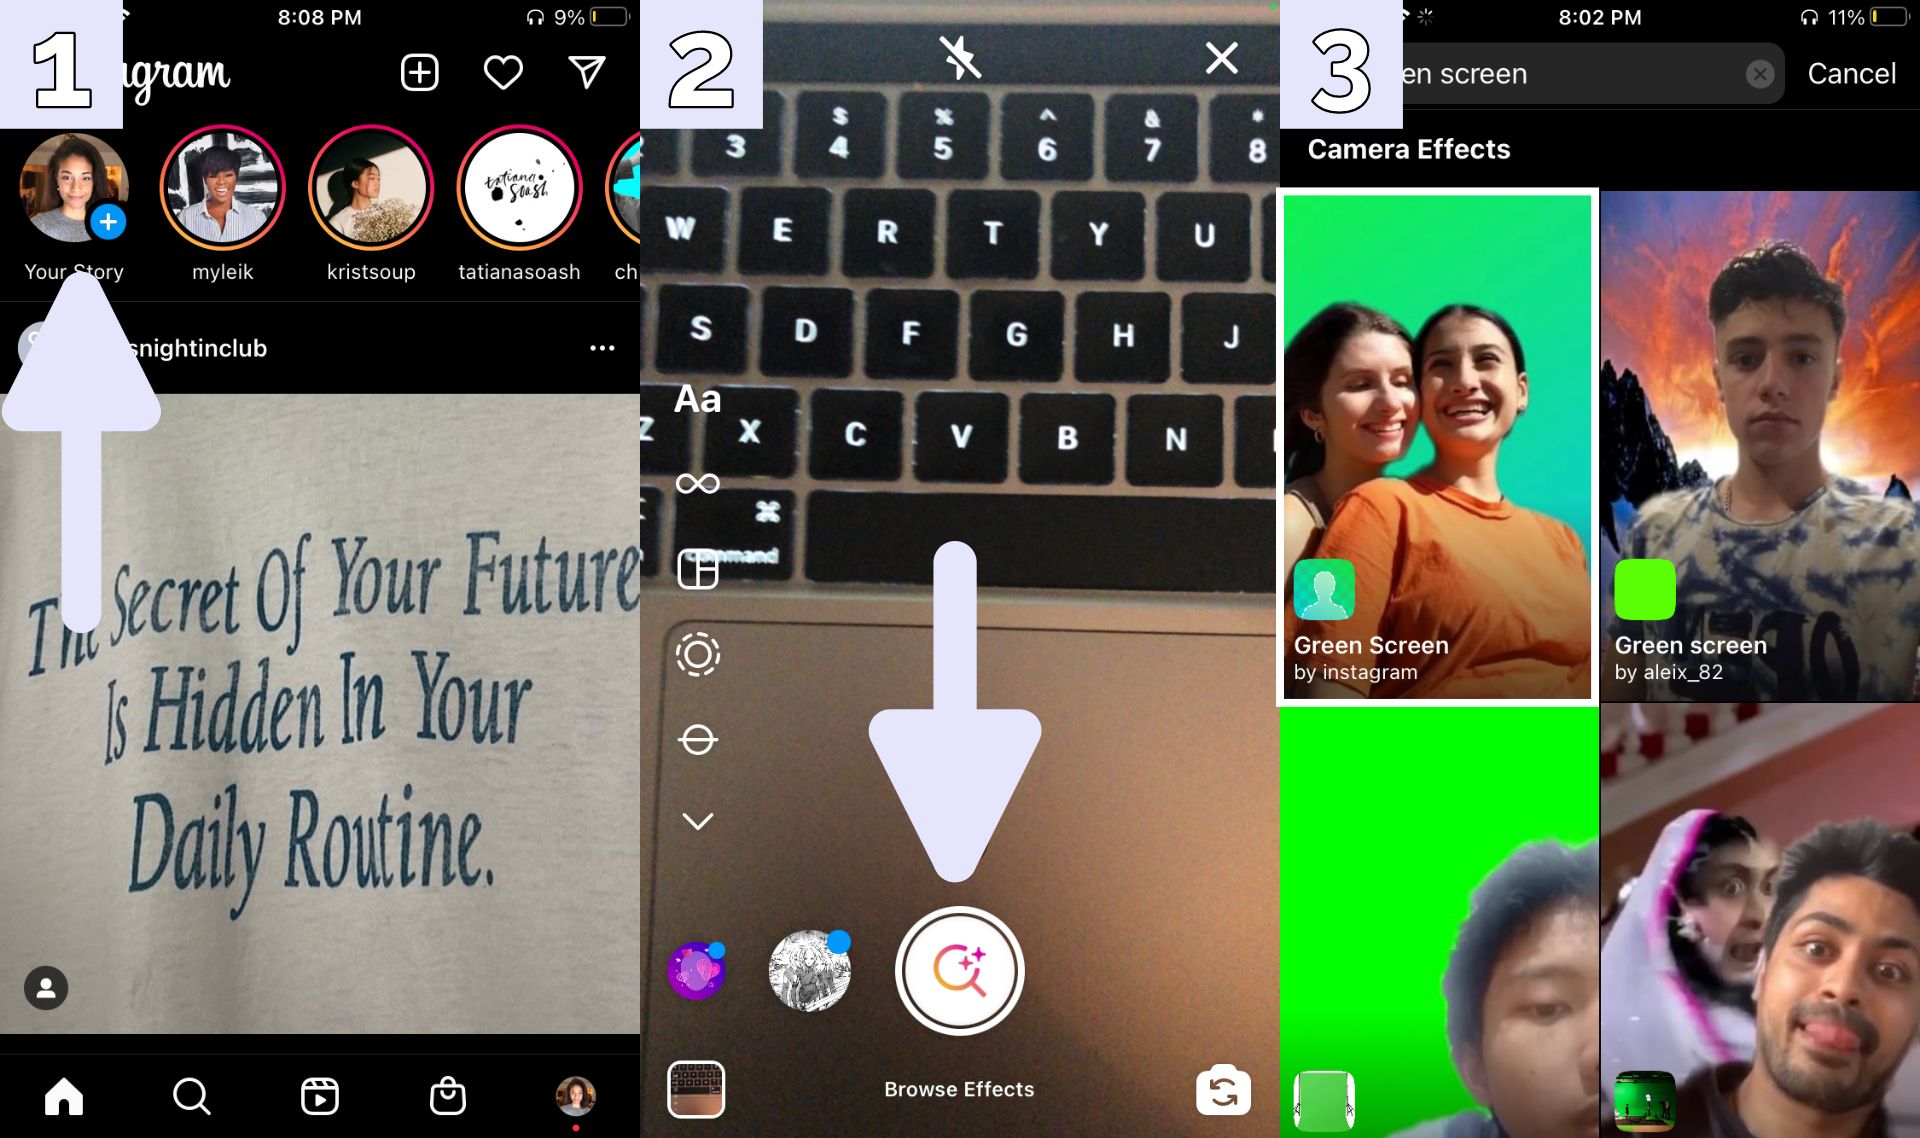
- Open Instagram on your mobile device, then tap on your profile picture in the top left corner of the screen.
- Tap "story" then scroll all the way to the right and tap "browse effects." You can also tap "reels" and "effects" on the left side of the screen. Scroll all the way to the right until you see "browse effects."
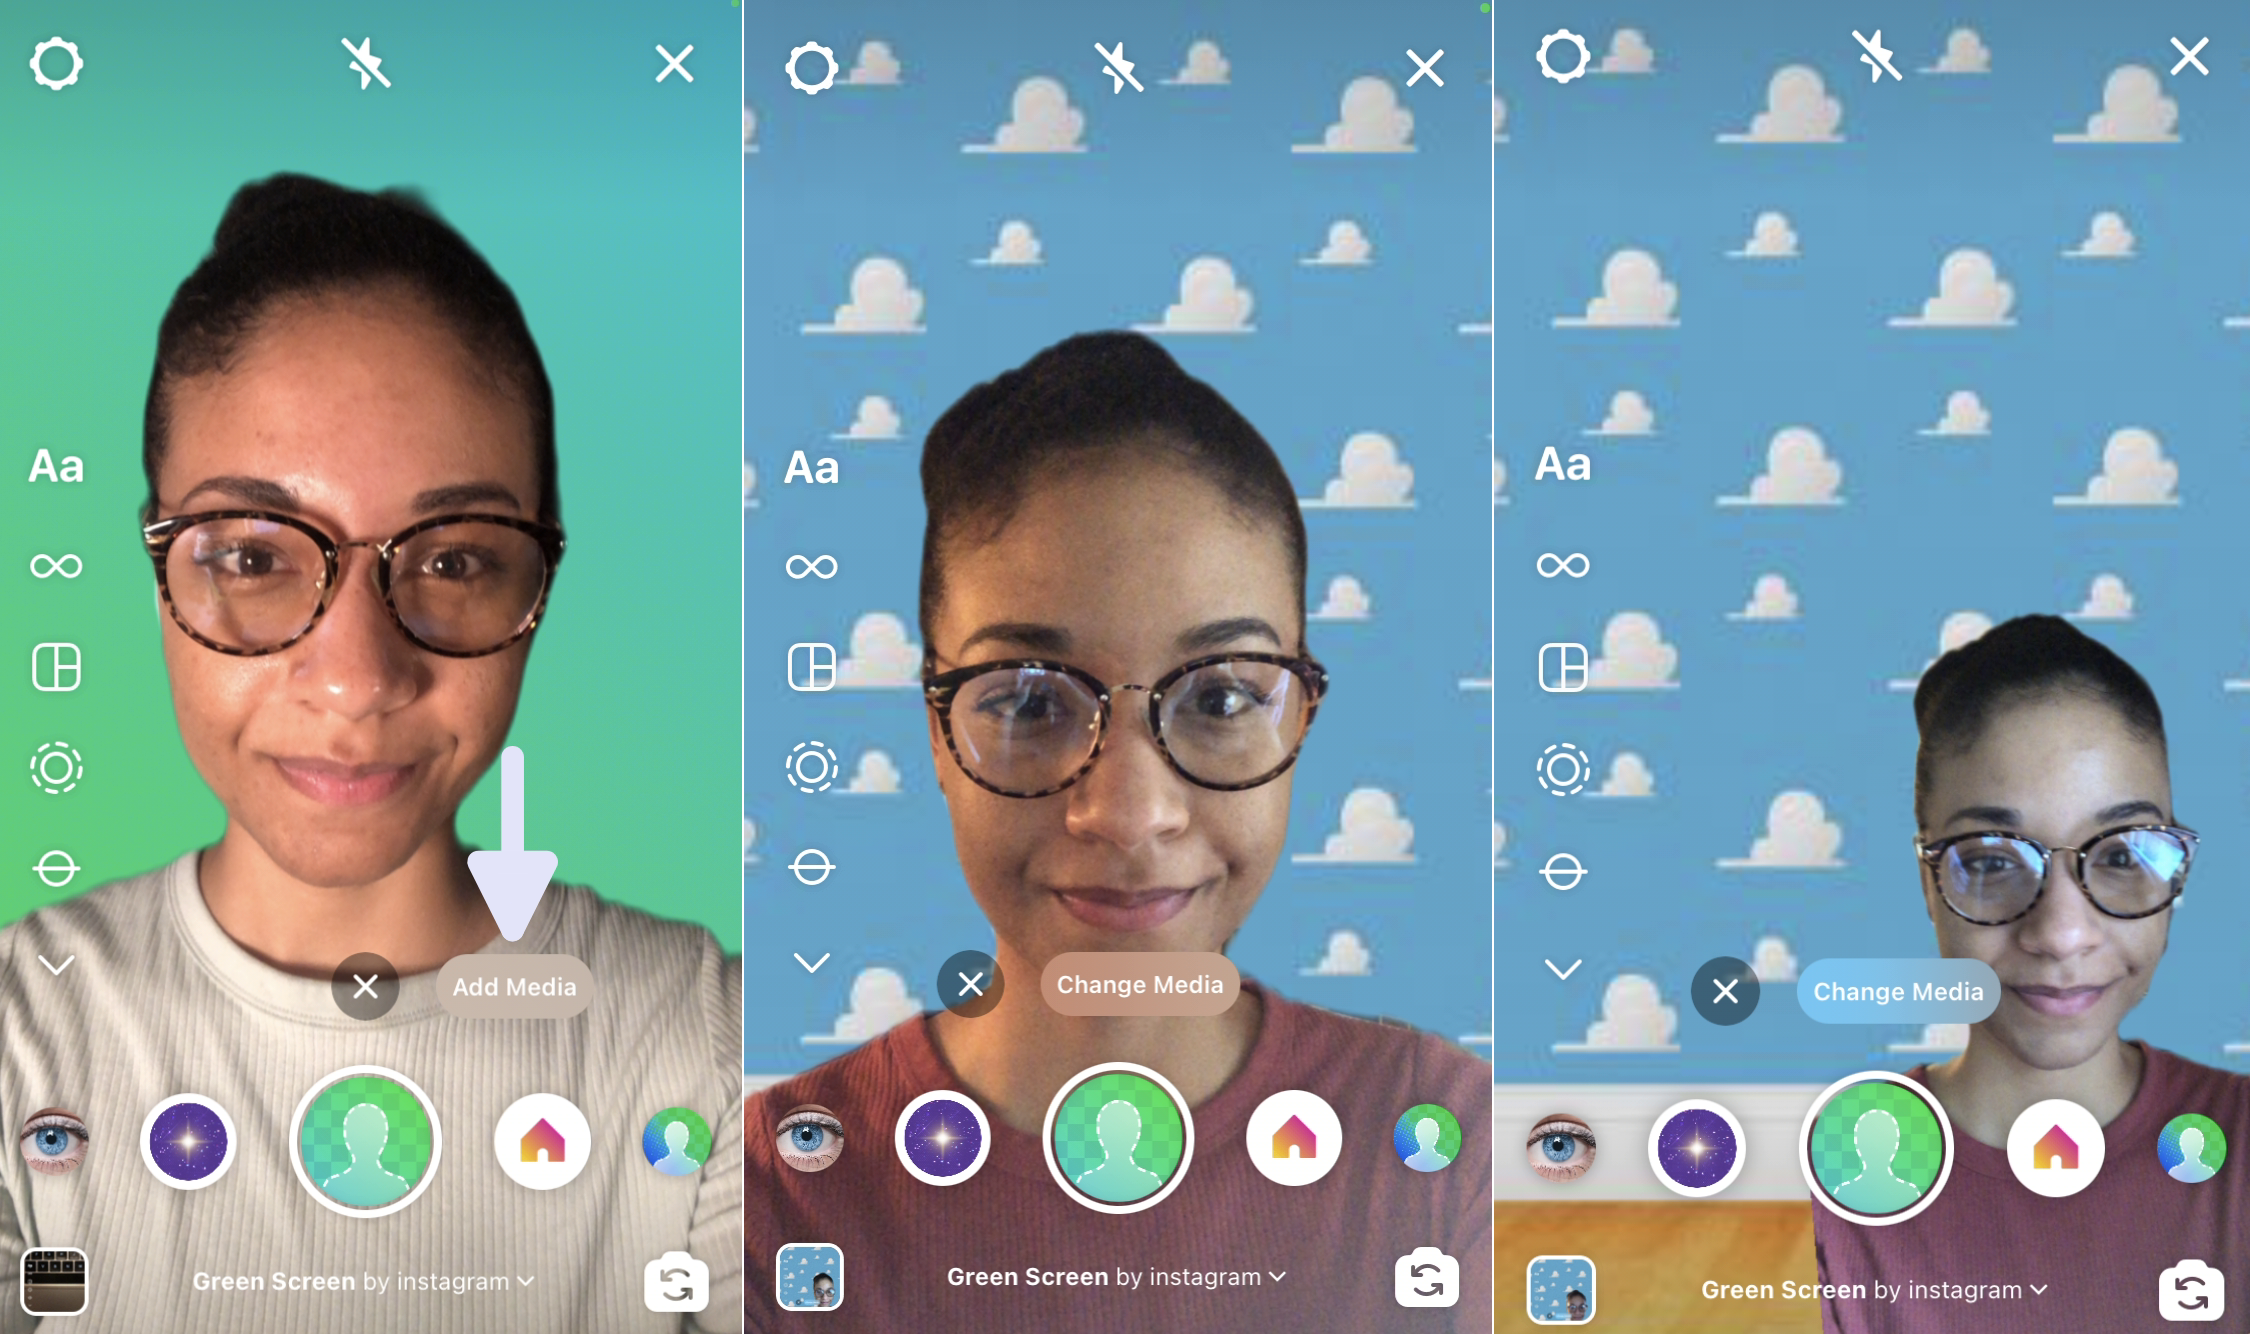
- Tap the search icon and type "green screen." A variety of camera effects will appear, but the one we want is by Instagram. Tap the first option and bookmark it to save it to your camera effects.
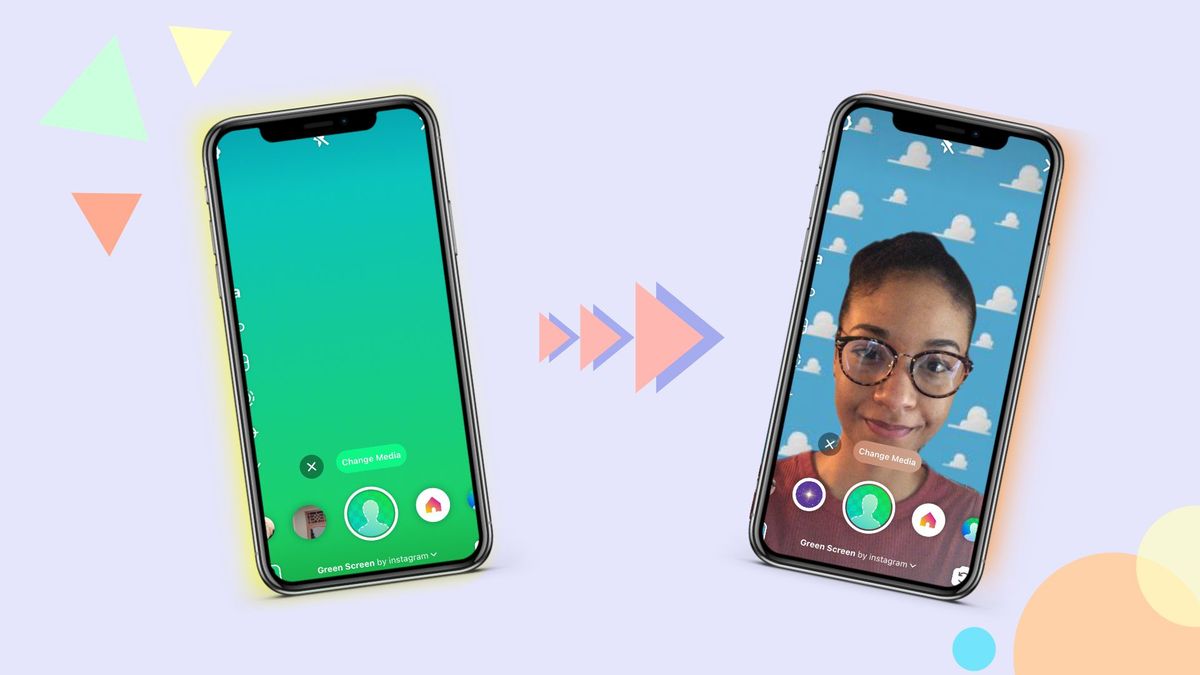
Now, it's time for the fun part! Let's test out this effect to see how creative one can be as a first-time user. Return to the story page and tap on the circle with the green screen effect. If you're using reels, tap "effects," then the green screen icon. With the front-facing camera, you'll see yourself with a green screen in the background.
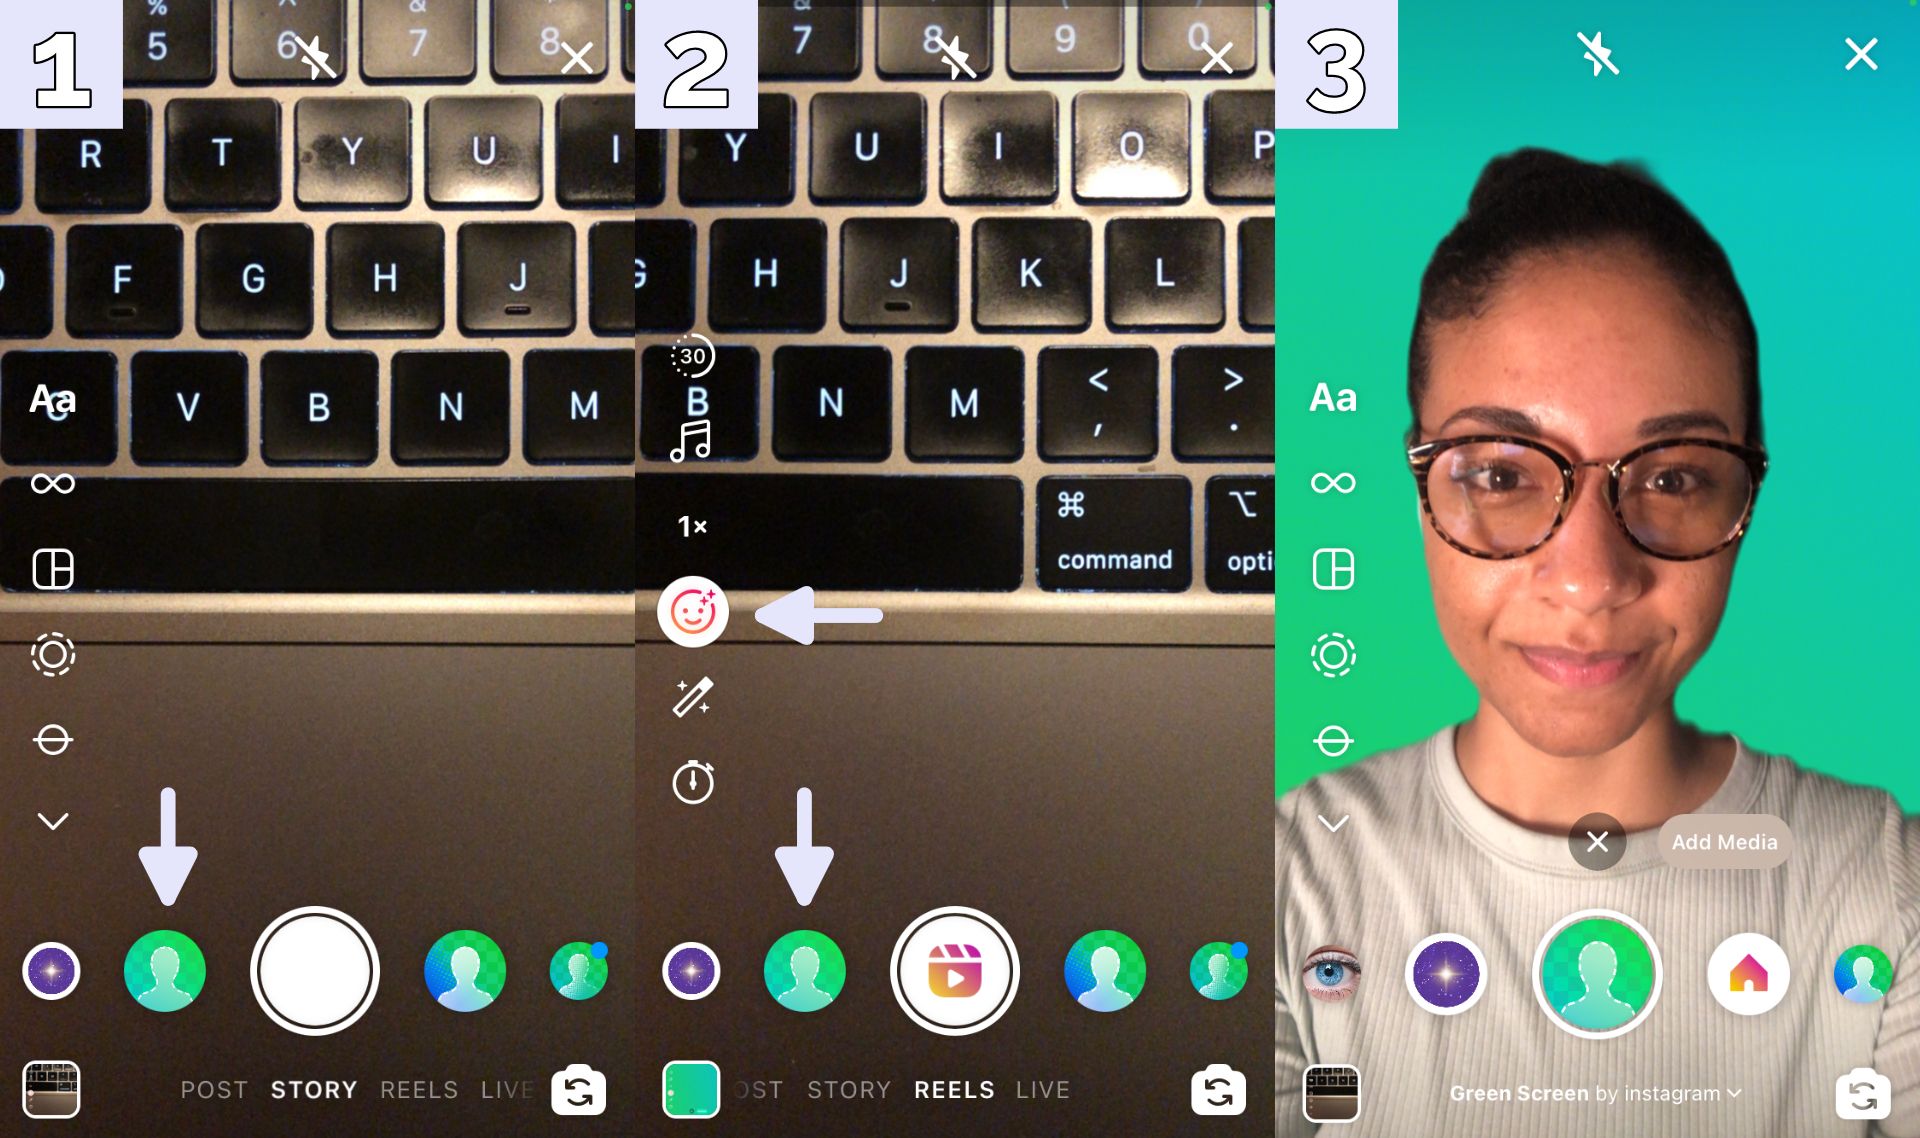
Tap "add media" to swap out the green screen for an eye-catching background. Upload a photo or a video and pinch and drag yourself to change where you appear on the screen. This is perfect for content that needs media to capture the story to the fullest extent.
Try something simple like a picture to warm up to the feature. Upload an old family a photo to travel back in time or add a picture from your favorite TV show or video game. I'm opting for a Toy Story virtual background! If you upload a video the sound will not be included.
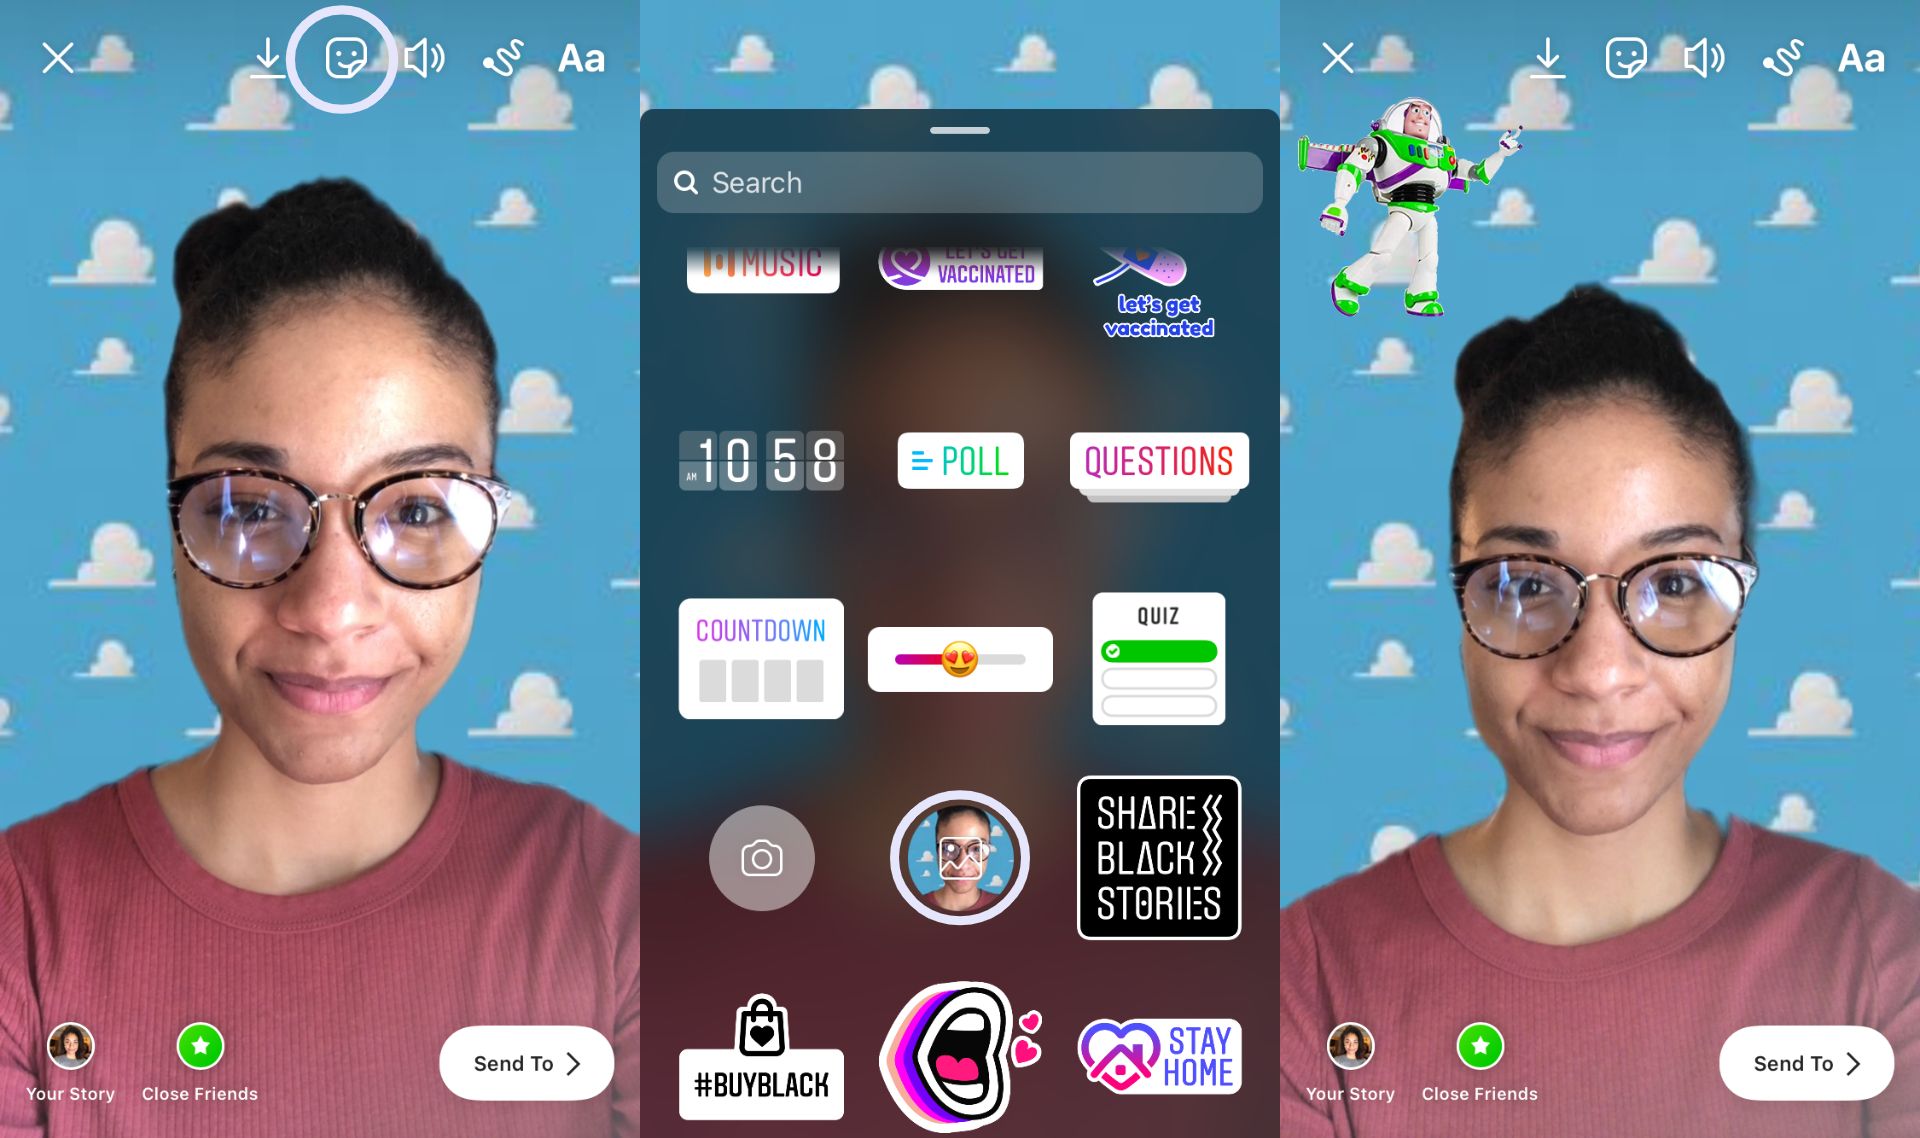
You can search for GIFs and overlays by tapping the sticker icon after recording your story or reel. With the camera roll sticker you can upload additional photos from your gallery, but you can't overlay videos or GIFs. I recommend finishing off your post with captions using the text tool so it's accessible to more viewers.
How to Remove Instagram Background in Kapwing
Overall, the green screen effect is easy to use and allows users to get creative by adding other elements to their background. If you're looking for something with more features so you can include audio and overlay videos and GIFs, try Kapwing's remove background tool. Kapwing is a browser-based video editor that's free to use on any device. The best part is you don't need a green screen to achieve the same effect!
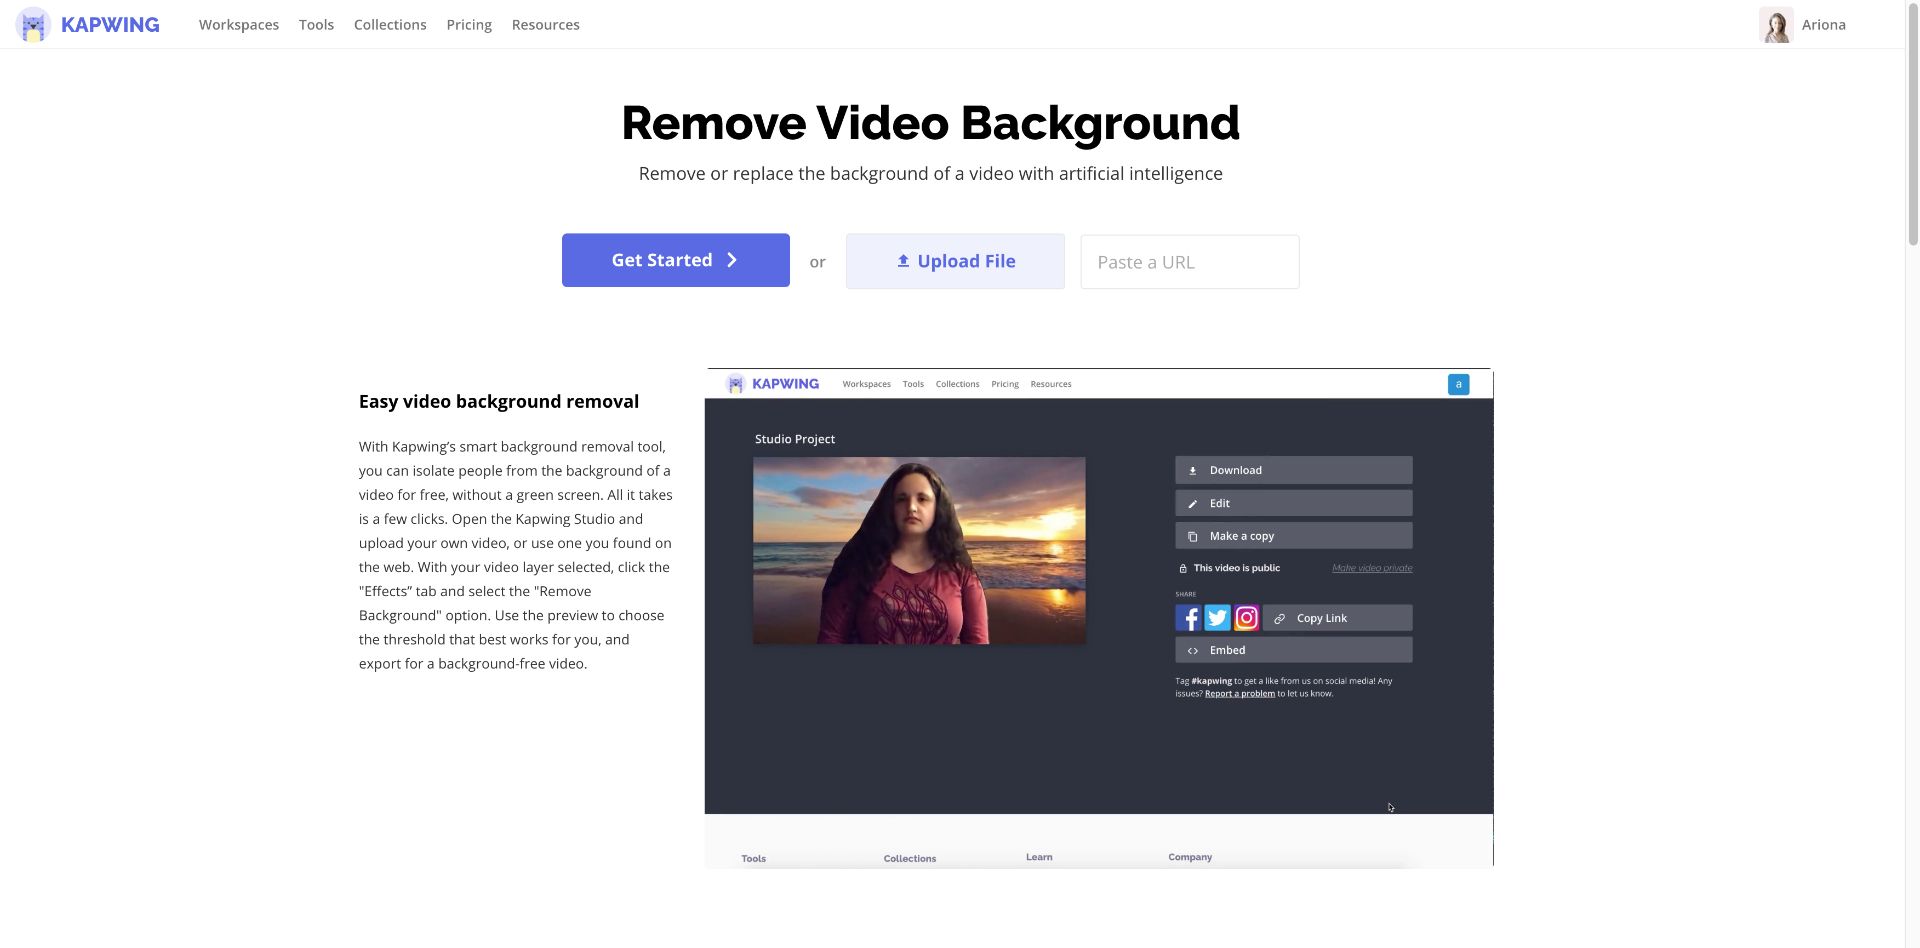
Step One: Upload a Video
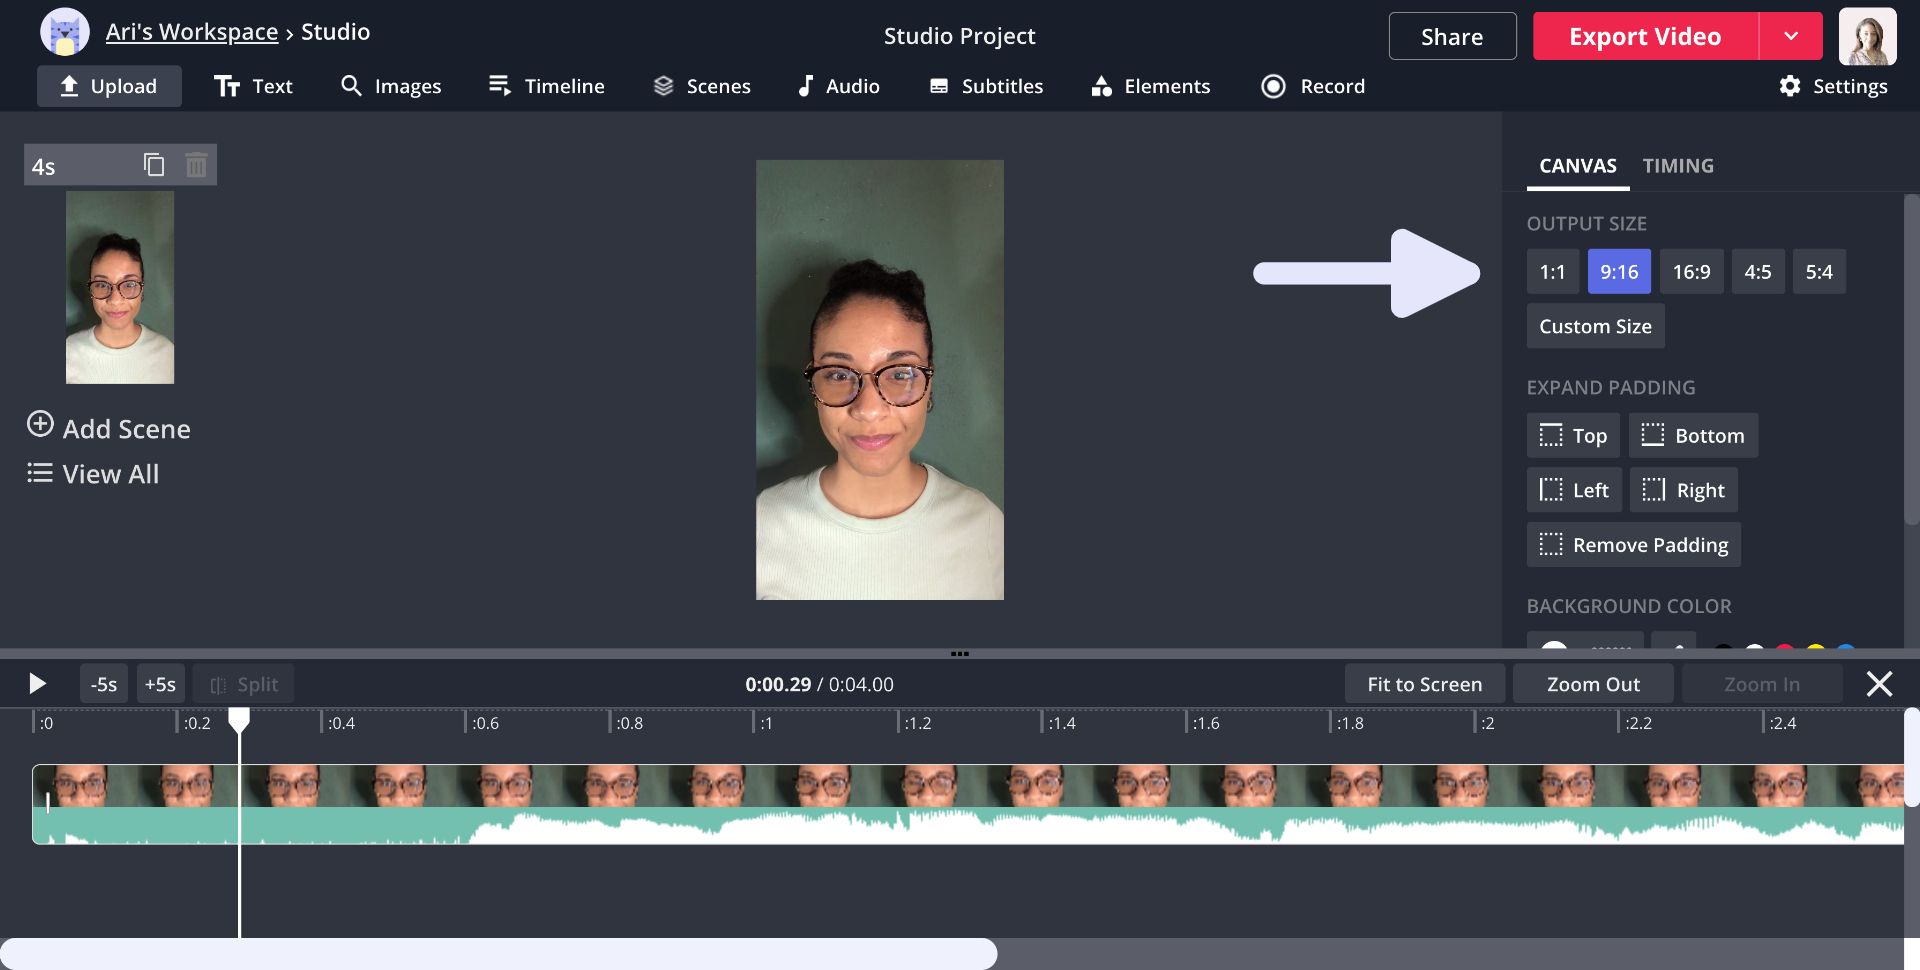
Visit Kapwing, click "tools," and select remove video background. Upload a video or paste a URL. I recommend using a PC for this tutorial, but you can use an iPhone, Android, or tablet. Kapwing supports major video files such as MP4, MOV, 3PG, and more. Make sure the output size is 9:16 so your video is properly sized for Instagram.
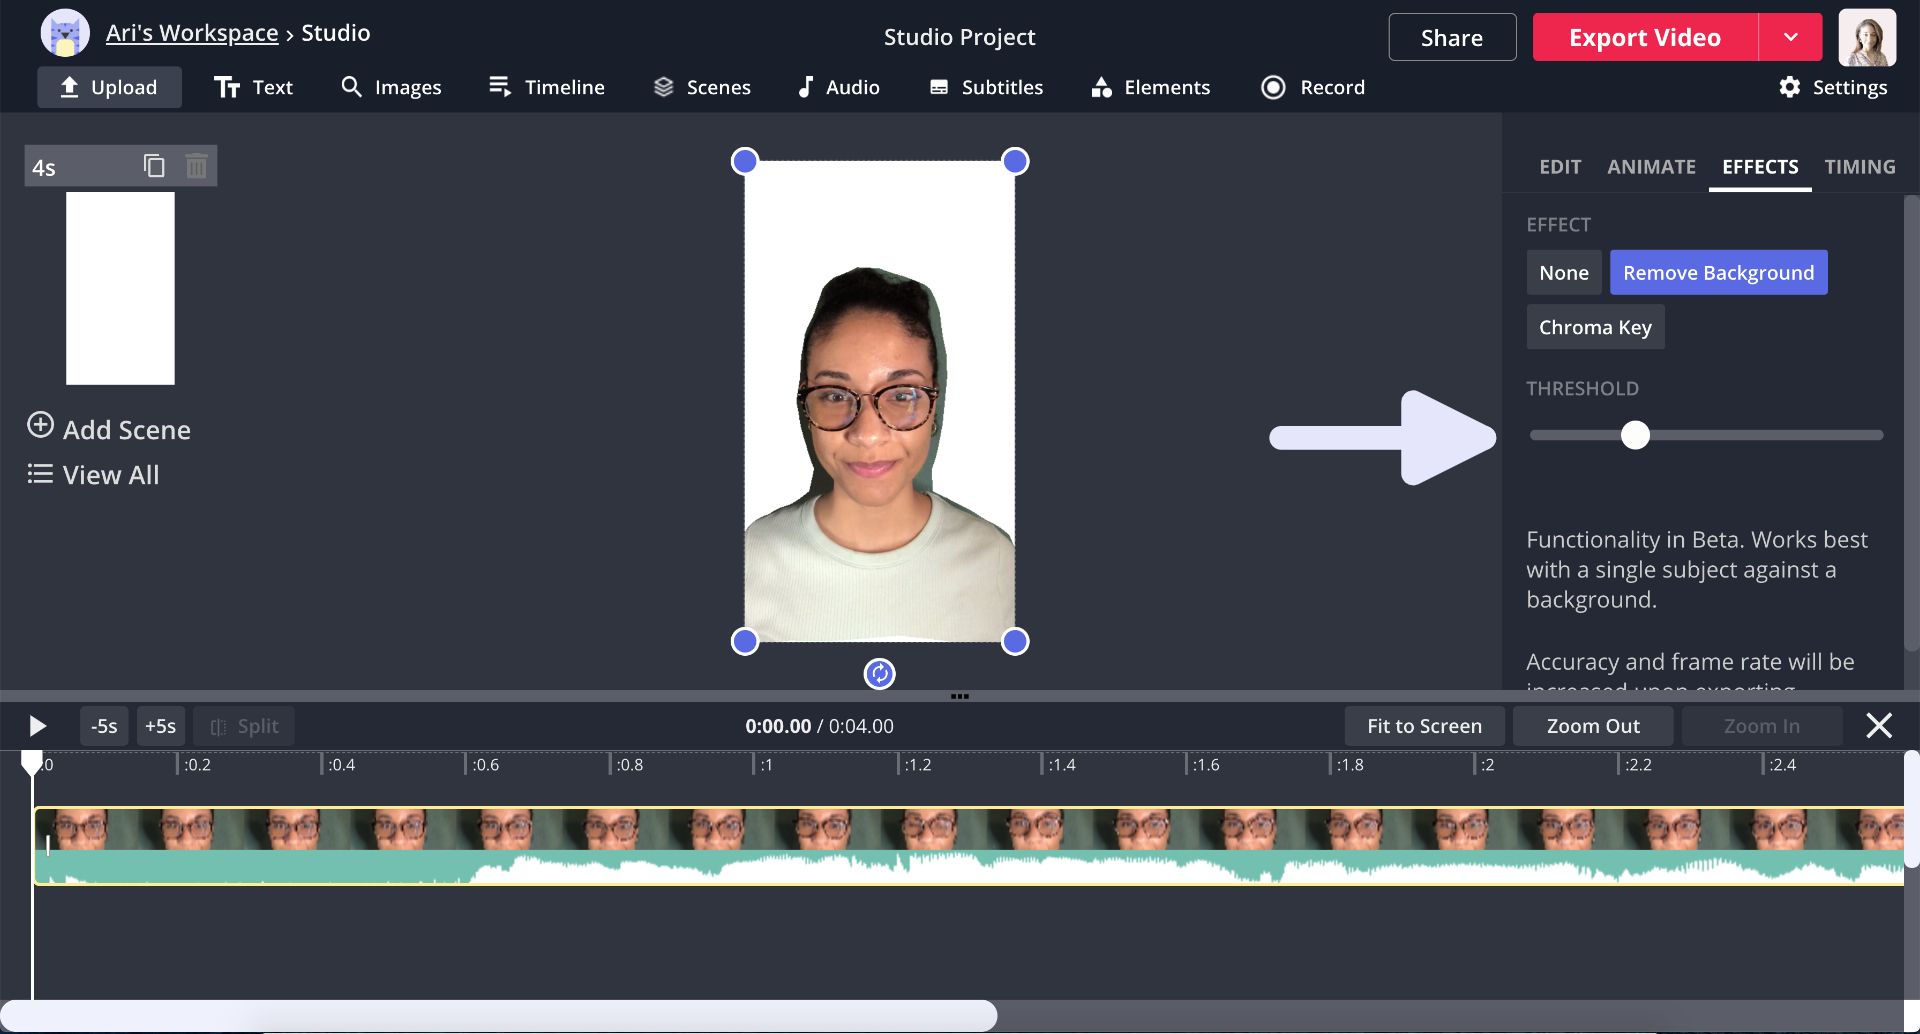
Step Two: Remove the Background
Click your video to select it, then click "effects" and "remove background." Drag the circle to adjust the threshold and watch your background disappear. You can also click "chroma key" to key out a channel. Click blue, green, or key to color to select a color with the eyedropper. Then you can adjust the hue, saturation, and brightness threshold.
Step Three: Upload a Background
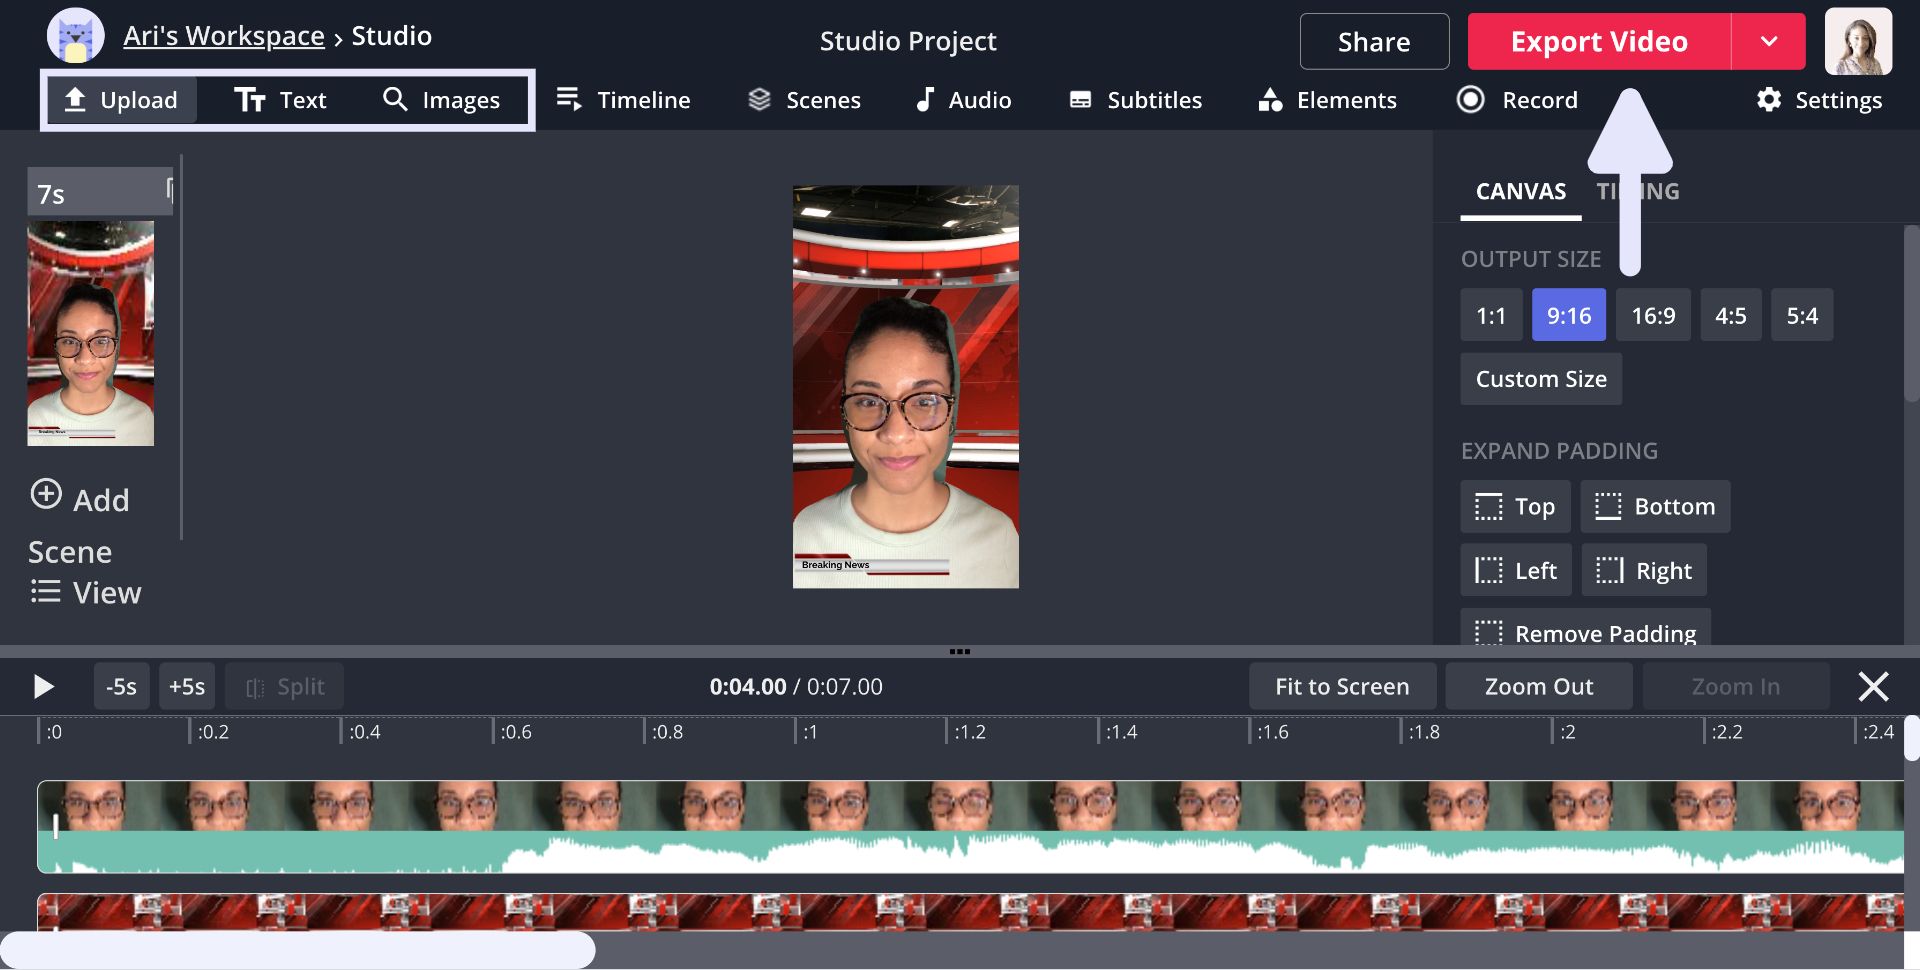
Click "upload" or paste a link to add new background. You can also click "image search" to find ideas from Google. I'm uploading a virtual studio background from YouTube to channel my inner news anchor. Below are a few ideas to help you get started.
- Iconic living room from a classic TV show
- An office space that matches your aesthetic
- A famous painting
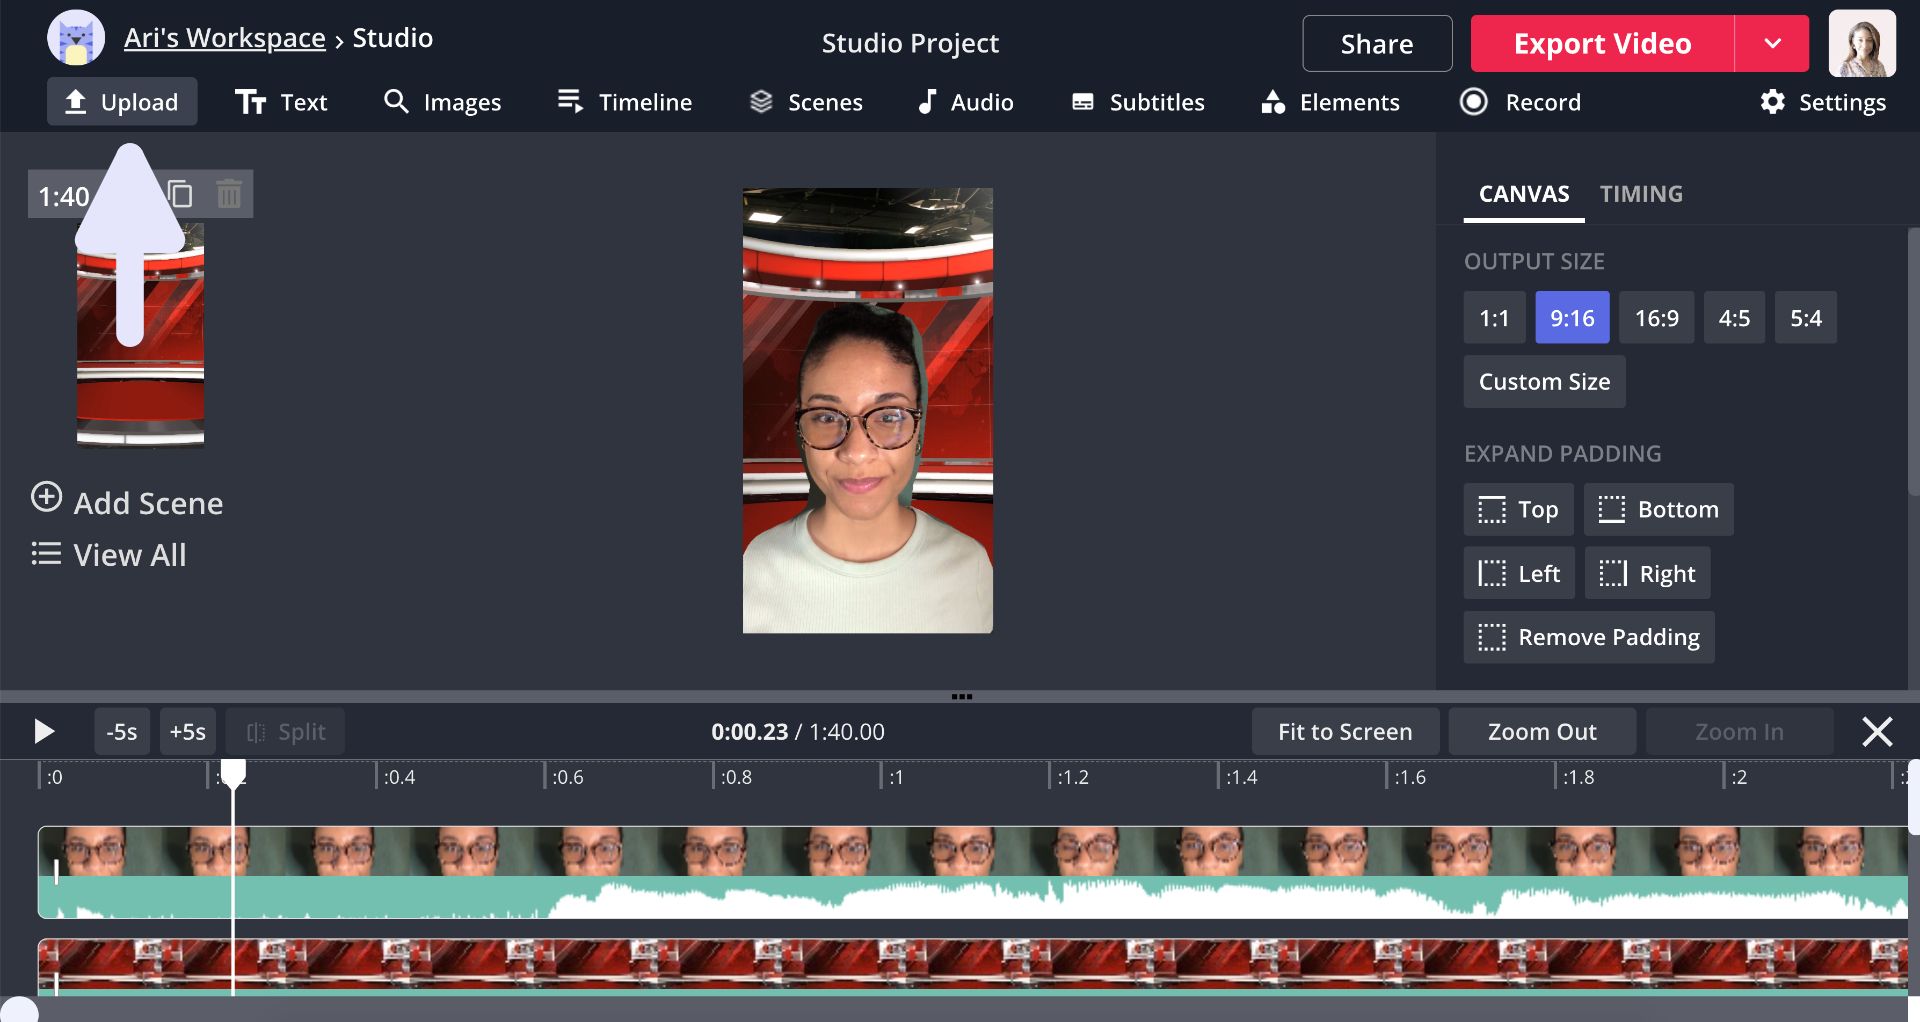
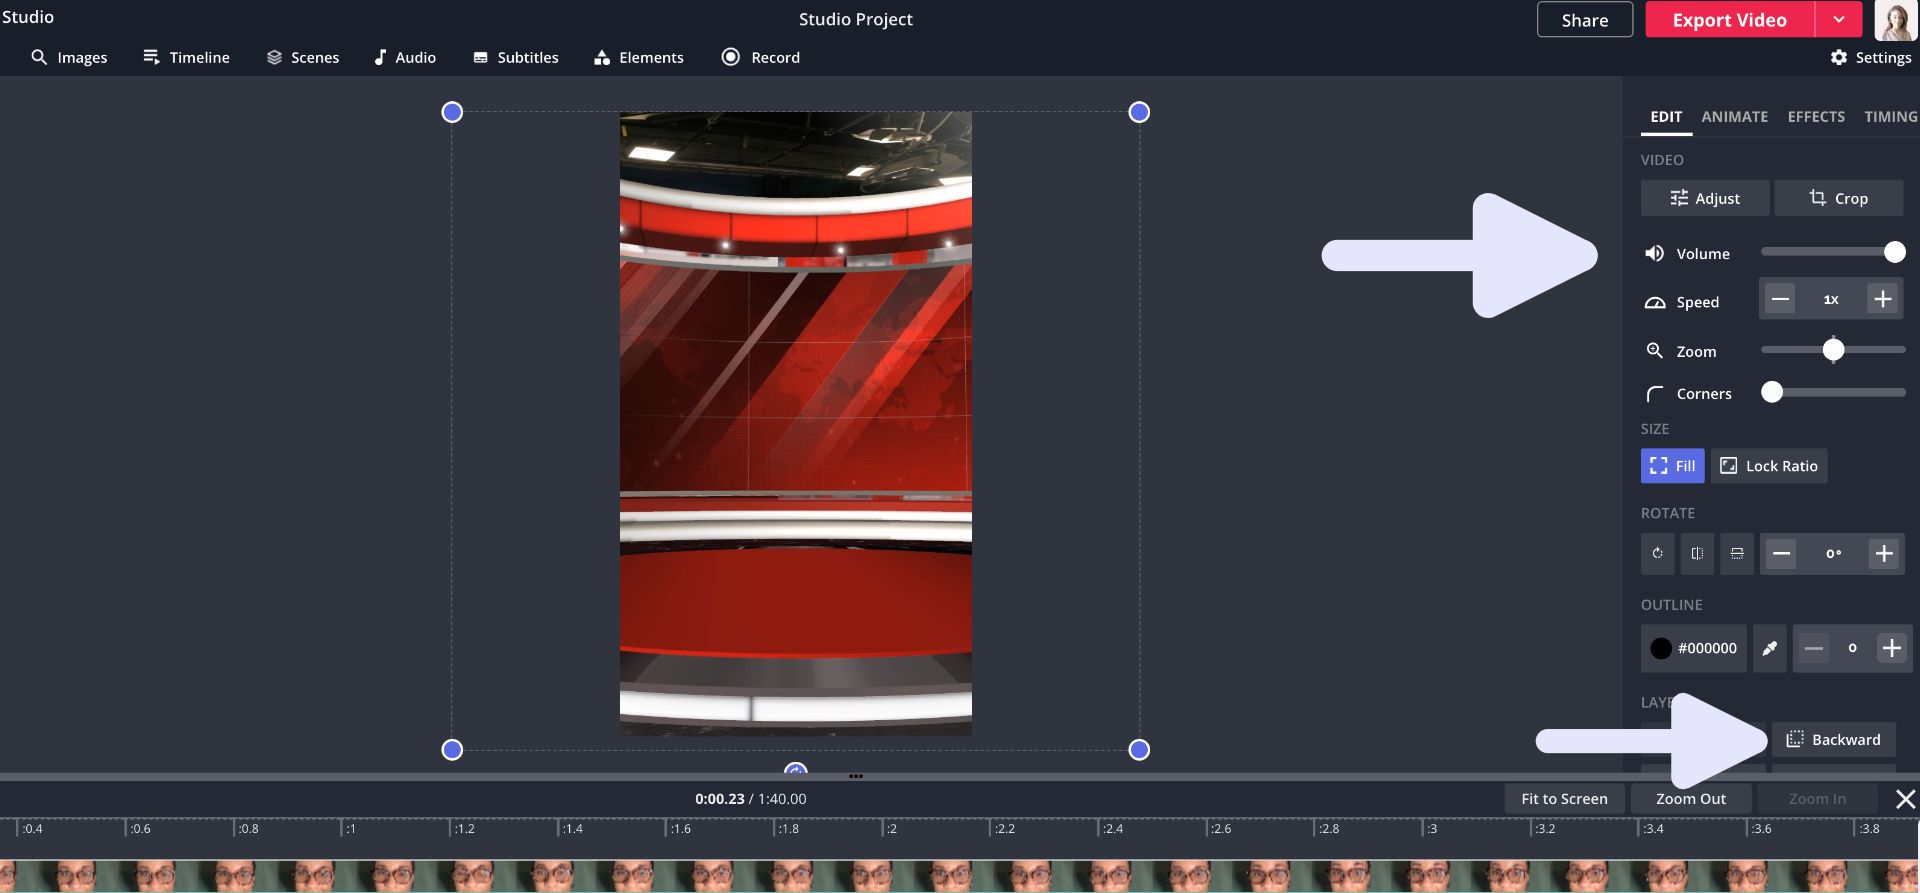
Your new layer will appear in the timeline and can be resized by dragging the corners and cropped with the crop tool. With the layer selected, click "backward" so it appears behind the original video. You can adjust the volume of each video to balance the audio or right-click and select "detach audio" to completely remove it from a layer.
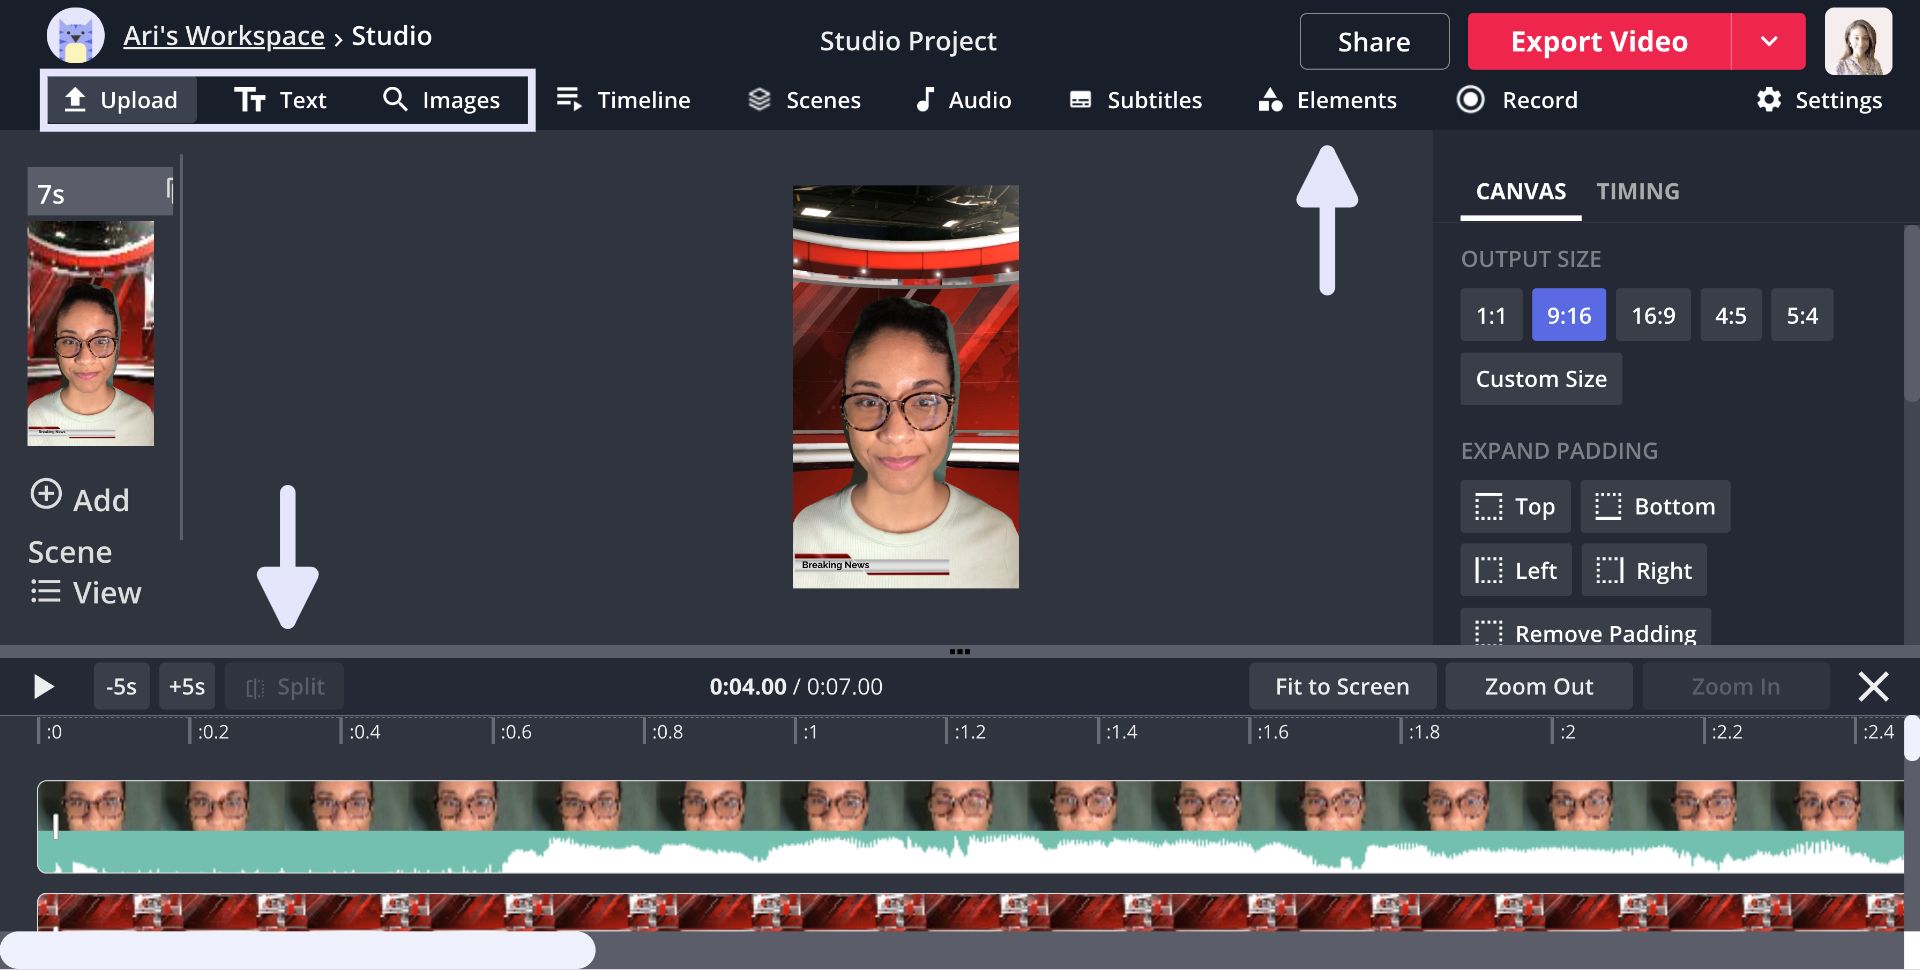
Customize your video with GIFs, videos, pictures, emojis, and more until you're happy with the results. I added a lower-third to resemble a news channel and added a breaking news sound effect from YouTube. Drag each layer to the desired position on the time and drag the ends to trim the length. You can also use the split tool to split a video into parts and delete sections from the middle.
Step Four: Export and Download
Replay your video a few times to make sure it's exactly how you want it to appear. Then, click "export video" at the top right corner of the studio to process the video. When it's ready, click "download" or create a free Kapwing account to remove the watermark first.
Let your creativity flourish and feel free to reach out on social media with topic suggestions! Head over to YouTube and TikTok for trendy tutorials and follow us on Twitter to stay up to date on all things Kapwing.
Related Articles:
- How to Make Videos for the TikTok Green Screen
- How to Make Green Screen Memes
- How to Create a Green Screen Video Without a Green Screen
- How to Remove the Background from a Video