How to Make a Vertical Video into a Horizontal Video
If you’re a modern content creator and you realized you actually want your vertical video to be horizontal instead, I’ll show you how to make the switch in Kapwing.

In the world of smartphones, vertical (portrait) photos and videos have taken over the way that we capture and share our favorite memories on social media. However, horizontal (landscape) videos are still the standard in television and movies. Plus, the extra screen real estate means you can showcase more action.
If you’re a modern content creator and you want your vertical video to be horizontal instead, I’ll show you how to make the switch in Kapwing. I’ll go over everything that you need to know about aspect ratios, scaling and resizing your video, and different ways to achieve the horizontal video look. Here are the steps to get started:
- Upload Your Video to Kapwing
- Change the Aspect Ratio and Scale the Video
- (Optional) Add a Blurred Background
- Export and Download the Horizontal Video
Step One: Upload Your Video to Kapwing
Go to Kapwing.com on your desktop or mobile device and select Get Started.
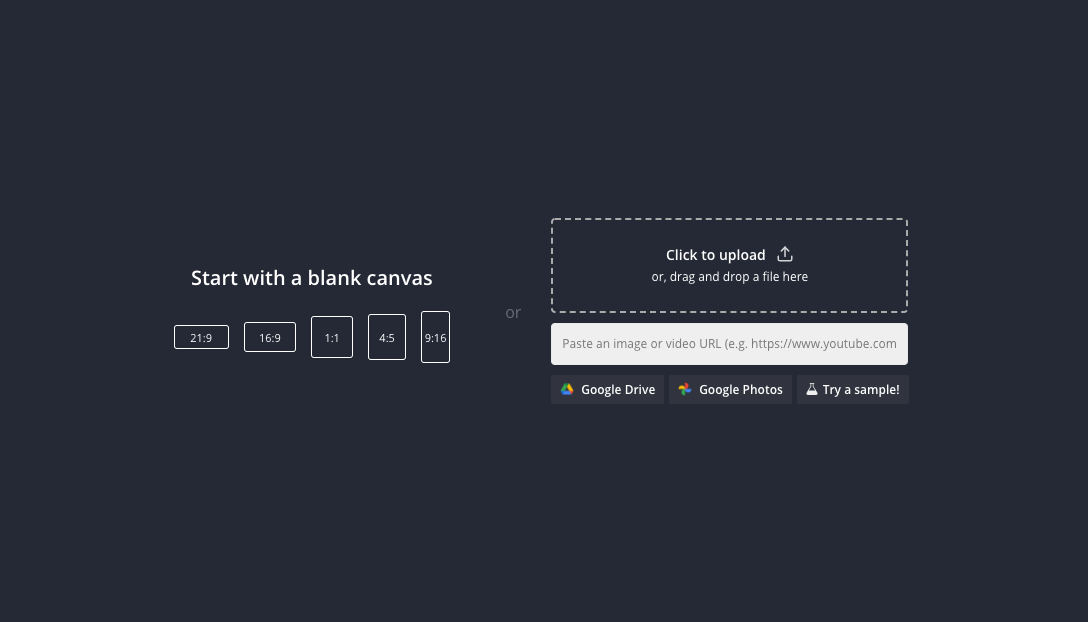
Select Click to upload and find the vertical video from your camera roll or folder or you can import from a URL if the video is stored in the Cloud or something you found online.
Step Two: Change the Aspect Ratio and Scale the Video
Once the video has loaded into the timeline, you can change the aspect ratio. On desktop, go to the right-hand side panel and choose 16:9 as the output size. On mobile, select Edit Background and choose 16:9 as the output size.
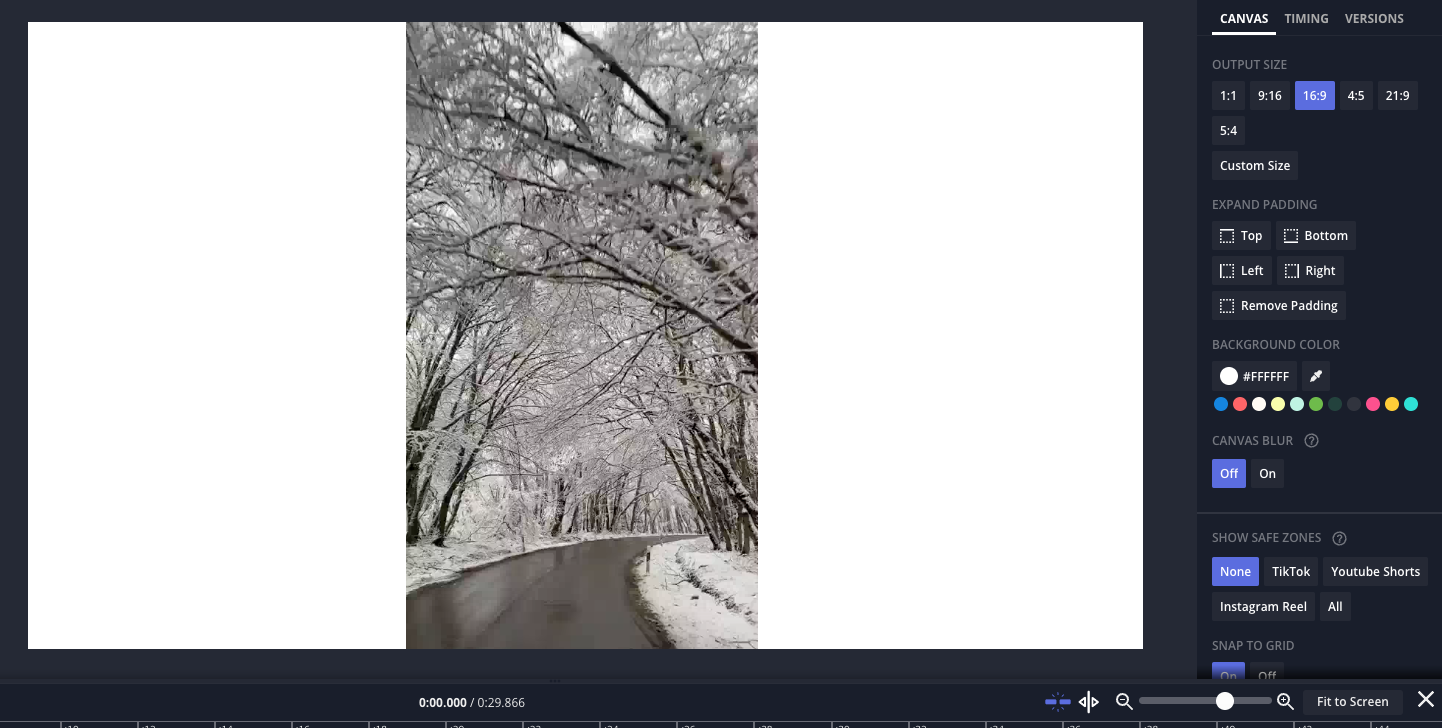
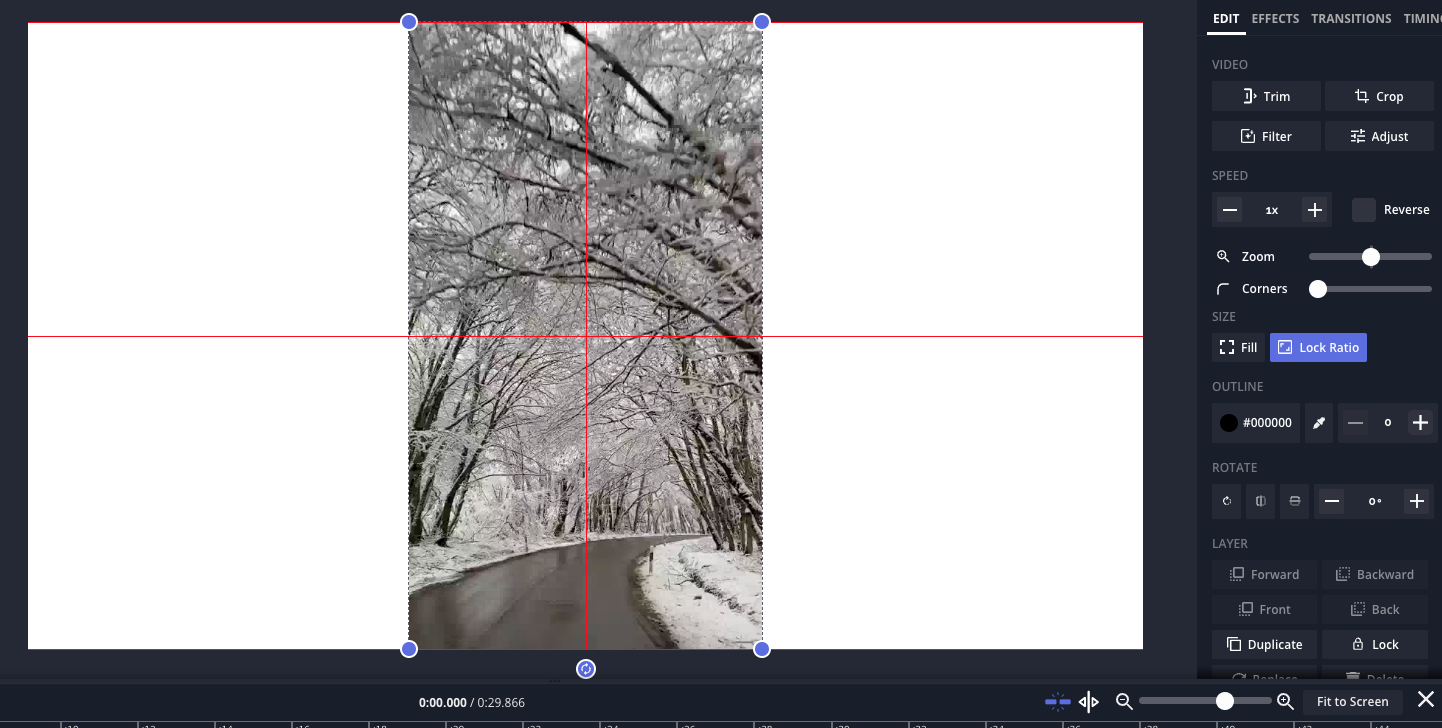
The canvas behind your video should now be in a horizontal position. To center your video on the canvas, tap or click on it. Four dots will appear on each corner. Select "Lock Ratio," then drag one of the corners until the video fits to the top and bottom edges of the canvas. You will see a horizontal and vertical red line going through the canvas when the video has aligned in the middle of the canvas.
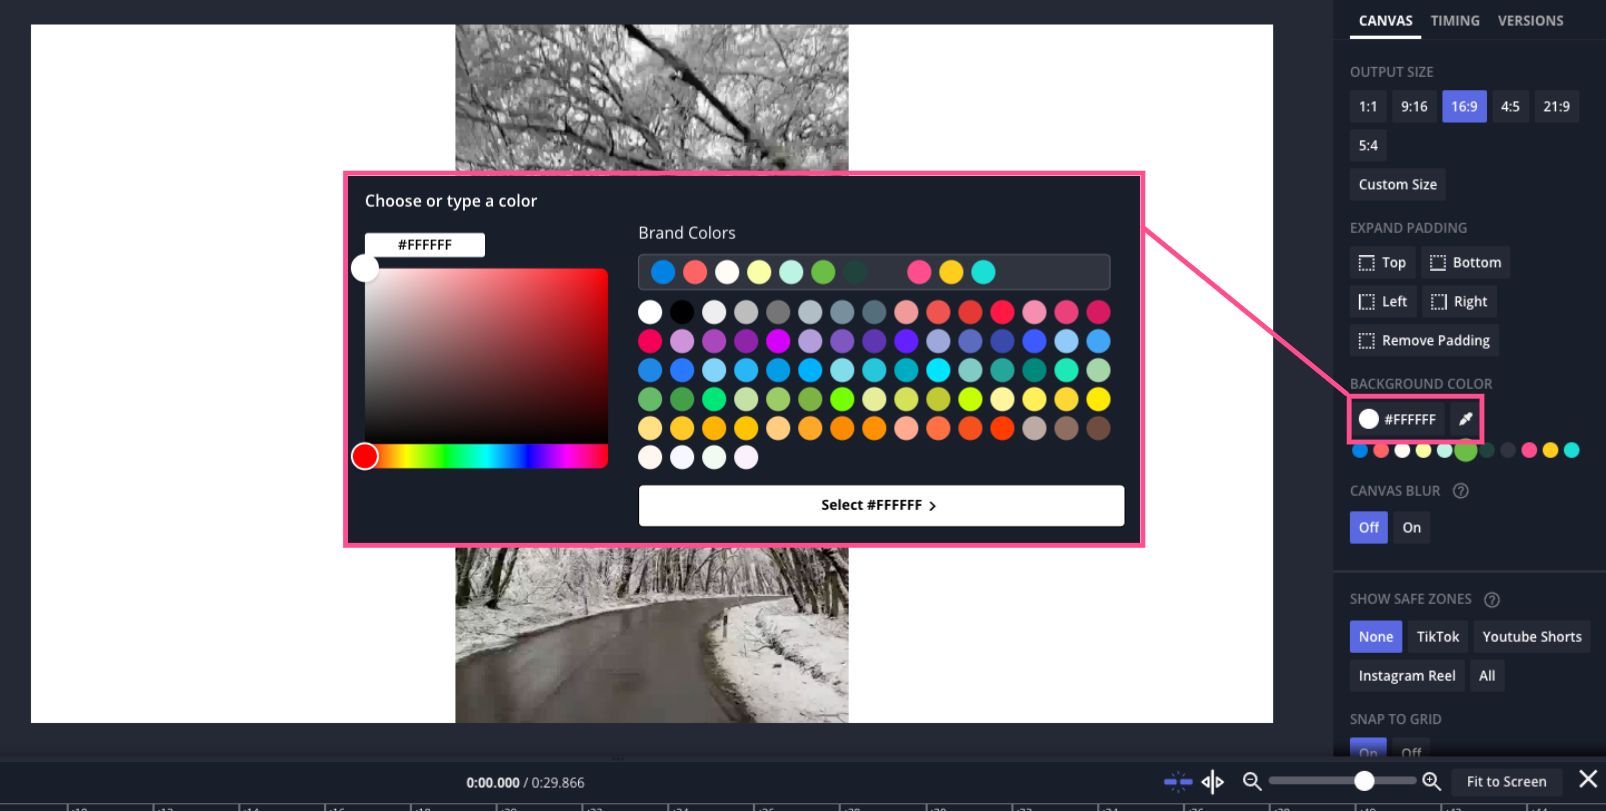
If you don’t want the video background to be white, you can select Edit Background to change the colors to one that you like more. Choose from the existing color palette or add your own custom color using the gradient slider or by entering a HEX code.
If you don't want to add a blurred background or change the background color, you're done and can export video at this stage.
(Optional) Step Three: Add a Blurred Background
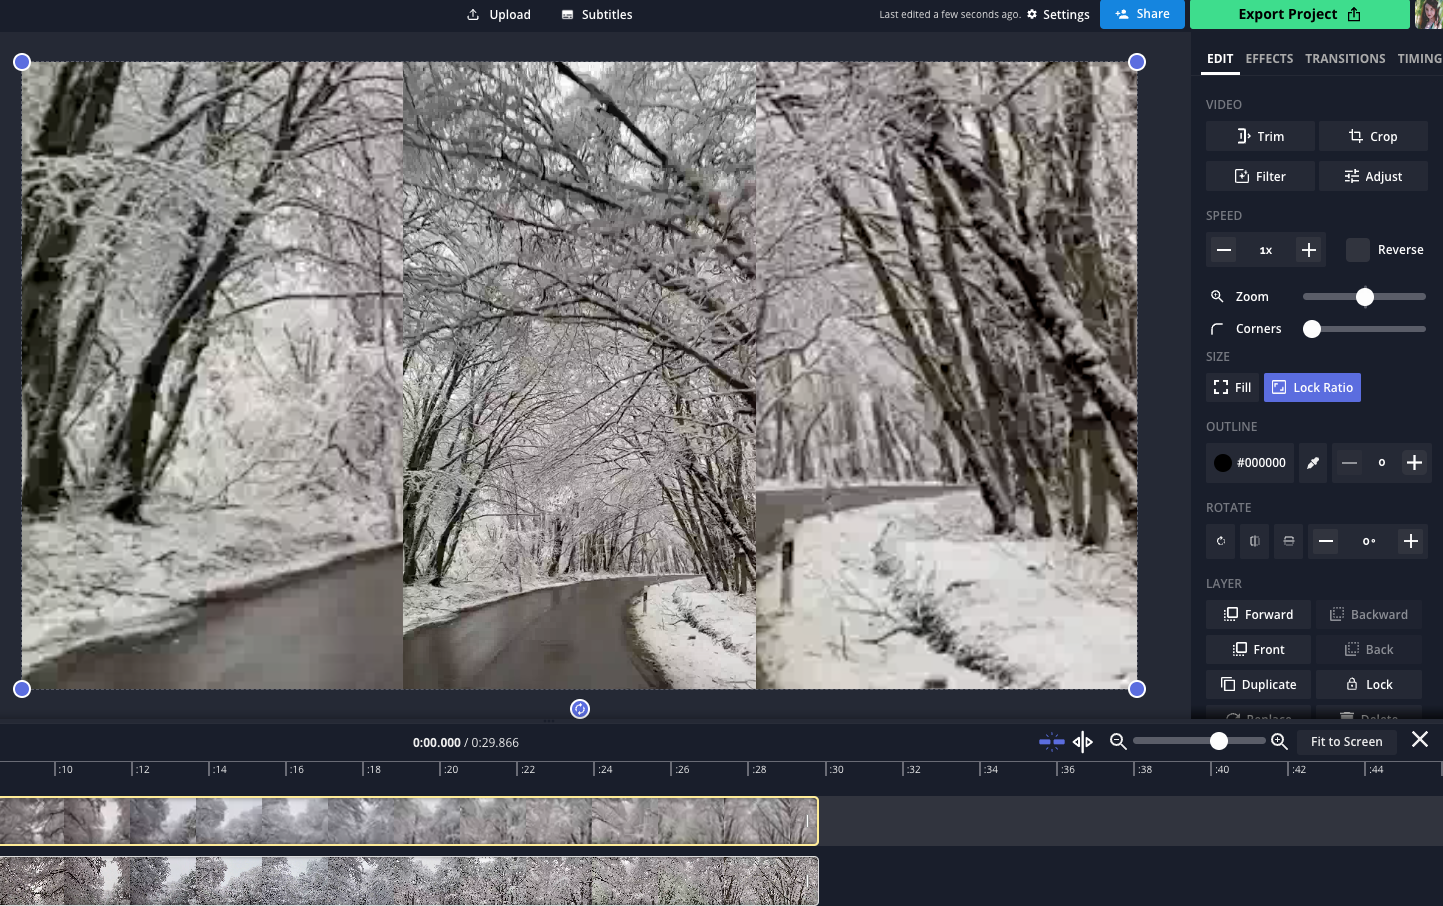
If you want to fill up the white space for the horizontal video, some video creators like to add a blurry background to the video. On desktop, copy the video and paste it into the timeline - this will be your new background video layer. On mobile, upload the same video into the timeline. You should now see two layers in the timeline. For the background video layer, use the purple corners to drag and resize one of the video layers to take up the whole canvas.
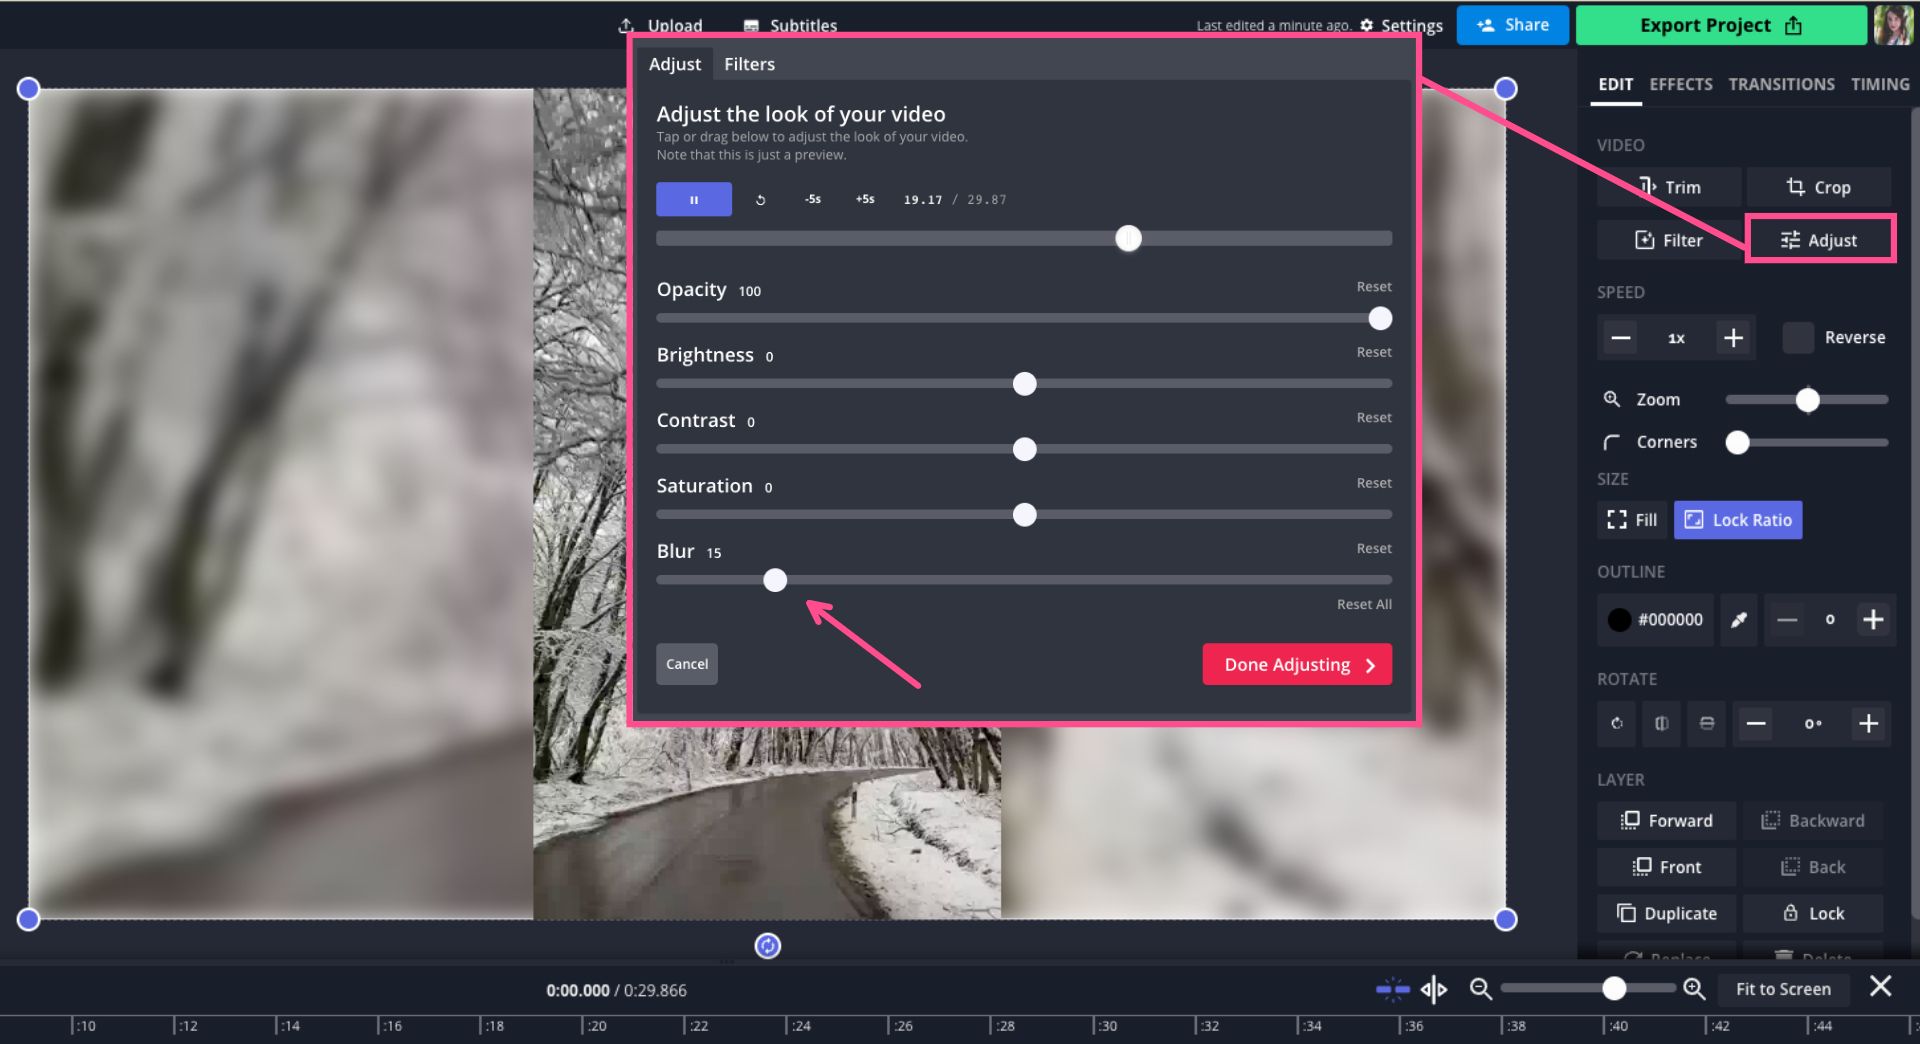
On desktop, select the background layer and click on the Adjust button on the right-hand side panel. Use the Blur slider tool to create a blurred background. On mobile, select the background layer and tap Edit video then Adjust. Scroll down to the bottom until you see Blur. Drag the slider to the right to blur the background and tap Done Adjusting.
Step Four: Export and Download the Horizontal Video
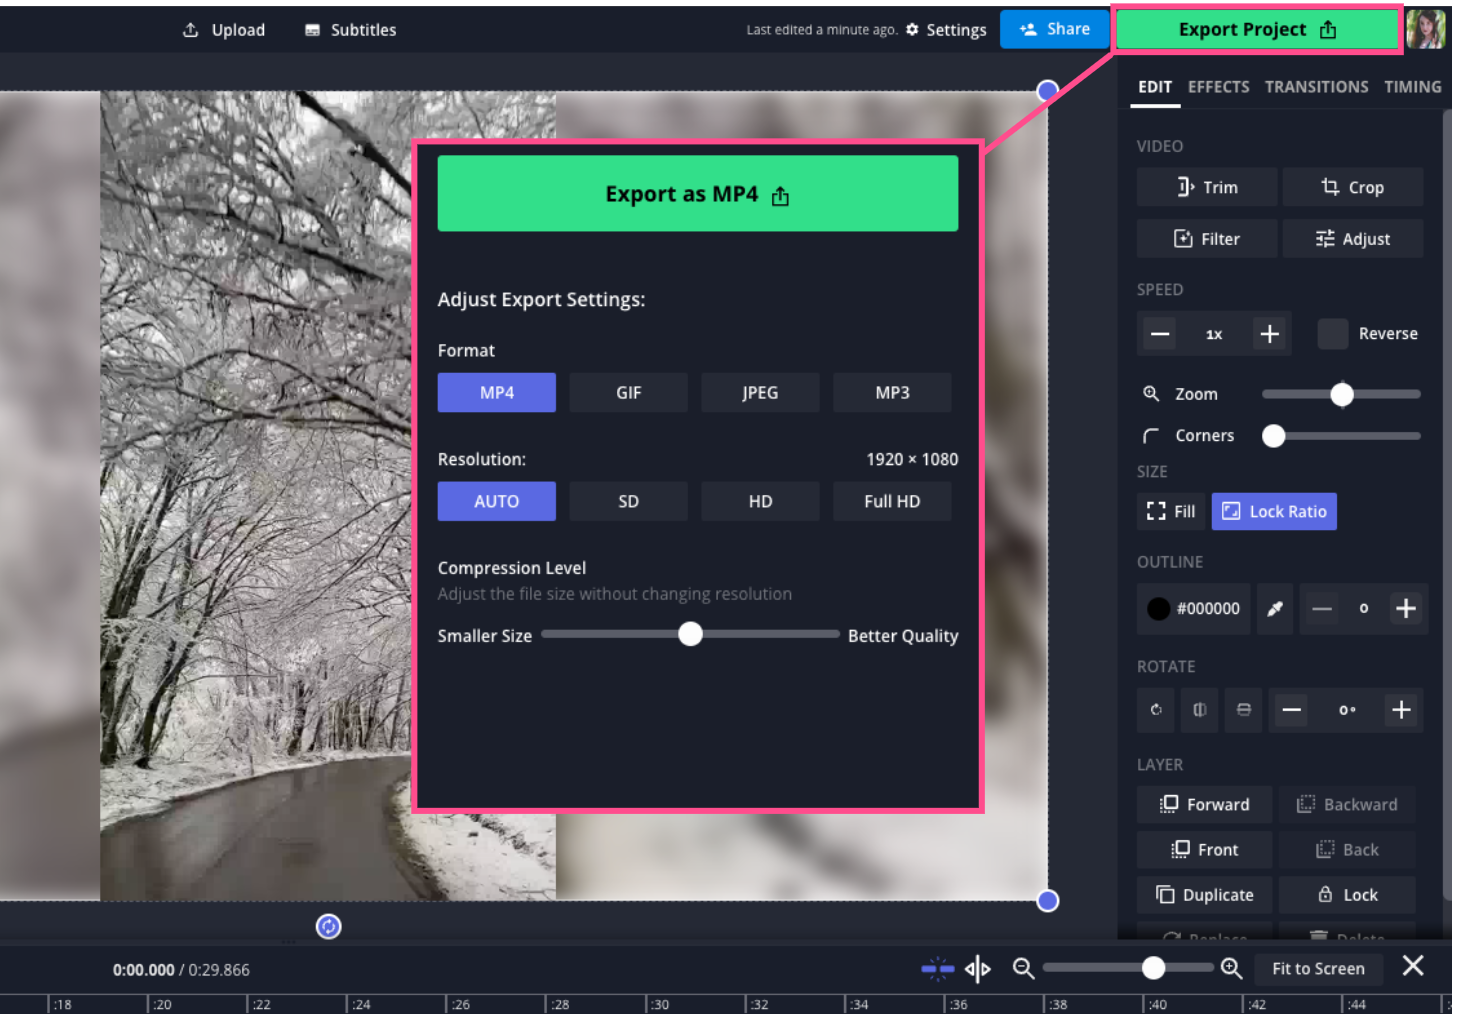
After changing the aspect ratio and scaling the video, you’re ready to export! Click the Export Project button and select your export format and resolutions settings. When the video finishes processing, click the Download button and the it will be saved to your device.
I hope that this video helped you change your vertical video to a horizontal one.
If you’re interested in more photo and video editing tips, visit our Resources page where we post written tutorials regularly. Don’t forget to tag us @KapwingApp on social media to share what you’ve made with Kapwing - we love supporting our creators!
While you’re here, check out related articles below:


