How to Add a Textured Overlay to Images and Videos
Want to add visual texture to your images and videos without using Photoshop? Learn how to add any kind of texture overlay online.
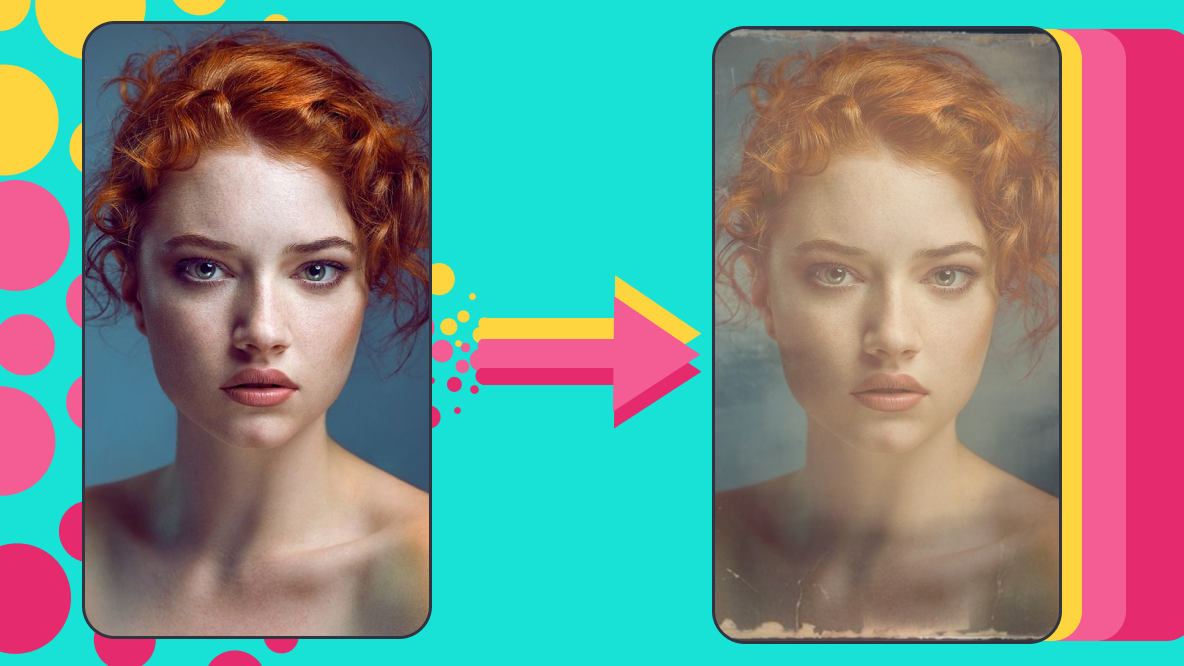
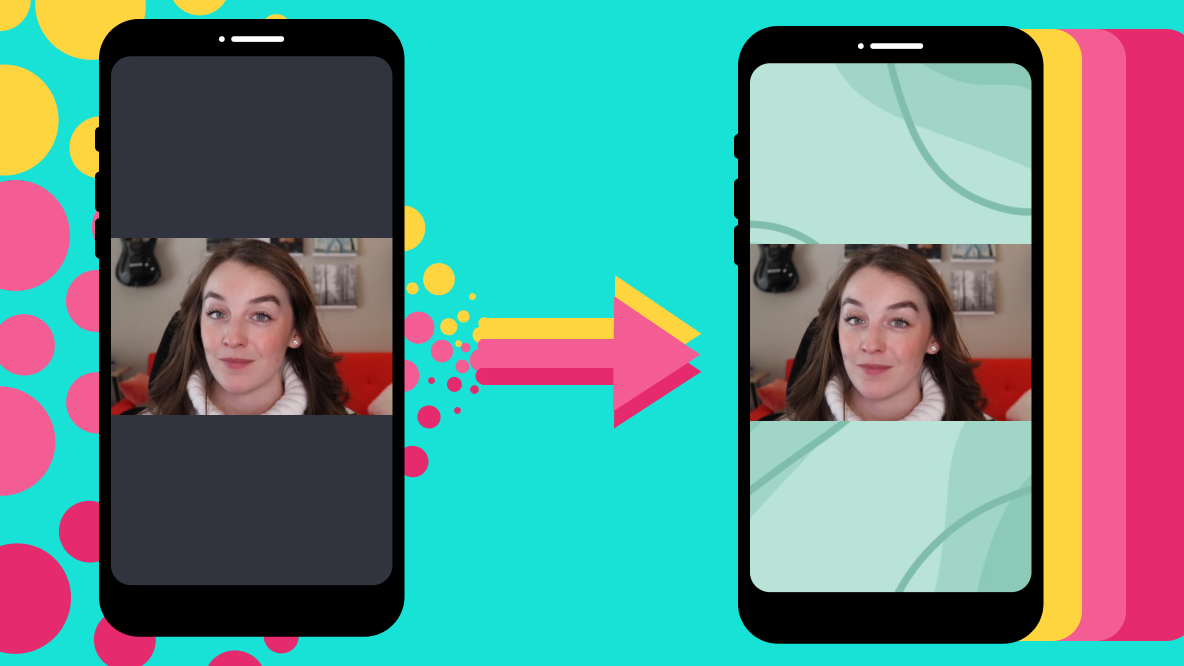
Adding a texture overlay is a great way to add flavor and personal style to your images and videos. Texture overlays are transparent layers added over a photo or video and are usually an image of something with a unique pattern or texture, like stripes, sand, or rainbows. However, any image can be used as a textured overlay. The only limit is your imagination!
Overlays can be used to add more depth to a visual, evoke a specific feeling in the viewer, and assist in developing a story around an image. For example, you could overlay rays of sunshine onto an image of a smiling face or add a heavy tooth paper texture to a photo to give it the feel of a painted portrait.
For this demonstration, I’ll be using Kapwing. It’s an online image and video editing tool for mobile and desktop devices, so I don’t need to download any software.
I'll be following these steps to add a textured overlay:
- Upload image or video
- Add the overlay image
- Adjust overlay opacity
- Export and share
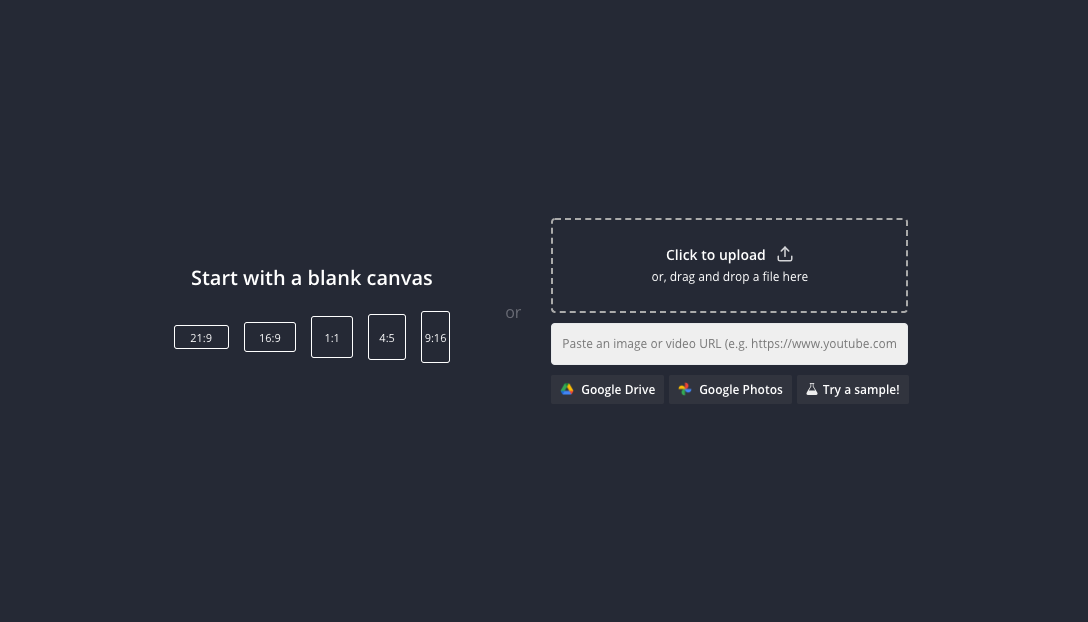
Step 1: Upload image or video
On your mobile or desktop device, navigate to Kapwing.com and click Get Started. Upload the video or image you want to add a textured overlay to. You can choose a file from your device or upload from a Google Drive account or a URL.
Once you've uploaded your media, make any edits to it that you'd like using the Edit menu tools on the right. You can also trim and split video using the timeline.
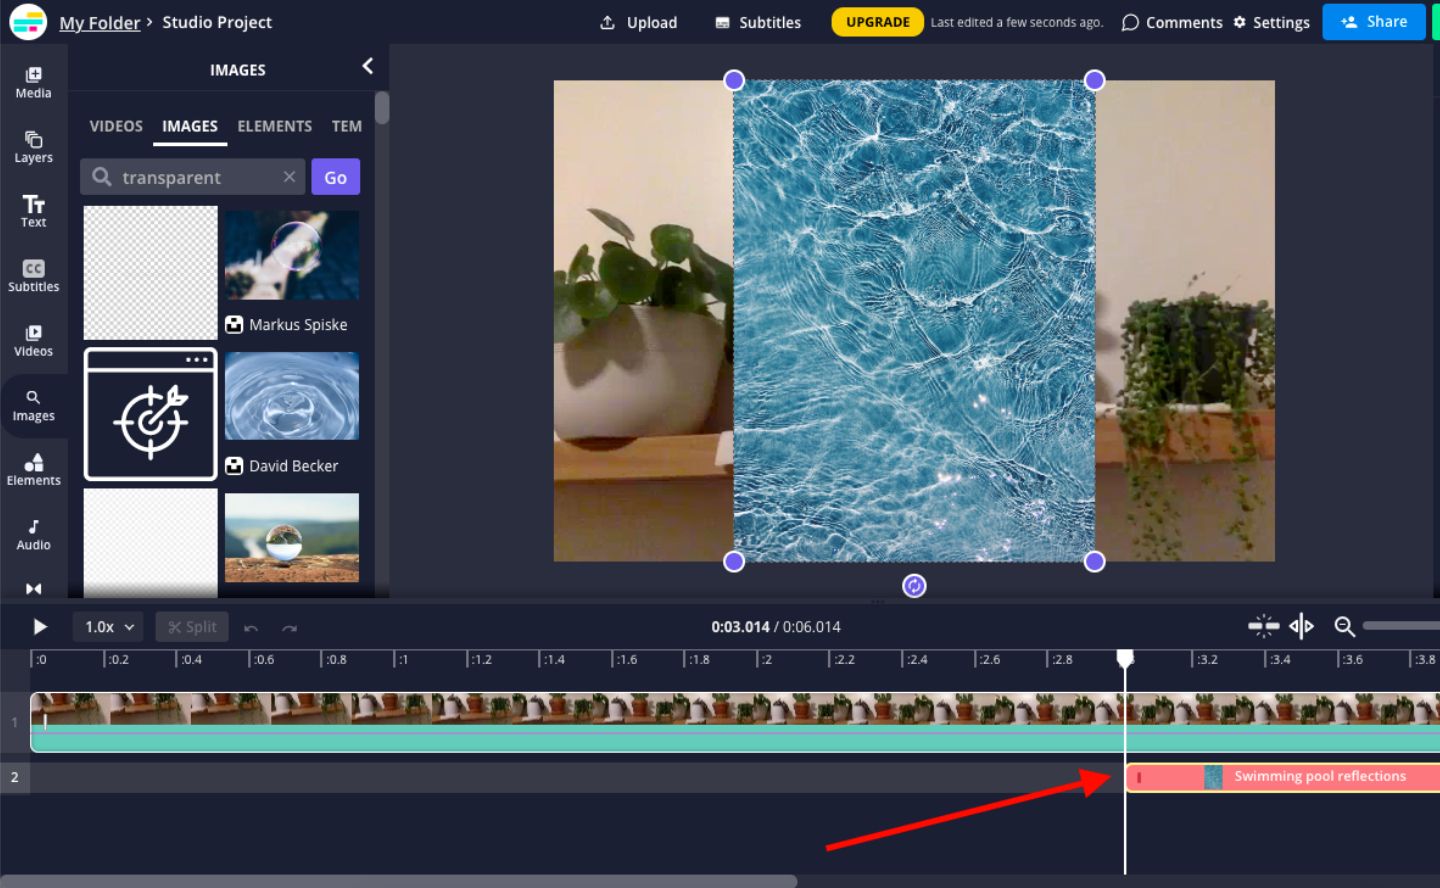
Step 2: Add a textured overlay image
Select Images on the left hand side of the Kapwing editing studio to bring up a large selection of photos to use as your overlay. If you’ve already found an image you’d like to use as an overlay, click the Upload button on the header to add it to the project.

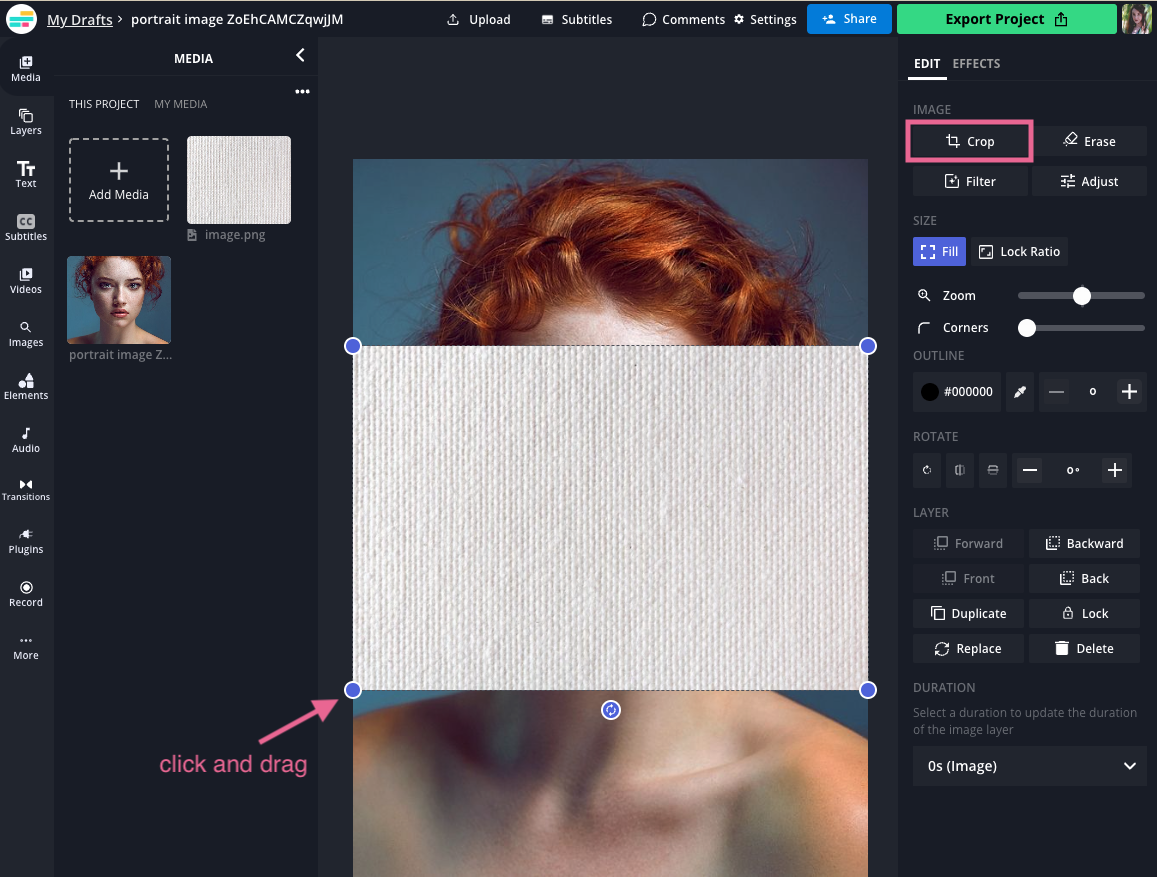
Resize the overlay image so that it completely covers the background. Either click and drag on the corners of the image until it covers the canvas or use the inline crop tool.
If you're adding a texture overlay to a video, make sure the overlay image and the video background sync up in the timeline. Click and drag the image layer in the timeline to move it around. Drag the edge of the layer to trim it.
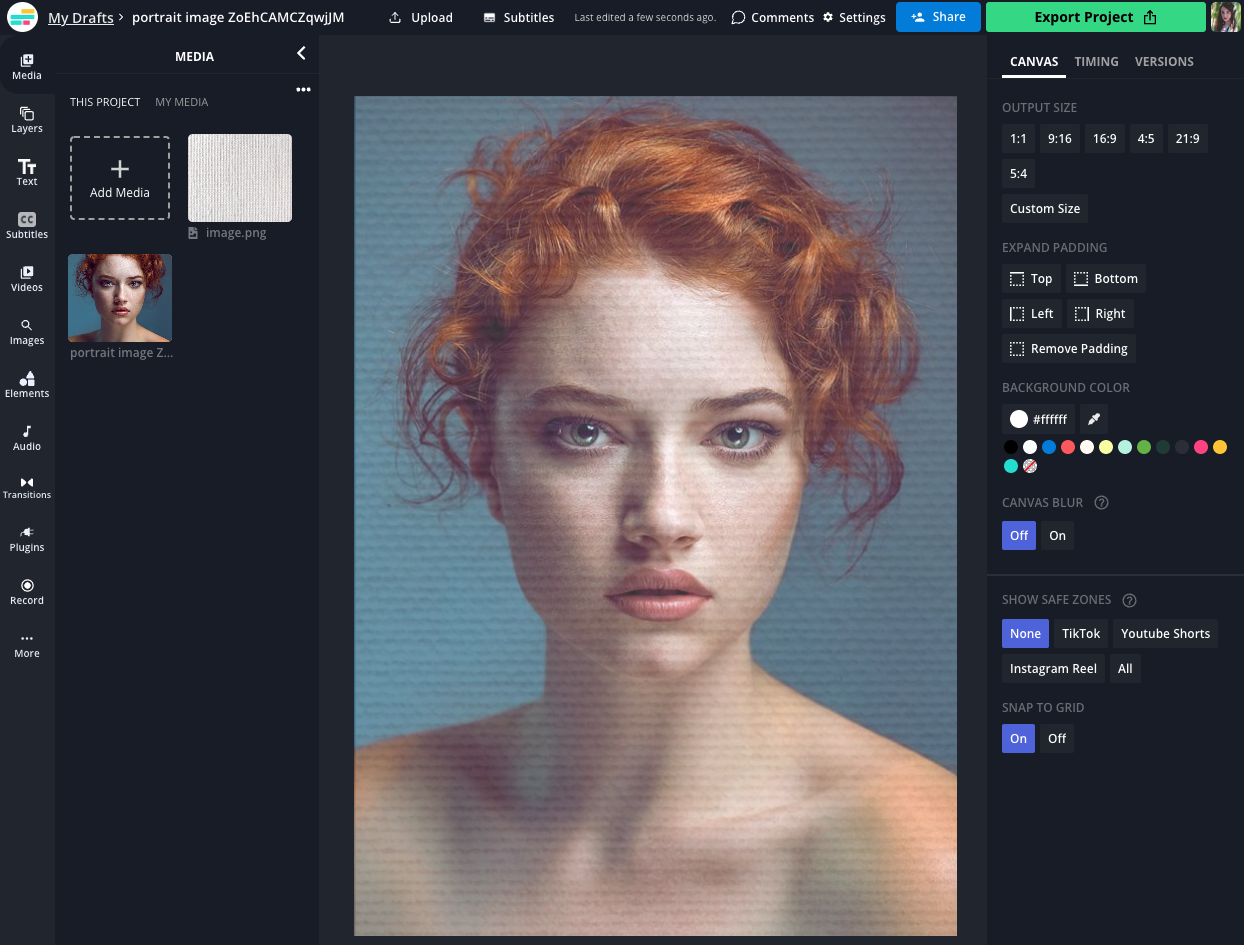
Step 3: Adjust the overlay image opacity
After you’ve decided on the image layer’s placement and sizing, the next step is to transform it into an overlay. With the overlay image layer selected, click the Adjust button in the right-side edit menu.

Using the opacity slider, reduce the opacity to make the image visible without blocking the video behind it. This increases the transparency of the image and is what gives it that overlay effect. The exact degree of opacity you'll need may vary depending on the image you've chosen. Return to project preview to see if you need to adjust further.
Increasing the brightness, contrast, and saturation levels can give the image even more texture but that's stylistic preference. Speaking of stylistic preference, you can further customize your textured overlay with the Filters tab within the Adjust menu.
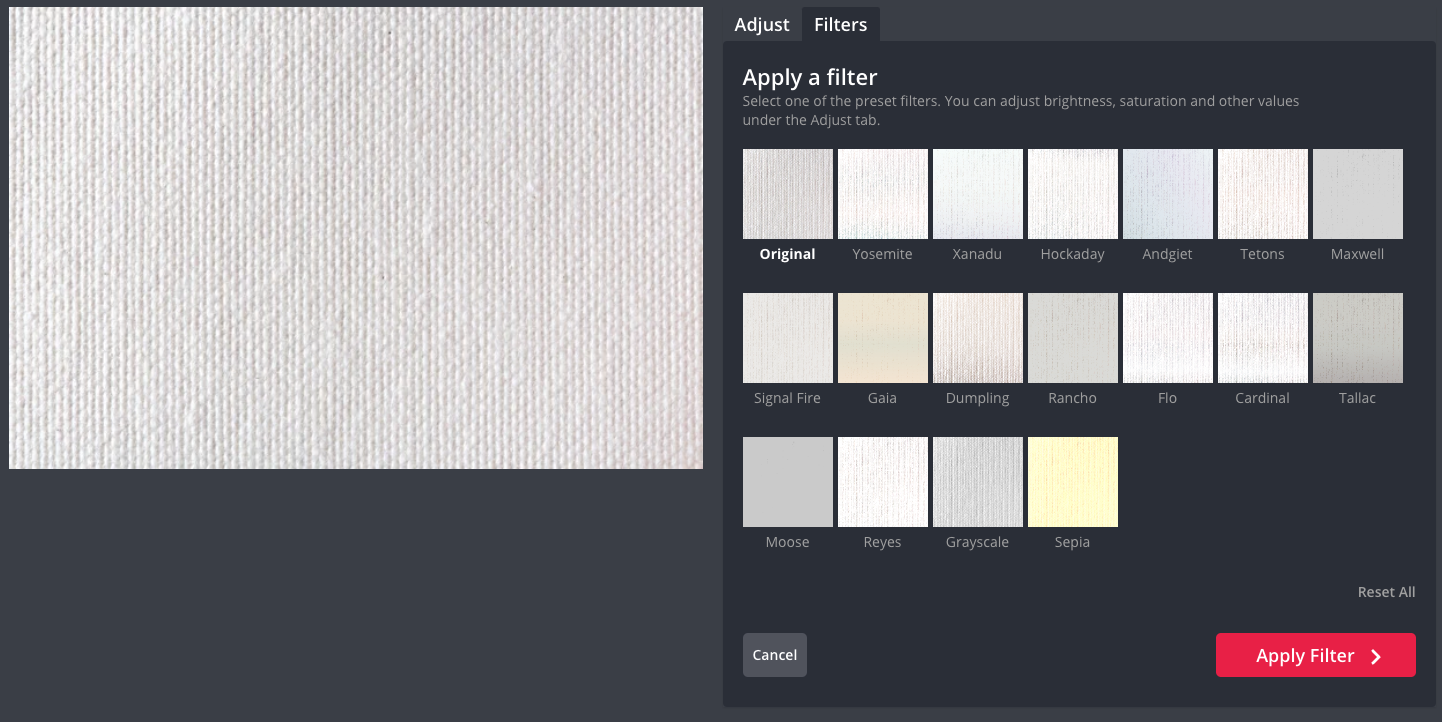
Here, you can alter the color, tone, and vibrancy of your overlay to give it an entirely new vibe.
Step 4: Export and share
When you're satisfied with the textured overlays you’ve added, hit the Export Project button in the top right corner. Choose your export file format and resolution settings then download.

Voila! You’ve successfully added a textured overlay to your image or video.
Check out our Resource Library for weekly articles sharing tips, tricks, and advice for all of your content creation needs — written by creators, for creators.
Create content faster with Kapwing's online video editor →