How to Turn a YouTube Video into a Blog Post
Stumped for blog or newsletter ideas? If you make long-form videos, you've already got a great library of content you can repurpose for your blog. In this article, I'll show you how to turn a video into a blog post without a ton of extra work.
Multi-channel video content creation is a lot of work, but there are some tricks and tools you can use to repurpose video across long-form and short-form platforms. But what about repurposing video for another powerful online format — written content?
There's a trick for that, too.
Whether you're looking for content ideas for your blog, your Substack (a newsletter that functions much like a blog), or even a company website, your own existing video content is a great place to start. In this article, I'll show you how to convert video to text so you can turn any YouTube video into a blog post in just a few steps.
Let's get started.
Step 1: Choose a Video to Convert into a Blog
You can, of course, just choose the most recent video you created and run with it. But if you're finding it difficult to decide which topic to prioritize first, let the numbers decide for you.
First, take a look at your YouTube analytics to see which videos have performed well recently. A video doesn't have to go viral on YouTube to make a good blog, but it should be gaining views consistently. While this isn't a 1:1 predictor of what will do well on your blog, these analytics are a good indicator of which topics resonate with your target audience.
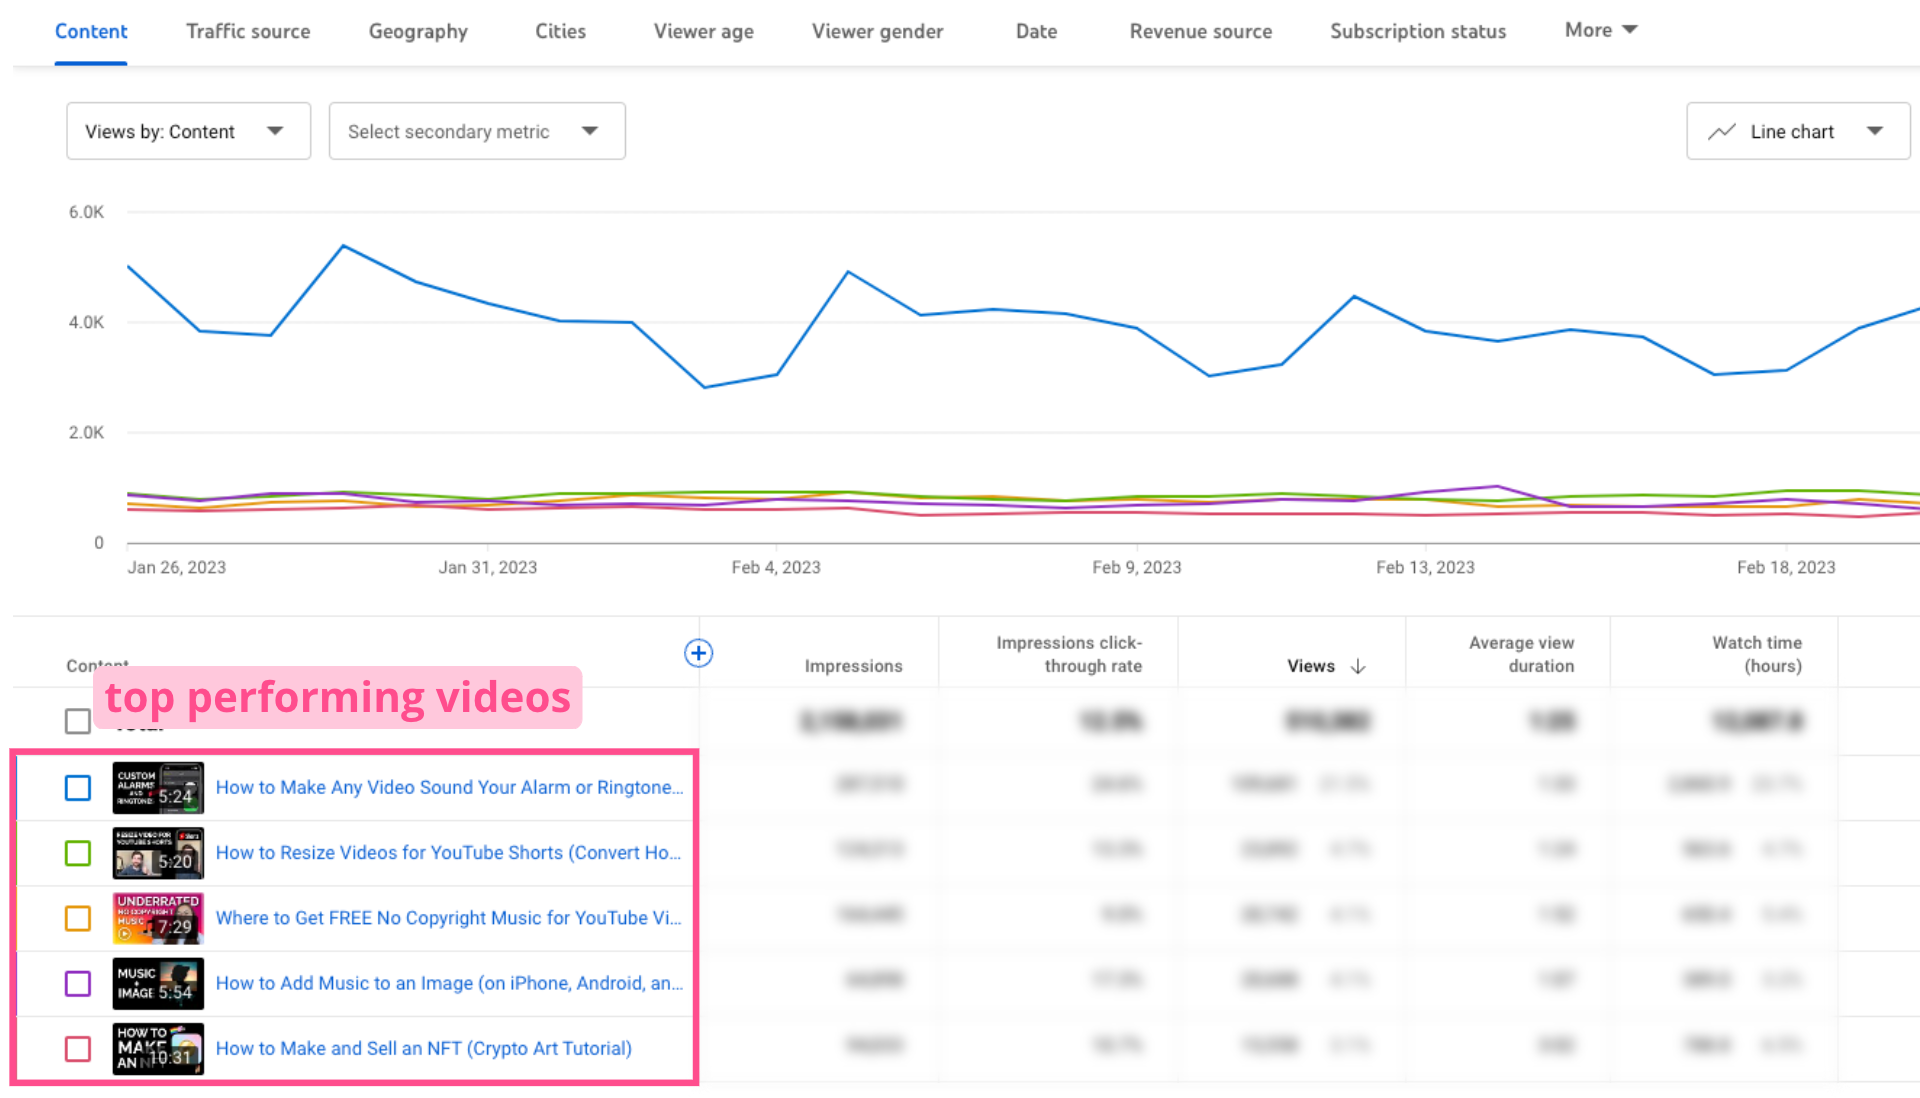
Once you've narrowed it down to the top two or three topics, it's time for some SEO research.
To get a good idea of what people are searching for and how hard it will be to rank for those search terms, you'll want to plug those topics into a keyword research tool, like Moz or SEMrush (both options have a free version with pretty robust keyword data).
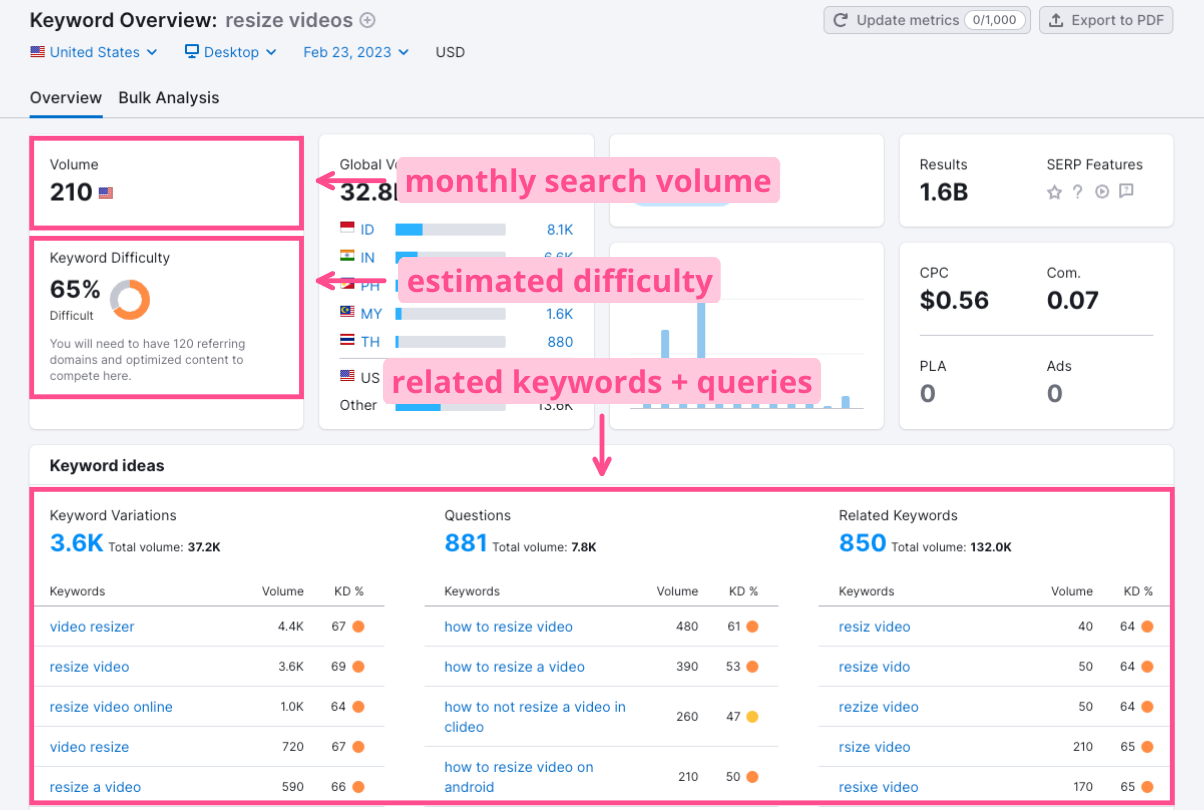
There's a lot that goes into keyword research, but in essence what you're looking for is relatively high monthly search volume and a low to medium difficulty rating. You can use keyword variant suggestions to branch out from the original query until you find a handful of keywords that fit your criteria.
Finally, let's take a look at the Search Engine Result Pages, or SERP, data. You want to make sure that the search intent behind the query actually matches what your video (and therefore blog) is all about.
For example, if your topic is "clean up podcast audio," you can see that of the top ten results, eight of them are articles or blog posts explaining how to do that.
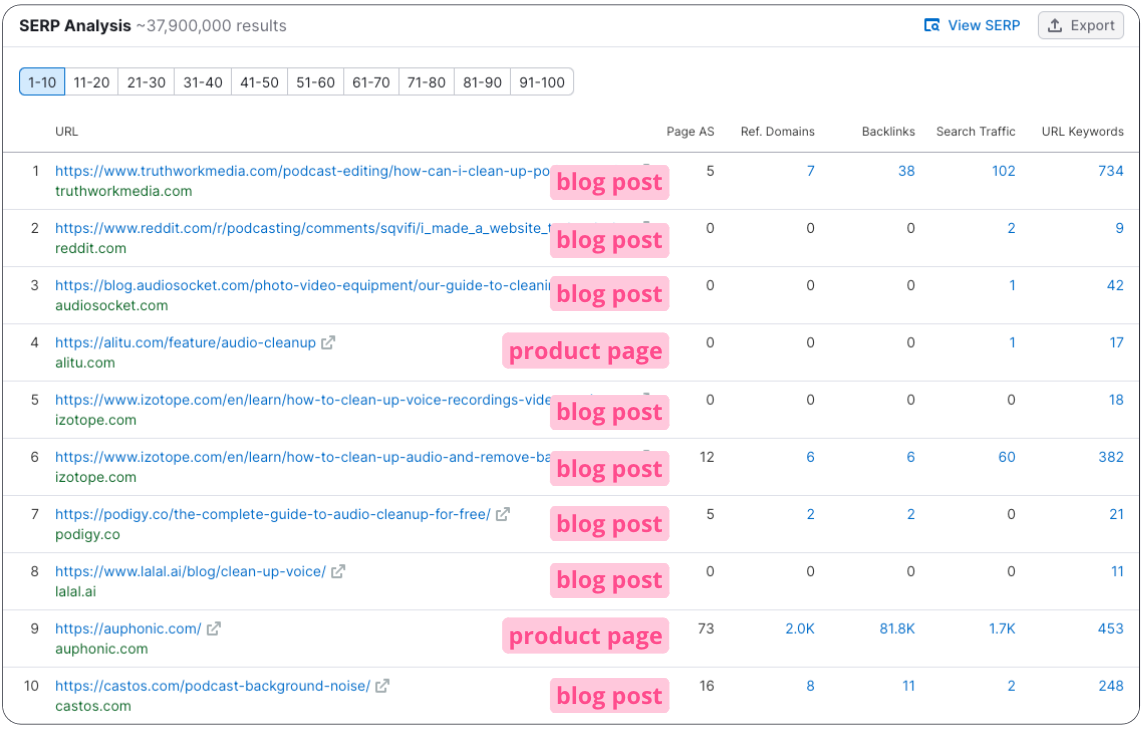
Only two are product pages for audio cleaning software. That's a good indicator that a "How to" article aligns better with the majority search intent.
If your topic was "podcast microphones," though, the search intent would be more commercial. You can see from the SERP that all of the results are either round up lists of the best podcast microphones (most likely with affiliate links to purchase) or actual product pages on sites like Amazon and Best Buy.
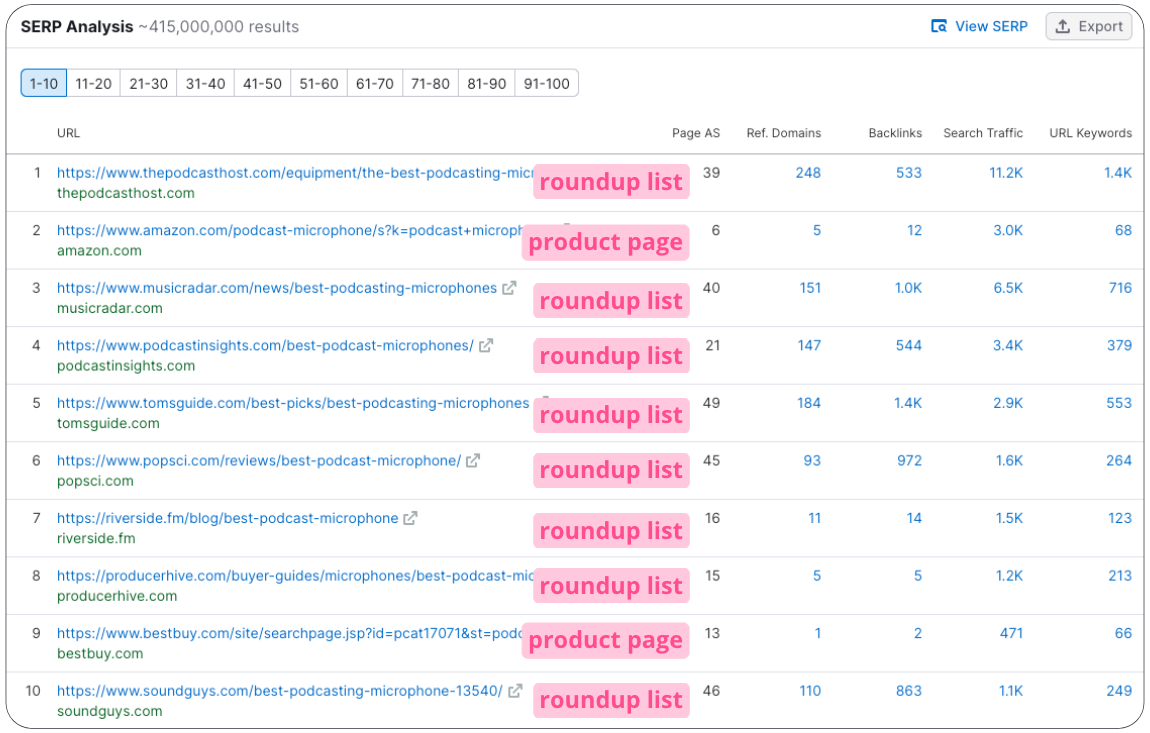
That means that for an article about how to calibrate your XLR podcast microphone, you'd want to pick a different keyword, like "XLR setup" or "XLR microphone setup."
Note: I used the SEMrush SERP analysis tool in the above examples, but if you don't have access to that, you can also plug your query into Google and look at the results yourself. Just disregard any results marked "Ad," as those aren't organic search results and aren't relevant for this exercise.
Now that you've got your blog topic, your keywords to target, and know that your content will match most searchers' intent, it's time to write your blog post.
Step 2: Convert Your Video into Text Format
Ok, so you won't actually be doing much writing.
Instead, let me show you how to convert the audio from your YouTube videos into text, to use as the foundation of your blog post.
To start, you'll need a tool that can automatically transcribe your video. For this tutorial, I'll be using Kapwing. It's an online video editing software with an automatic Subtitle Generator built in.
Navigate to the YouTube video you'll be converting and copy the link to your clipboard. Then head to Kapwing's Add Subtitles to Video page and click "Add subtitles" to get started.

You'll be prompted to sign in or create an account. Once you're logged in, you'll be able to create a new project within your account's workspace. When you first open a new project, you'll see the upload options.
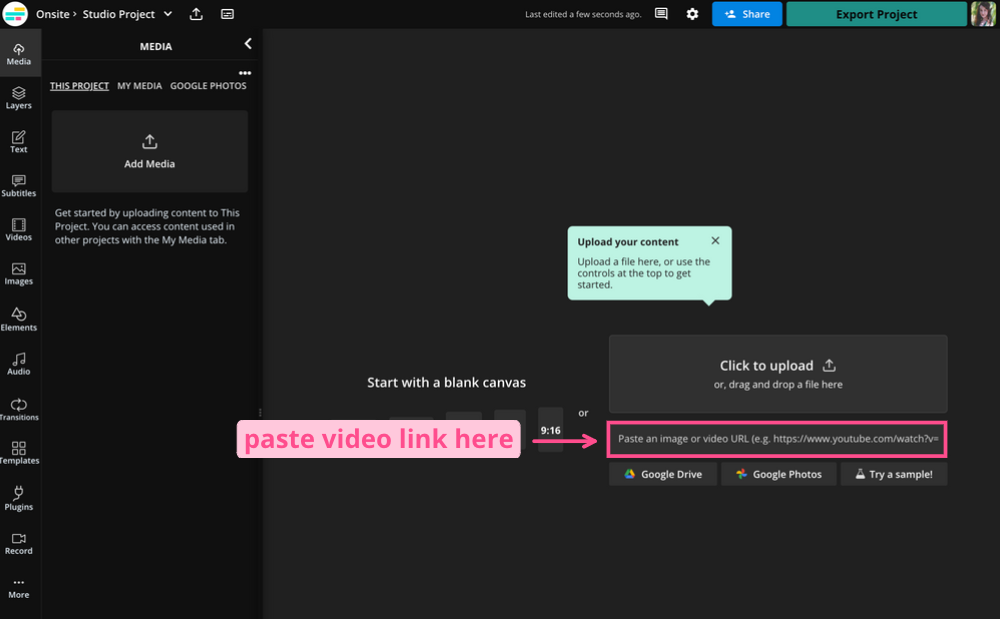
Paste the link to your YouTube video in the link box. Once your video is uploaded, click on the Subtitles tab in the left sidebar. Hit the "Generate Subtitles" button.
This feature will automatically transcribe the audio of your video into subtitles, synced to your speech. When it's done processing, click on the download icon at the top of the subtitle editor window.
You'll see the option to download as an .srt, a .vtt, or a .txt file. Choose .txt.
This is a plain text file, which means you'll be able to see all the transcribed text from the subtitles, without any of the timestamps. That's what you want.
📚 Learn more: How We Use YouTube to Power Our Marketing
Step 3: Edit Your Transcript as a Blog Post
Open your transcript in your .txt editor and hit Ctrl+A or Cmd+A to highlight the entire text. Copy to your clipboard and paste into whatever word processor or content management system you use to draft blog posts.
Now you can start editing.
First, make any spelling and grammar corrections to the transcript. Some words might be misspelled if they're uncommon. For example, transcription software often gets our brand name, Kapwing, wrong all the time. It's also possible that some homophones may have been transcribed incorrectly — "rose" being transcribed as "rows," for instance.
Additionally, since you're starting from a plain text document, you will also need to add in paragraph breaks and any formatting you want, like headers for SEO or bold or italics for emphasis.
But you also want to edit for readability. Even if you're starting with a video that was scripted, you'll need to make tweaks because we don't talk the same way that we write.
I often turn videos that my colleague Jack makes for Kapwing's YouTube channel into articles for our Resource Library. Jack writes great, engaging video scripts. But he's talking casually and dynamically. Written word, even casual written word, tends to be more structured than that.
Still, it's a lot easier to clean up a video transcript than write an article entirely from scratch. In a relatively short time, you should have a publish-ready blog post. Repurposing your YouTube videos into blog content is all about working smarter, not harder.
This process works for all kinds of video content — webinars, explainers, interviews, and regular old talking head videos. You can even transcribe your podcast and turn it into a blog post!
For more tips and tricks like this, check out our Resources Library. We publish articles written by creators, for creators every week. And to start turning videos into transcripts and blog posts, try Kapwing.
Create content faster with Kapwing's online video editor →