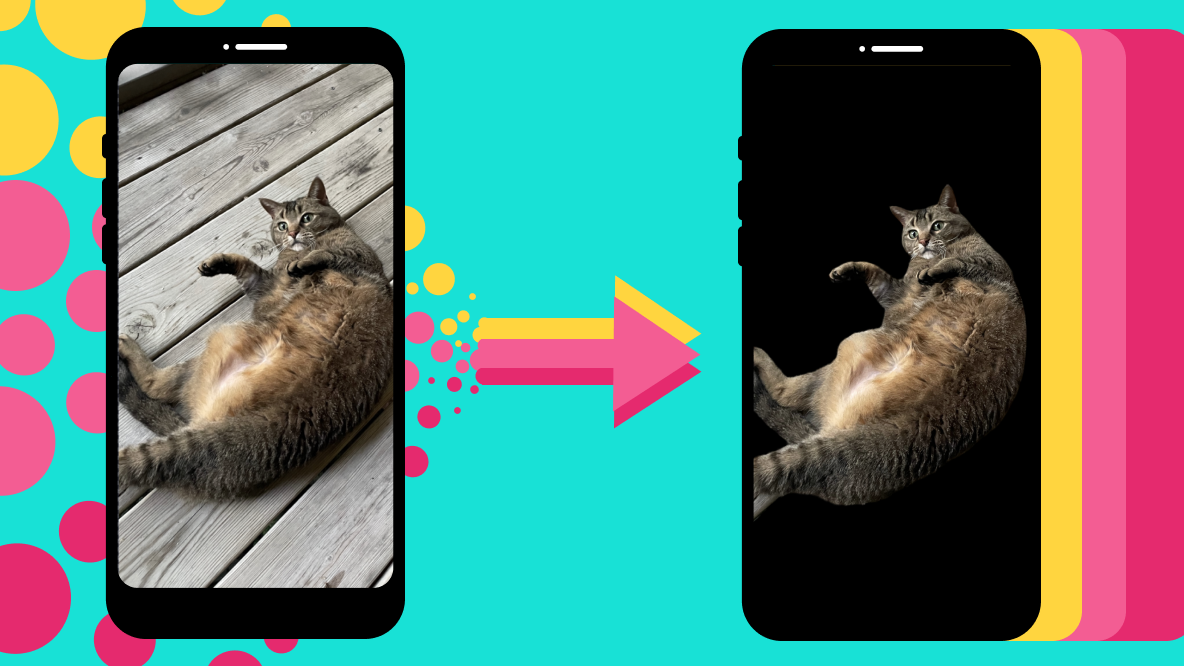
How to Remove Image Backgrounds without iOS 16 (on Any Device)
Don’t have access to the new iOS 16 feature to remove image backgrounds? In this article, we'll teach you how to erase the background on any image, no matter what device you're using.
Apple just released the the new iOS 16 this week and with it has come some pretty big changes, especially to image editing on the iPhone. One of the new iOS 16 features that everyone seems to be talking about is the ability to remove image backgrounds.
With iOS 16 users are able to "lift the subject from an image by removing the background... in Photos, Screenshot, Quick Look, Safari, and more." You can then share that new transparent background image in a number of places, including iMessage, Notes, and Files.
It's a pretty cool feature that we've all been anticipating for several months, but even after the official iOS 16 lauch, it's still not available to everyone. Android users, of course, don't have access to the new iOS 16 features, but many Apple users are also being left out. iPhones and iPads without the A12 Bionic chip aren't compatible with most of the iOS 16 features.
So, how can you remove image backgrounds without iOS 16? In this article, we'll show you how to do just that on any image, with any device.
How to Remove Image Backgrounds without iOS 16
If you're rocking with an older iPhone or use an Android, follow this tutorial to learn how to remove image backgrounds on mobile or desktop.
For this tutorial, we'll be using Kapwing's one-click Remove Background tool.
Step 1: Upload Your Image to the Studio
Just like the new iOS 16 feature, Kapwing's Remove Background tool can be used on any image you've saved to your device, the cloud, or just found online. If it's an image you found online, make sure to copy the URL first.
Go to kapwing.com and click Get Started.
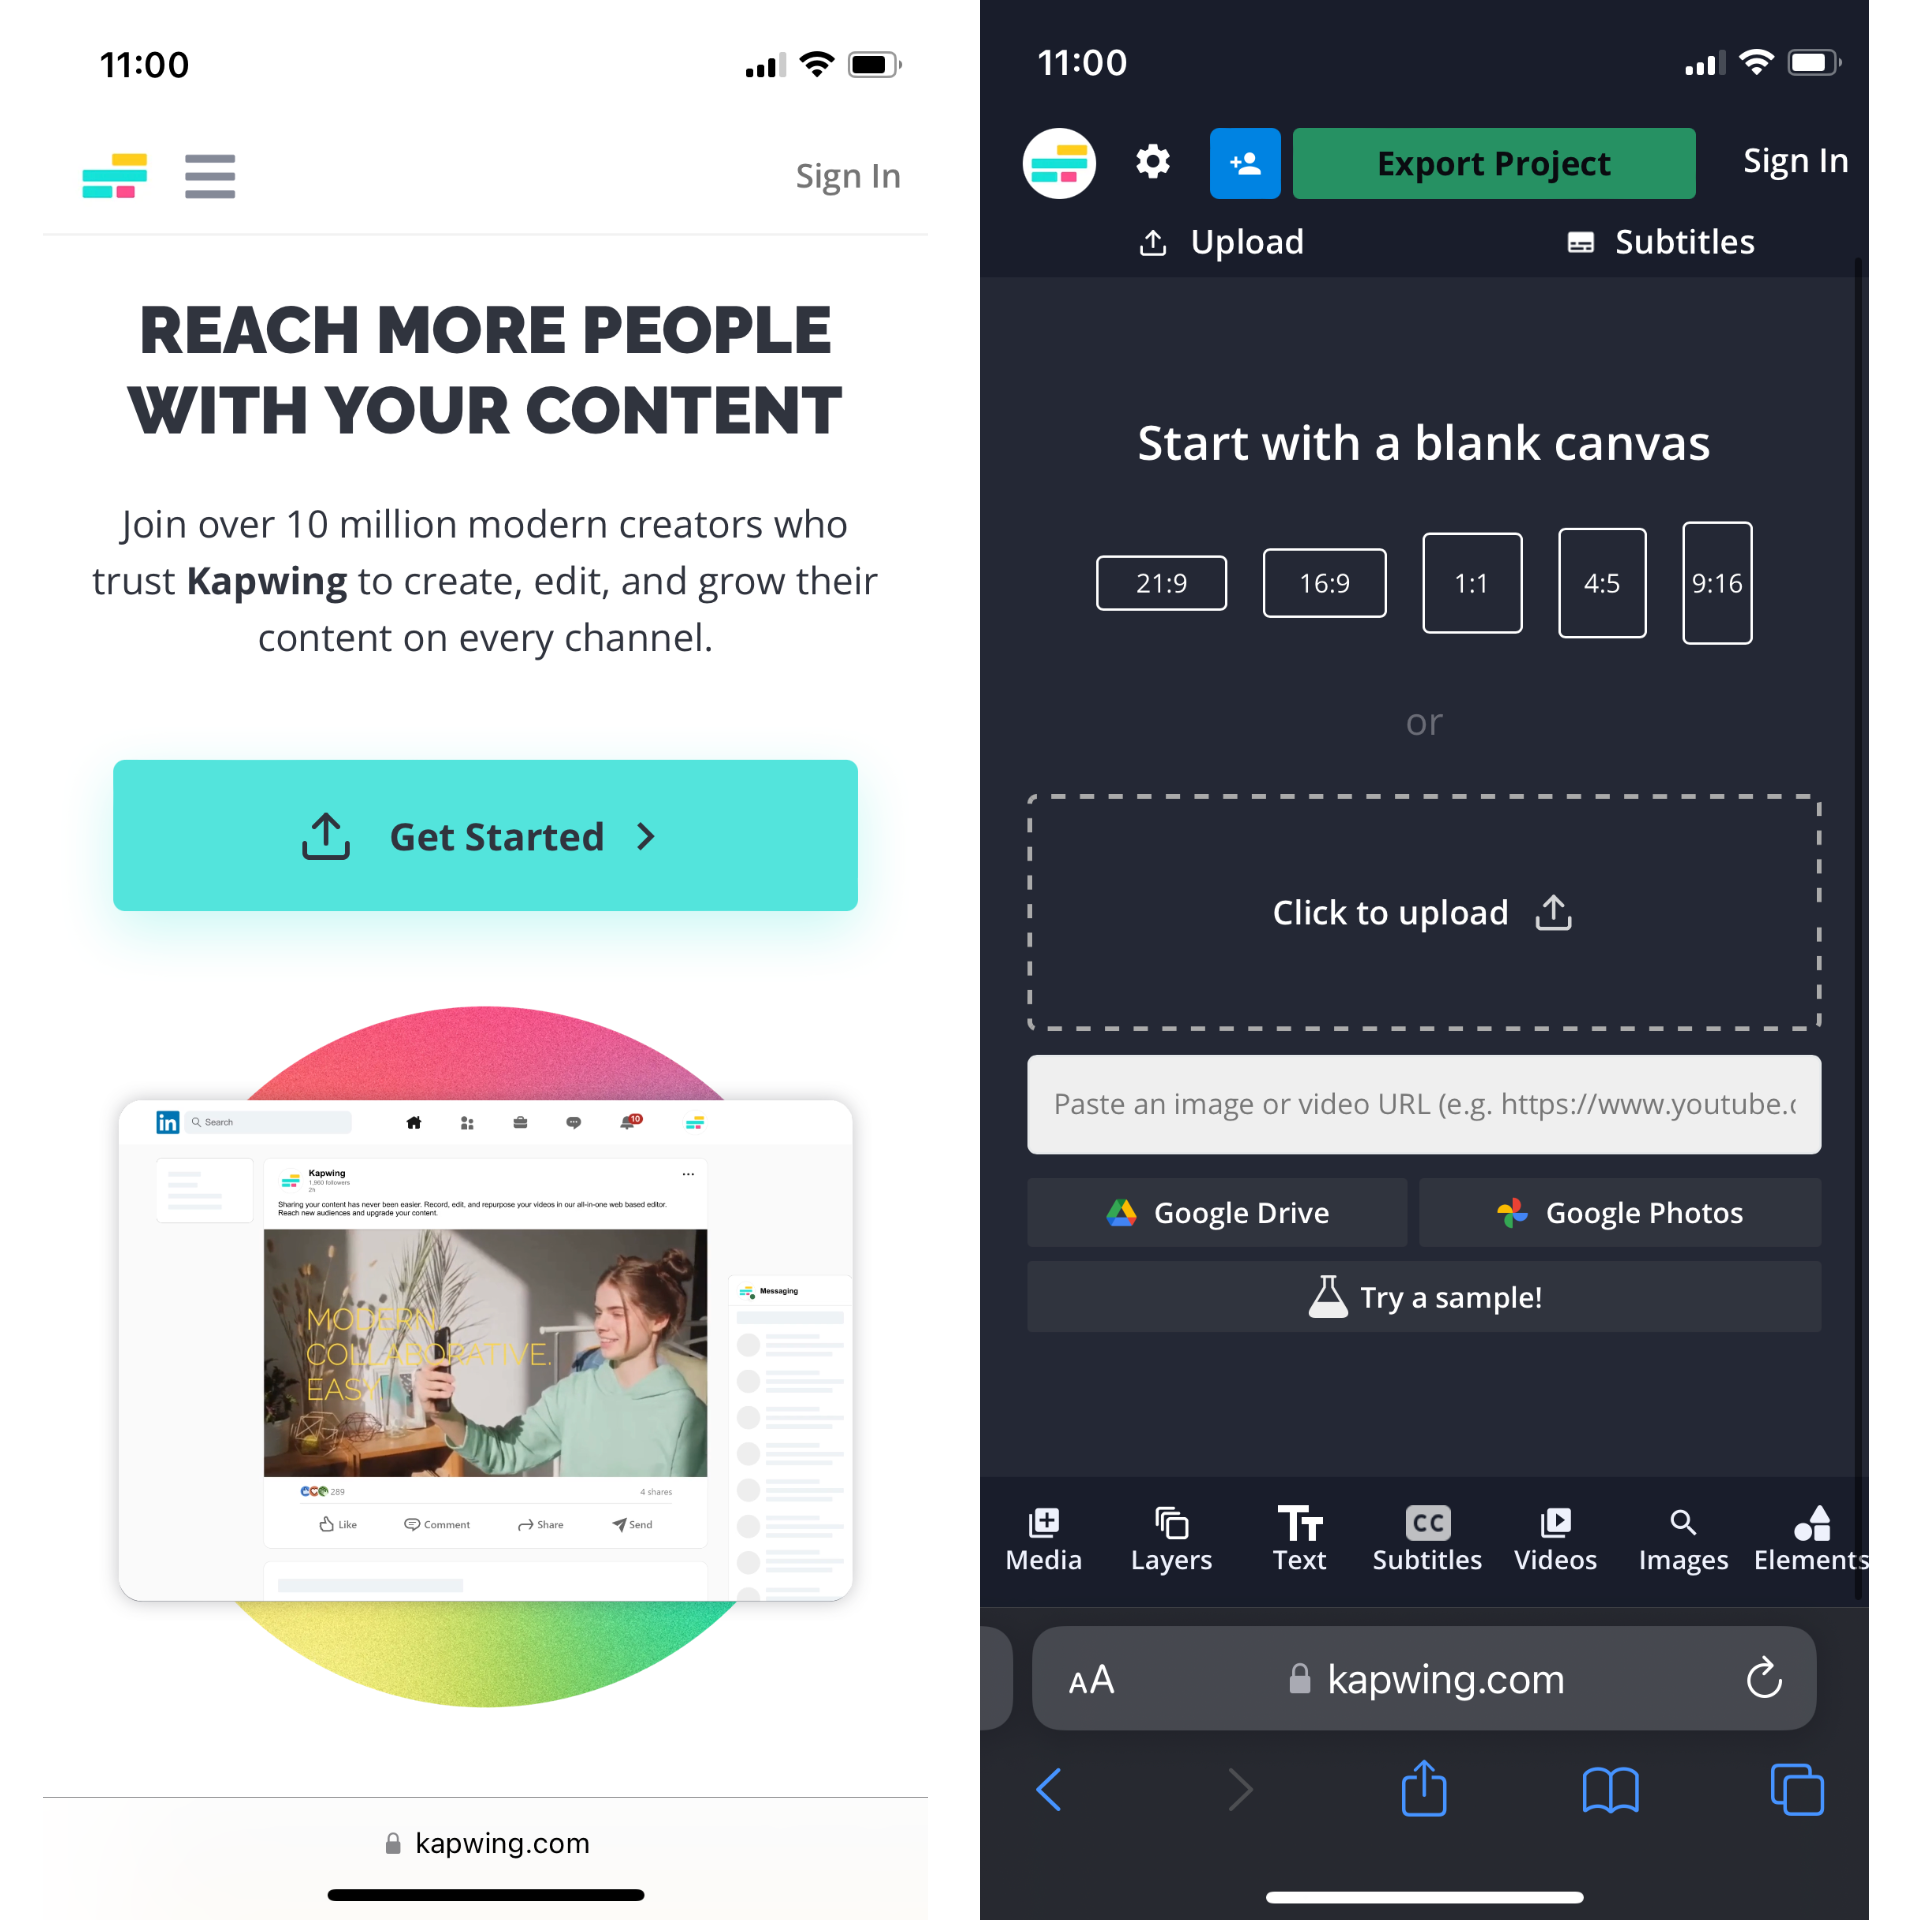
Then upload your image. You'll have options to upload from your device, from a URL, or from Google Drive and Photos.
Step 2: Remove the Background from Your Image
Once you've uploaded your image, click on Edit Image to open the editing menu. You'll see Erase as one of the top four options.
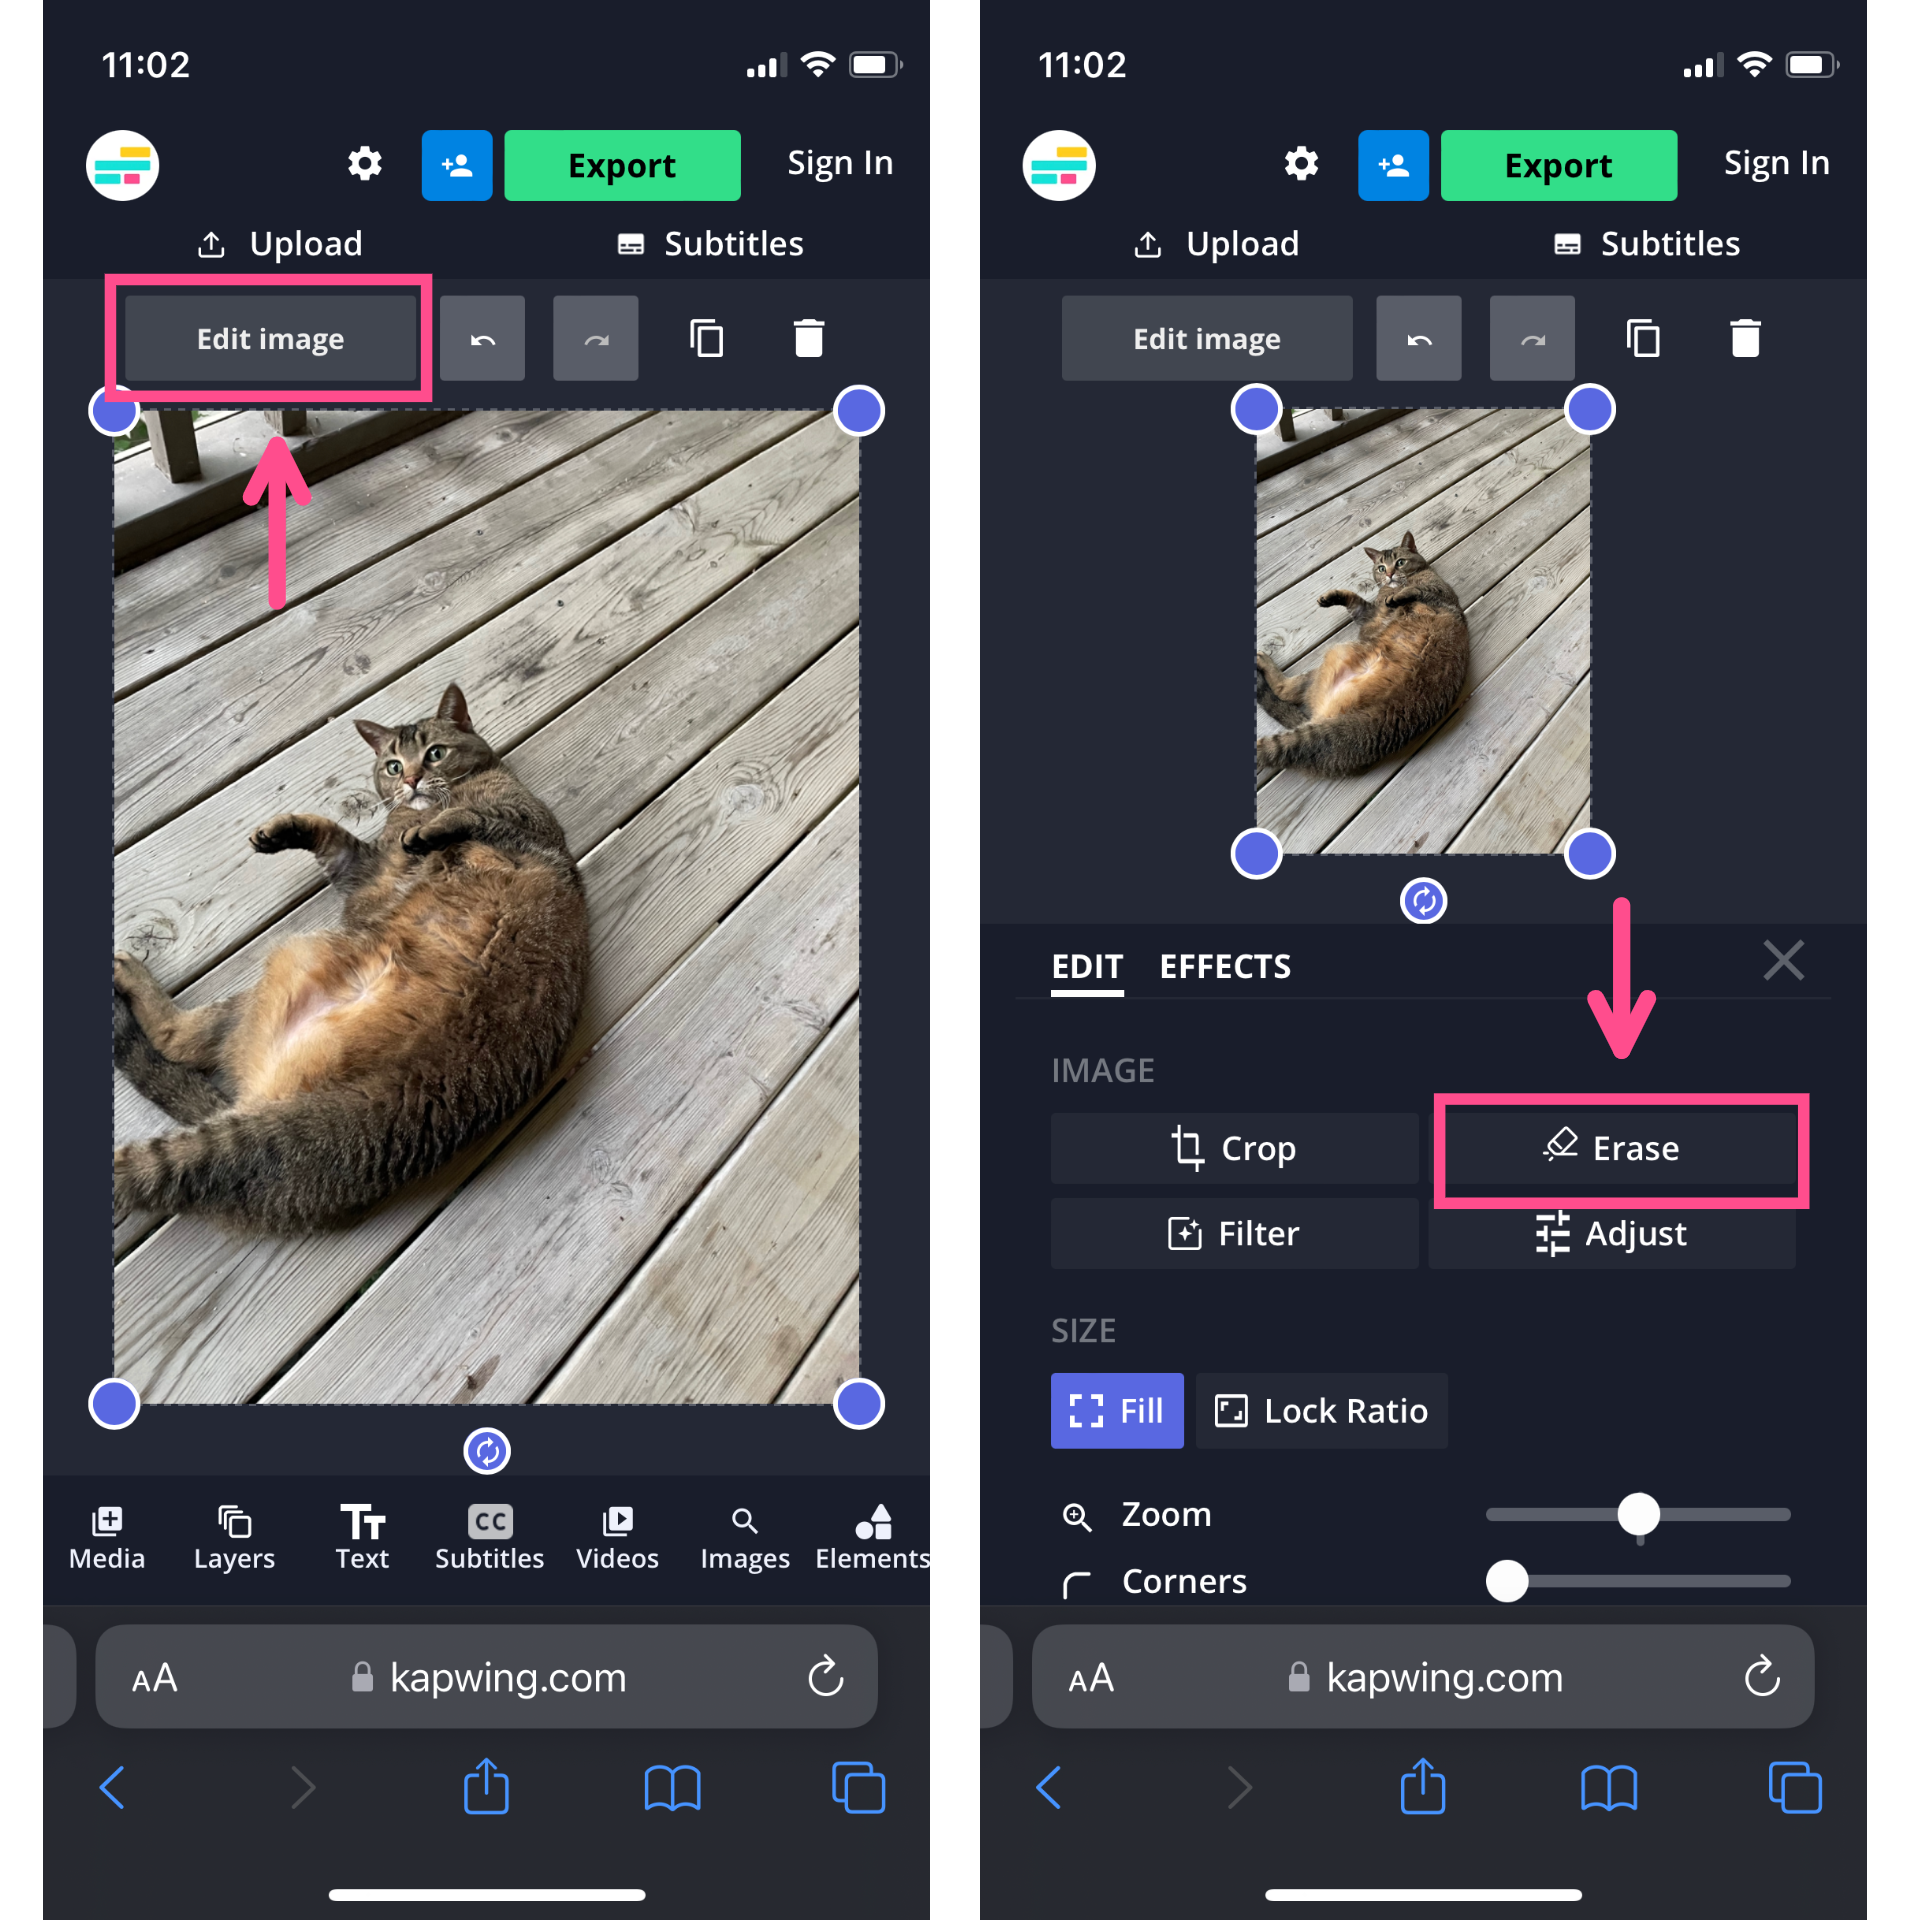
Click on the Erase button. You'll see a few different tools within this tab, including the Remove Background button right at the top. Tap it to instantly isolate your image subject and erase the background.
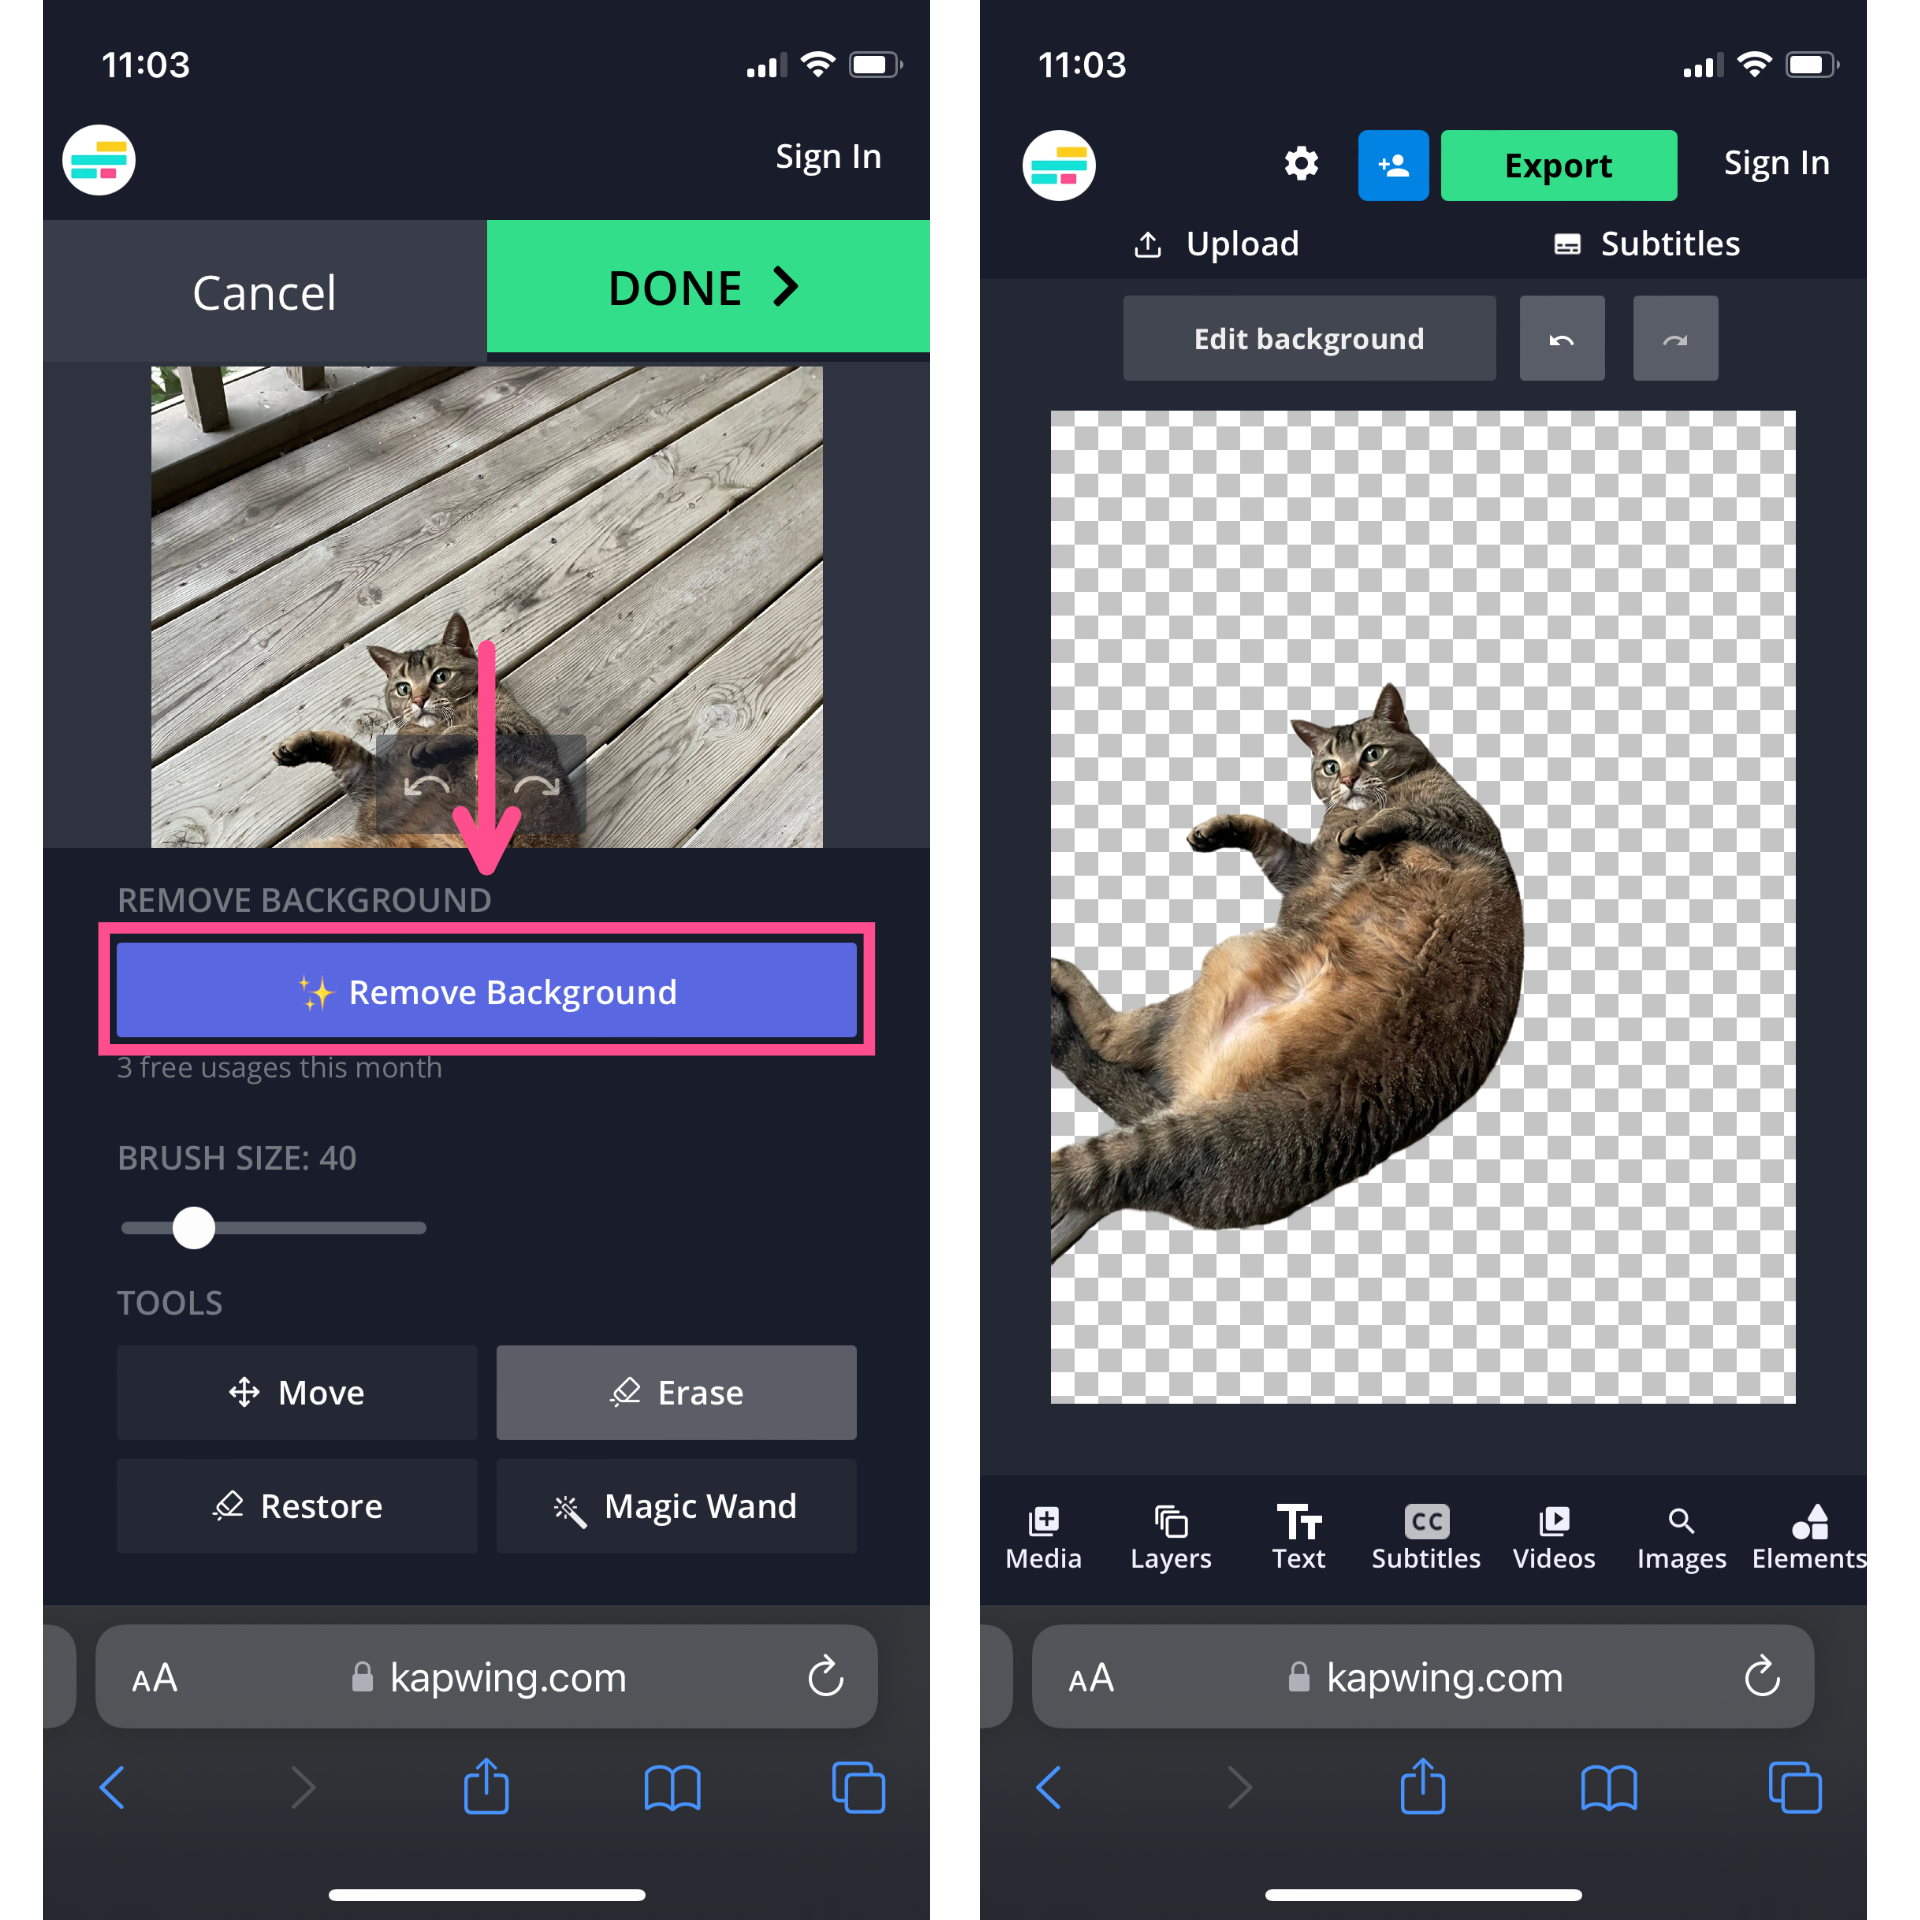
The background will now show up as gray and white checkerboard in the Studio, indicating that it's transparent and can be saved as a PNG.
Step 3: Download and Save Your Transparent Background Image
Now you have a perfect, transparent background PNG. Click Export to render the image and see your download options.

If you're not already signed in, you may be prompted to sign in to save your image watermark-free. Then just click Download file to save it to your device.
For Safari users on iPhone, the image won't automatically save to your Camera Roll. Instead, it will save to your Safari downloads. Open this by clicking the blue download arrow button in your browser search bar and selecting Downloads.
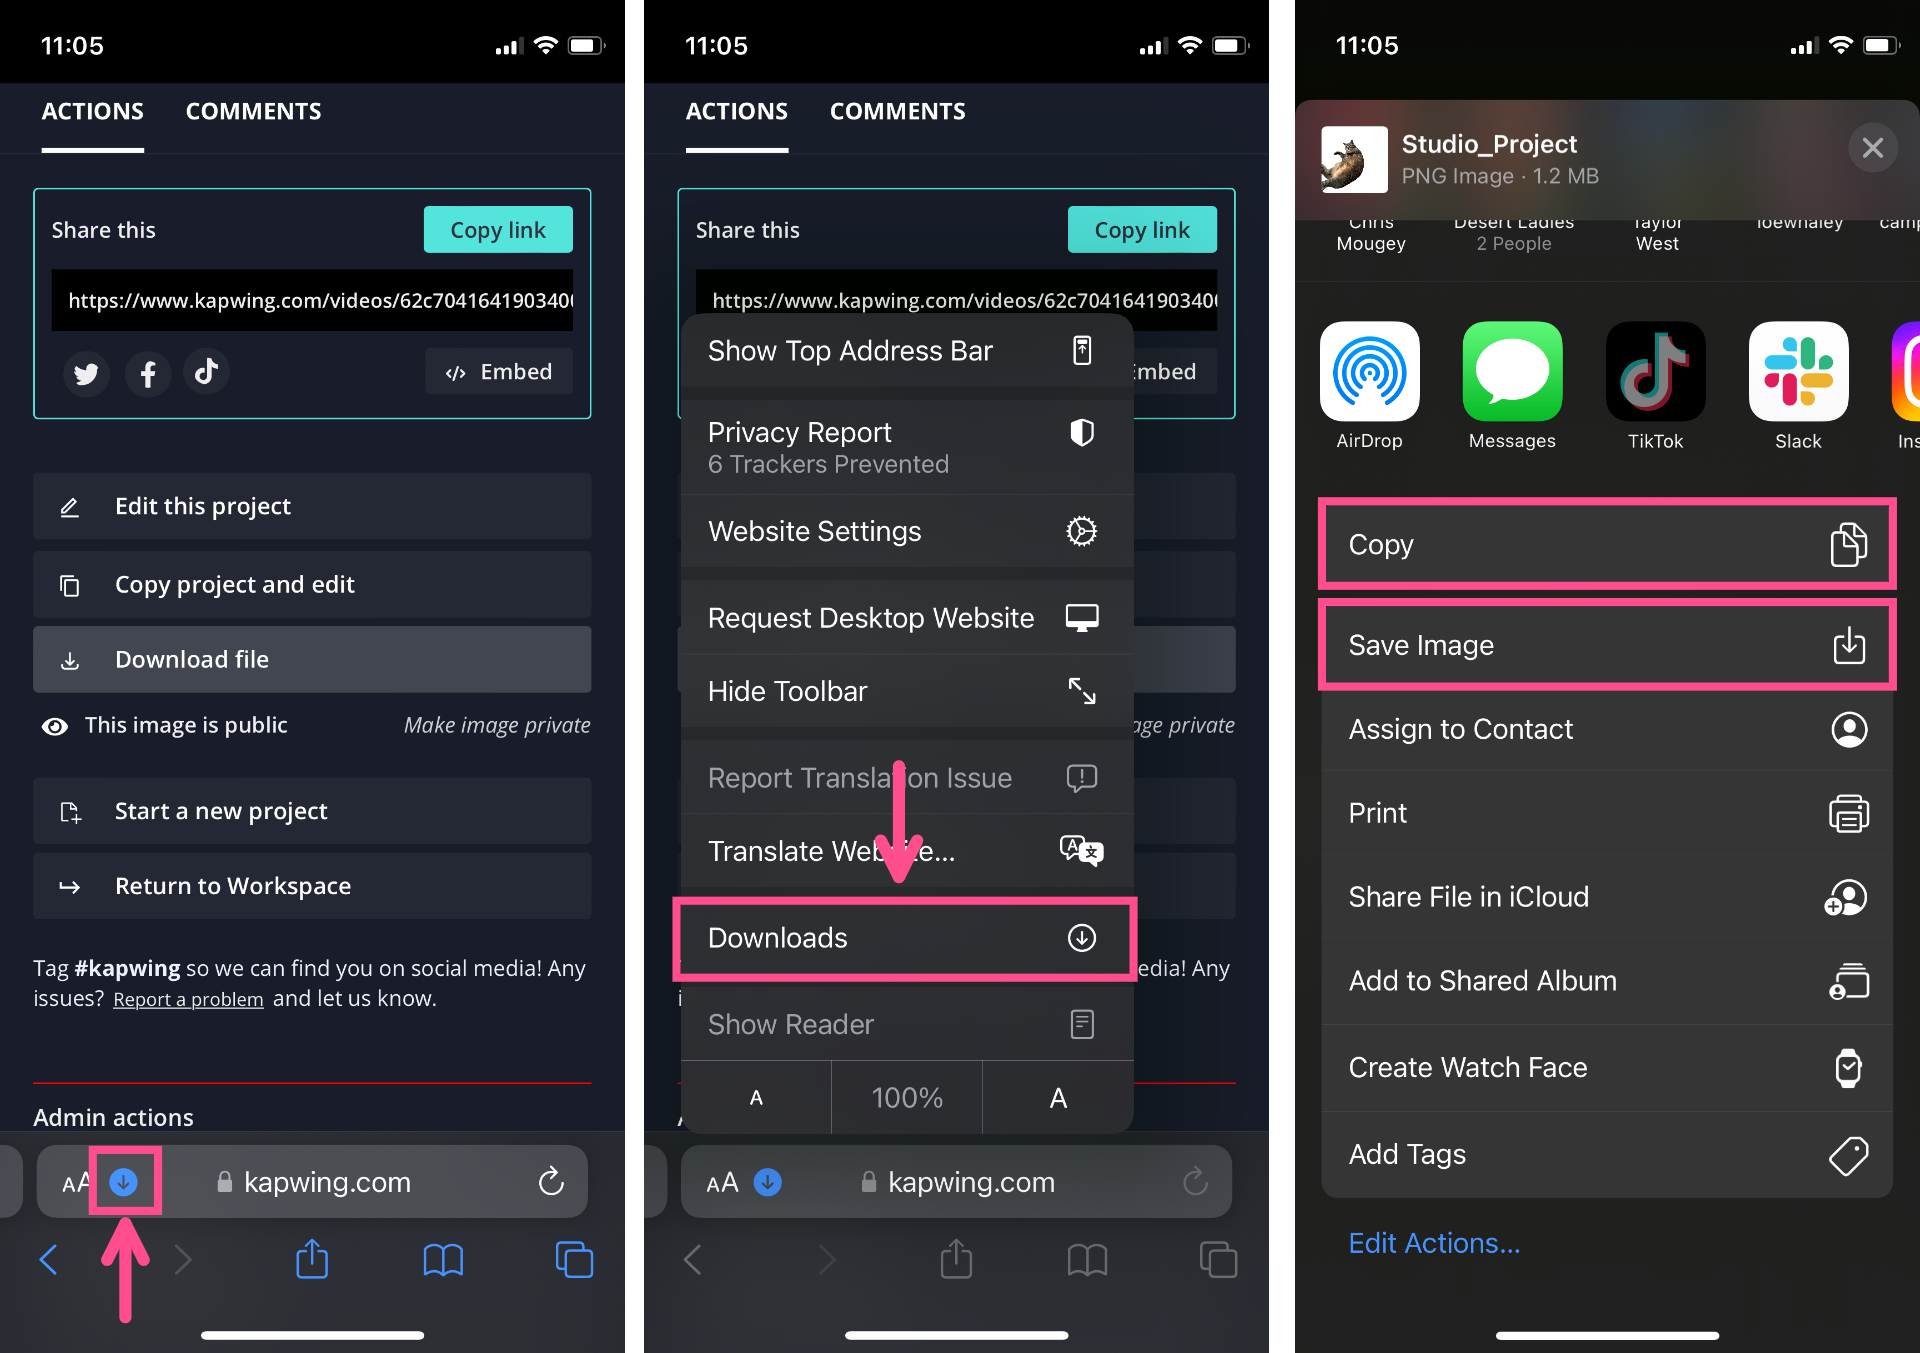
From this menu you'll have the option to Save Image (which will send it to your Camera Roll), Copy (which will save it to your clipboard, so you can paste it elsewhere), or open it directly in any of the supported apps on your phone, like Messages.
Step 4: Share Your New Transparent Background Image (without iOS 16)
Just like with the iOS 16 feature, you can now share this transparent background image anywhere you'd like: iMessages (or regular messages, if you're a green text girlie), Notes, Slack, Instagram DMs — truly anywhere.
So, whether you're holding off on getting a new iPhone or feeling Android user FOMO, now you know how to quickly remove the background from any image on any device.
For more creator tips, info, and news, check out our Resources Library!
Create content faster with Kapwing's online video editor →