How to Edit Videos: A Complete Beginner's Guide to Modern Video Editing
Video is the preferred medium for most users and social media platforms. Learn how to edit video online quickly and efficiently.

Video is the most popular medium for sharing content online—with no signs of that slowing down in 2024."Creators" of every stripe will become video creators, and those with little to no editing experience are looking for ways to make video quickly and at scale.
The good news is the barrier to editing and creating video has been lowered significantly thanks to advancements in tech. Online video editors are faster and more powerful while still remaining more user-friendly than traditional desktop software.
In short, this is the best-possible year to become a full-stack video creator. And we're going to help. To start, we've put together a step-by-step guide to the basics of creating, editing, or repurposing your first video.
How to edit a video online
There are two methods for editing a video online:
- Start from scratch, with raw footage, or
- Repurpose an existing video for a new format.
While some aspects remain the same in both workflows, the exact steps are pretty different, so we’ll walk through each of them separately.
Let’s start with editing a new video, entirely from scratch.
How to create a video from scratch
Step 0: Record your video
You can set yourself up for success before you even press record. Here are a few things you can do to make your editing job easier before you start creating.
Make sure you have the right equipment
A good camera is a nice-to-have, but not a necessity. Your smartphone can capture high-resolution video, ready to publish on most channels. Apple's Continuity Camera lets you replace your webcam with your iPhone for shooting interviews or talking head style videos. And internal stabilization has gotten significantly better, making phone cameras an option for on-the-go shots, as well.
The one thing you don’t want to do is use your laptop’s built-in camera. 720p is simply not high enough resolution.
Another piece of equipment to consider is lighting. Even the best cameras will struggle to pick up clear, quality video in low lighting.
Natural light is best, but if your setup doesn’t get much sunlight you’ll want to invest in a ring light or stand light. Even if you do get good quality natural light, it’s smart to have auxiliary lighting as backup in case weather or time of day affects your lighting.
But actually, the most important piece of recording equipment when filming a video is probably your microphone. Nothing makes viewers scroll away faster than bad audio quality. We recommend investing in a good microphone and, for best results, recording your audio separately and then syncing it before editing your video. This doesn’t require expensive gear—even a $50 lav mic will be better than just relying on the camera’s audio.
Make sure you have a good setup
Consider the space you’ll be using to record. Is it quiet? Well-lit? Visually interesting but not distracting? Then you're all set.
Get comfortable on camera
Being on camera is one of the top three concerns keeping most people from making more video. The truth is stage fright can only be fully alleviated by practicing. However, prepping what you want to say in the video can make it easier to feel (or at least appear) confident.
The best way to do that is by writing out an outline or script for your video. Put it somewhere where you can see it while recording and glance at when you need to. Another option is to use a teleprompter.
If you’re recording in Kapwing, you can paste your video script into the built-in teleprompter, which appears above the recording monitor window. Adjust the size of the teleprompter window, the size of the font, and the scroll speed to suit your preferences; this might take some trial and error.
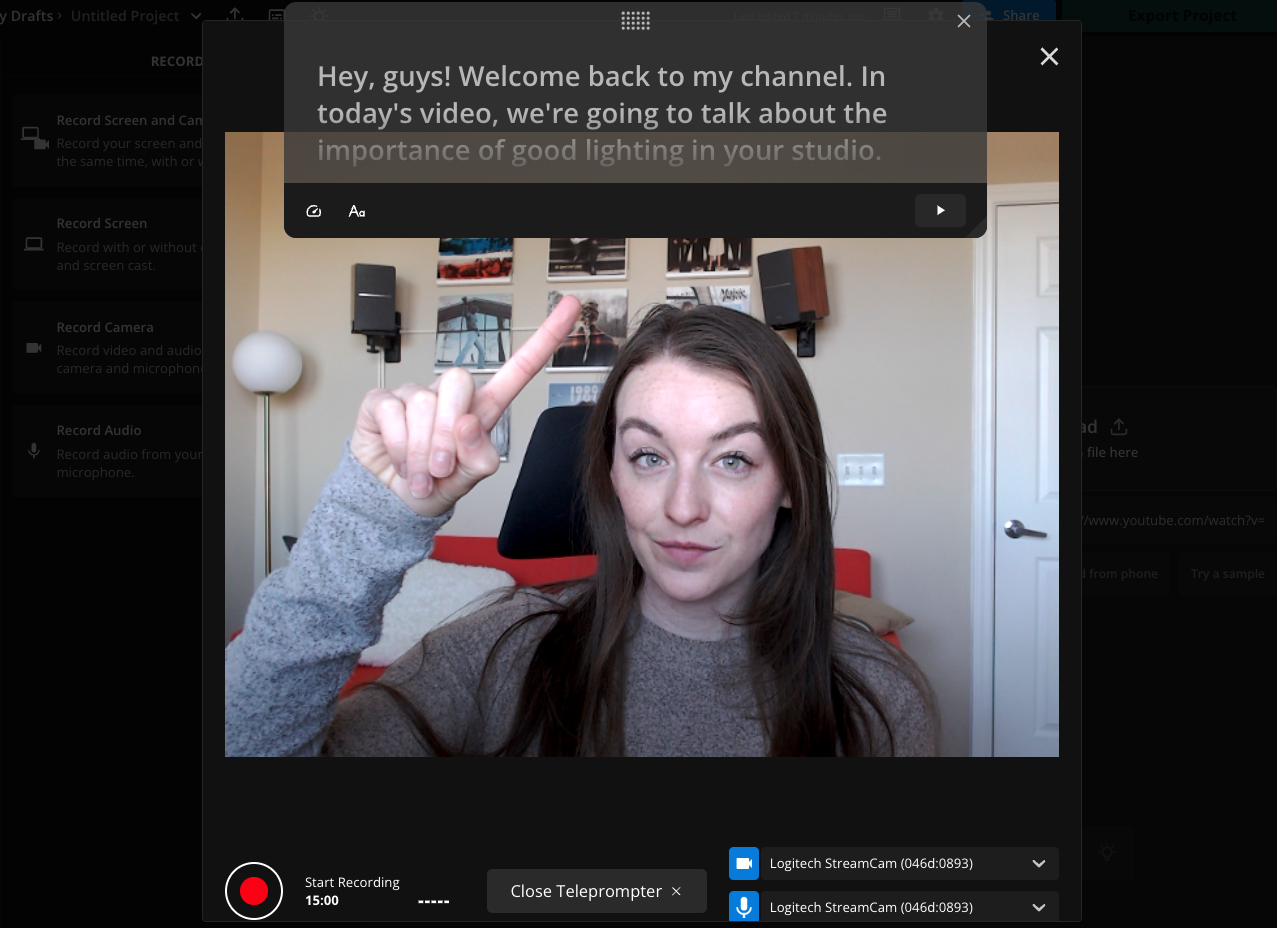
There’s no need to try to memorize everything. You’ll be able to cut out any takes where you flub a line or pause to read the script later on while editing.
Which is our final piece of advice for getting comfortable on camera. Almost everything can be fixed in post. The stakes are not that high for a recorded video. Take your time and know that the magic of editing covers a multitude of sins.
Step 1: Make a rough cut
A rough cut is the first draft of your video, with all the clips arranged in order and any mistakes or bad takes trimmed out. The main goal of the rough cut isn’t to create a publish-ready draft but instead to get all of the footage you want to edit in one place and cleaned up.
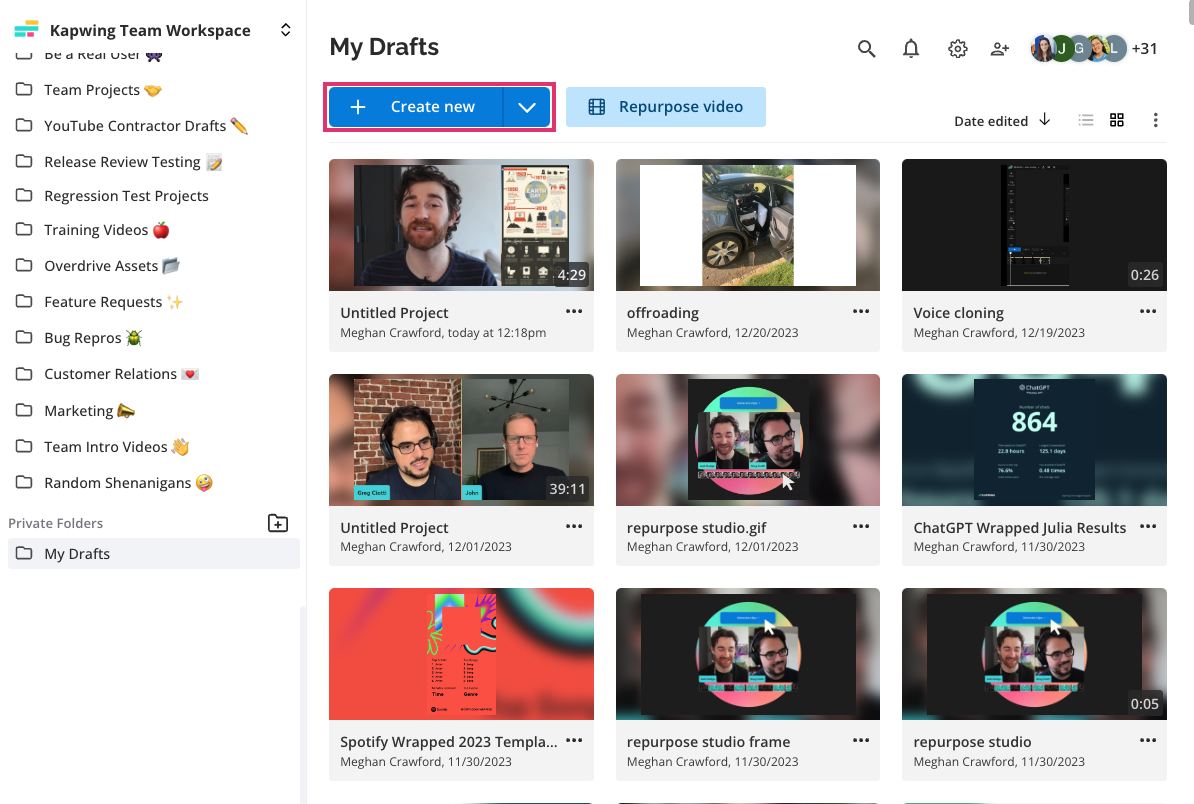
First, upload all of your footage to your video editor. For this tutorial, we use our product, Kapwing, which allows you to upload from your device or from the cloud. Make sure to select the “Create new” option at the top of your workspace to get started from scratch.
If you’re editing together multiple clips, add them to the editing timeline in the correct order. Now it’s time to trim the video and cut out the sections you don’t want.
Manually scrubbing through all of the footage to find the best takes is time-consuming. In Kapwing, we recommend first using Smart Cut to automatically remove any unnecessary silences from the footage, then follow with Trim with Transcript to cut out any mistakes, repeat takes, or footage you just don’t want to use.
Here’s how.
First, choose the footage you want to edit in the timeline, then click the “Smart Cut” in the right side tool menu.
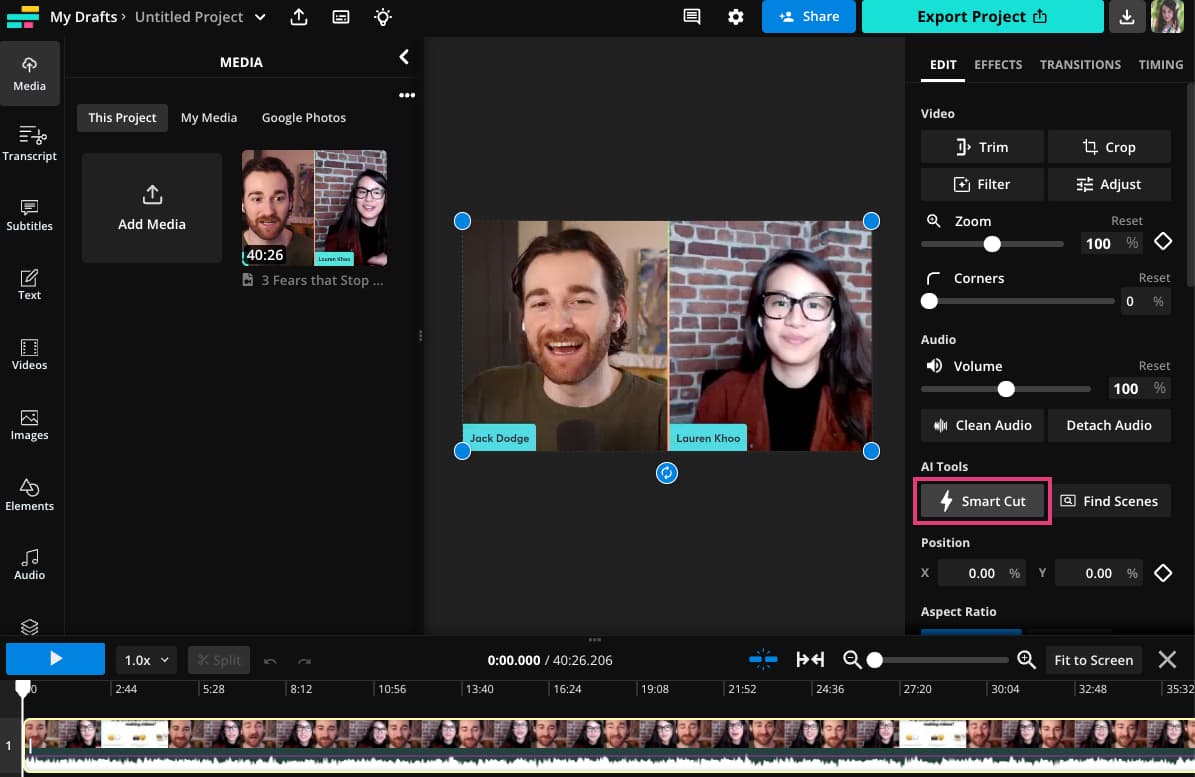
You can select how sensitive you want the silence detection to be using the slider, then hit done and Smart Cut will get to work.
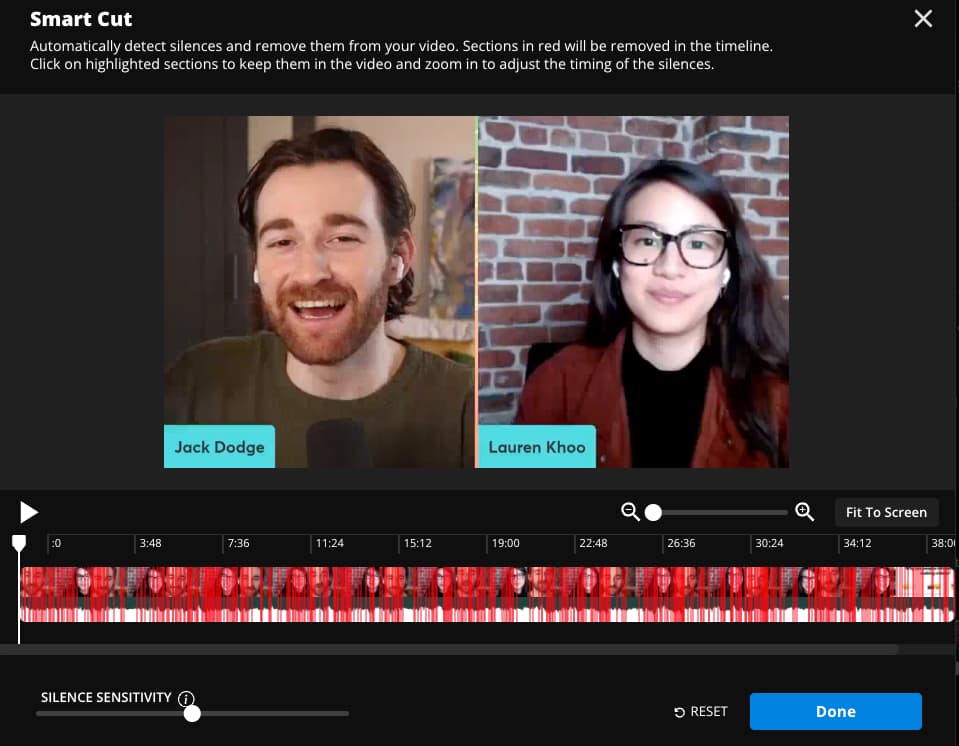
You’ll see the video layer in your timeline is now chopped into smaller clips, with all the silences removed.
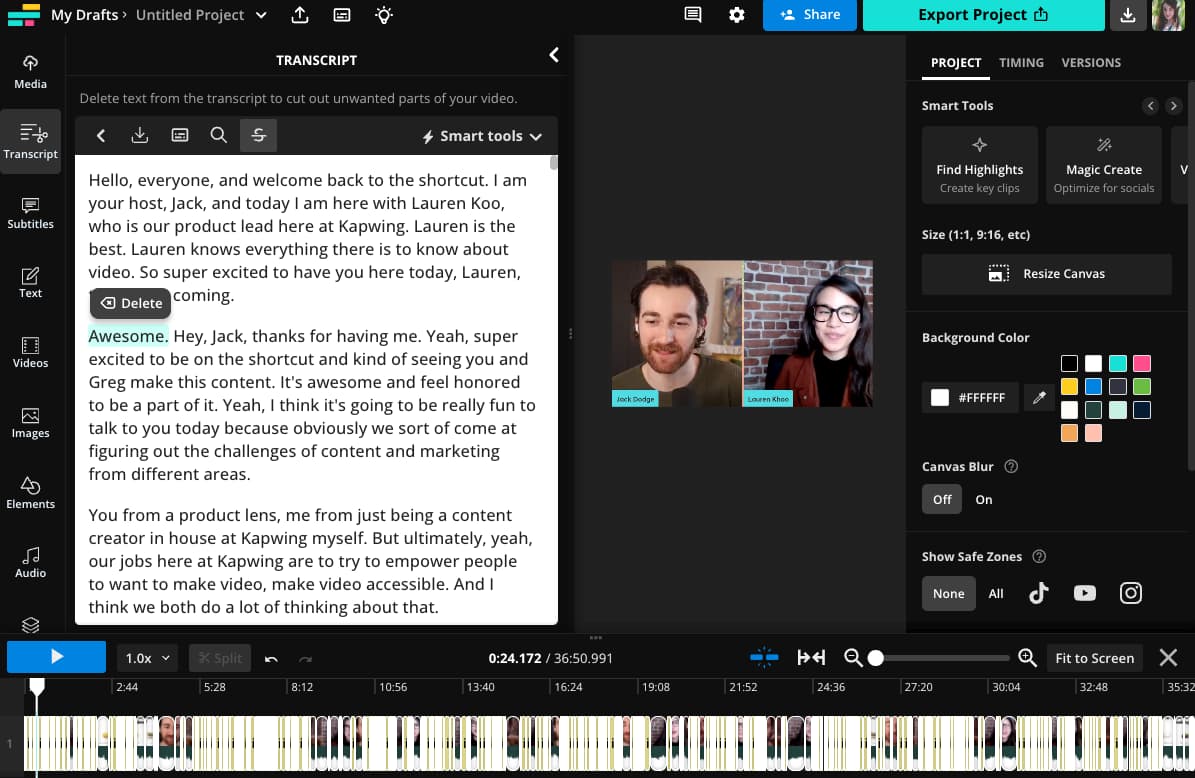
Now it’s time to use Trim with Transcript to finish your roughcut. Click the Transcript button from the left-side tab menu and Kapwing will generate an editable transcript for your video.

From here, simply edit the transcript like you would a text document—removing text you don’t want to appear in the final video. Kapwing will map the changes you make in the transcript to the video layers below, cutting out those deleted moments.
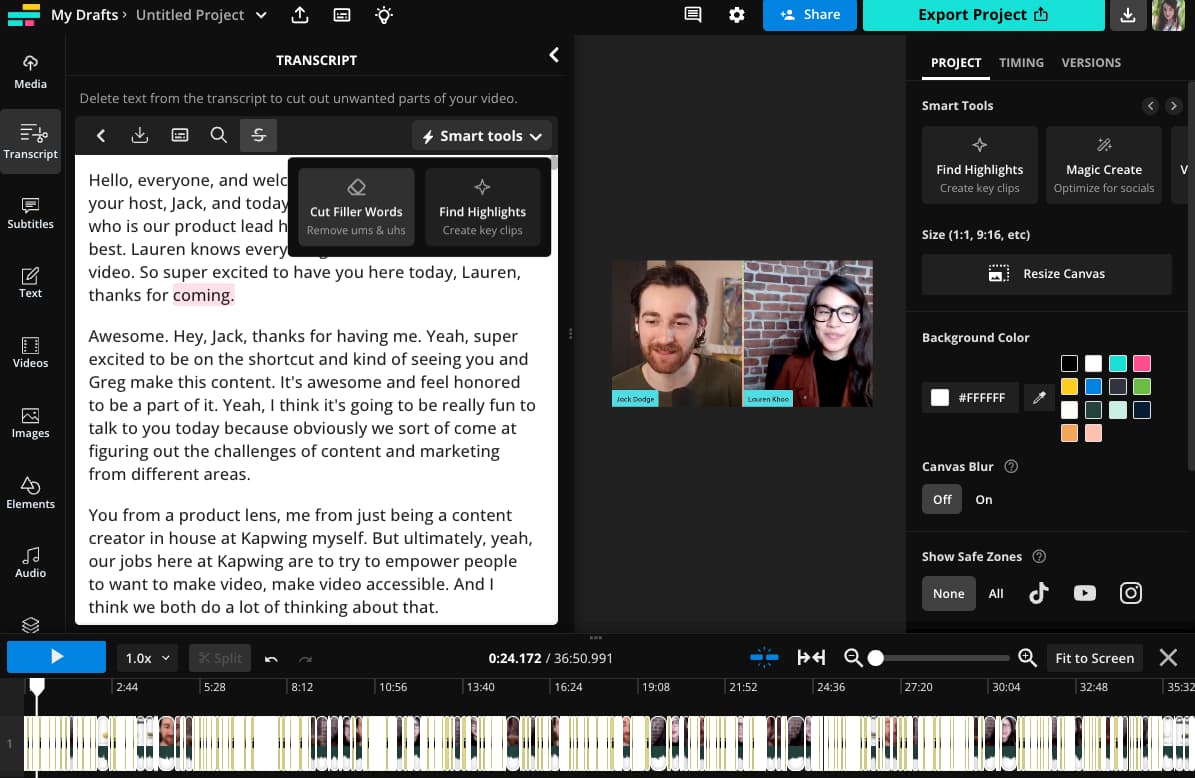
You can further speed up your roughcut process using the filler word filter. Click on the “Smart Tools” button in the top right corner of the transcript window and select “Cut Filler Words” from the drop down. This automatically removes “ums” and “uhs” from your transcript, making the video sound more polished and professional.
Before moving on to the next step, watch through your rough cut and look for any places that need additional polishing. If you find anything extra you need to cut, you can use the manual splitting and trimming tools in the timeline.
To trim a section, grab the end of the section in the timeline with your mouse and drag it left or right.
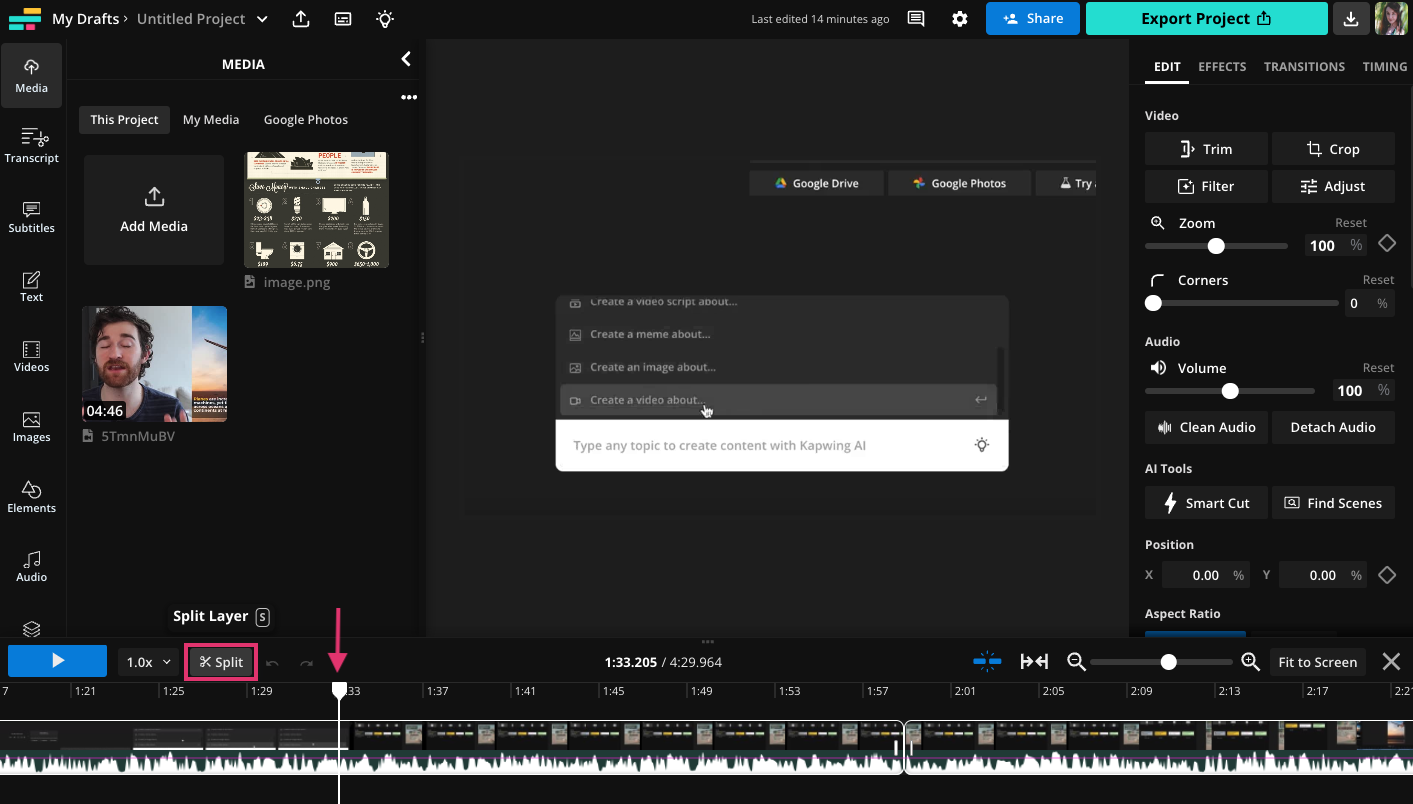
To cut out a section entirely, move the playhead seeker to the part of the timeline you wish to split, then use the Split tool or simply hit the ‘s’ key to use the keyboard shortcut. Once the section is split from the rest of the timeline, clip it out by using the ripple delete function (right click > ripple delete or cmd/ctrl delete).
You should now have a rough cut that’s ready to start editing.
Step 2: Add subtitles and voice over
We'll split this step into two sections, with one covering videos with spoken dialogue or a voice over and the other covering videos without.
For videos with voice over/talking:
If your video has voice over or someone talking on screen, it’s not complete without subtitles. They’re not just an accessibility feature. Subtitles also increase viewer engagement and watch time.
To add subtitles to your video in Kapwing, you can upload an existing subtitles file (SRT or VTT) if you have one or generate your subtitles automatically.
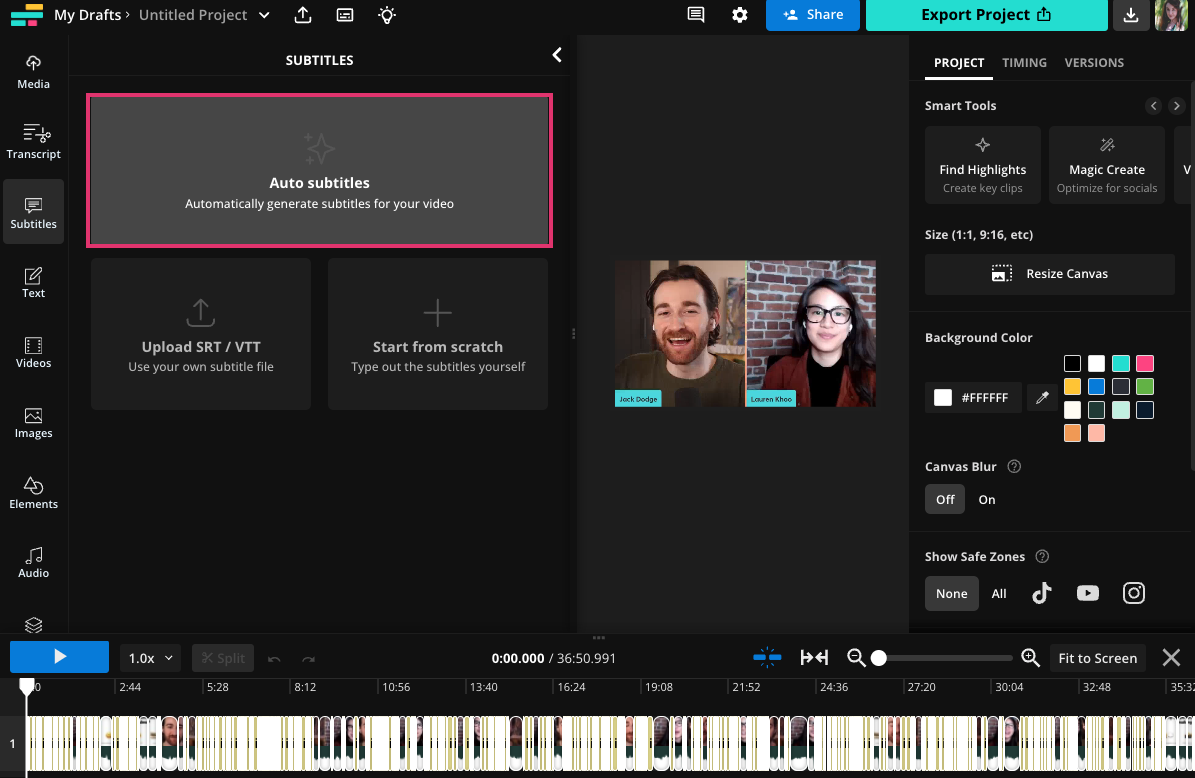
Click on “Subtitles” in the left-side tab menu, then select “Auto subtitles” to begin using Kapwing's AI-powered Subtitle Generator.
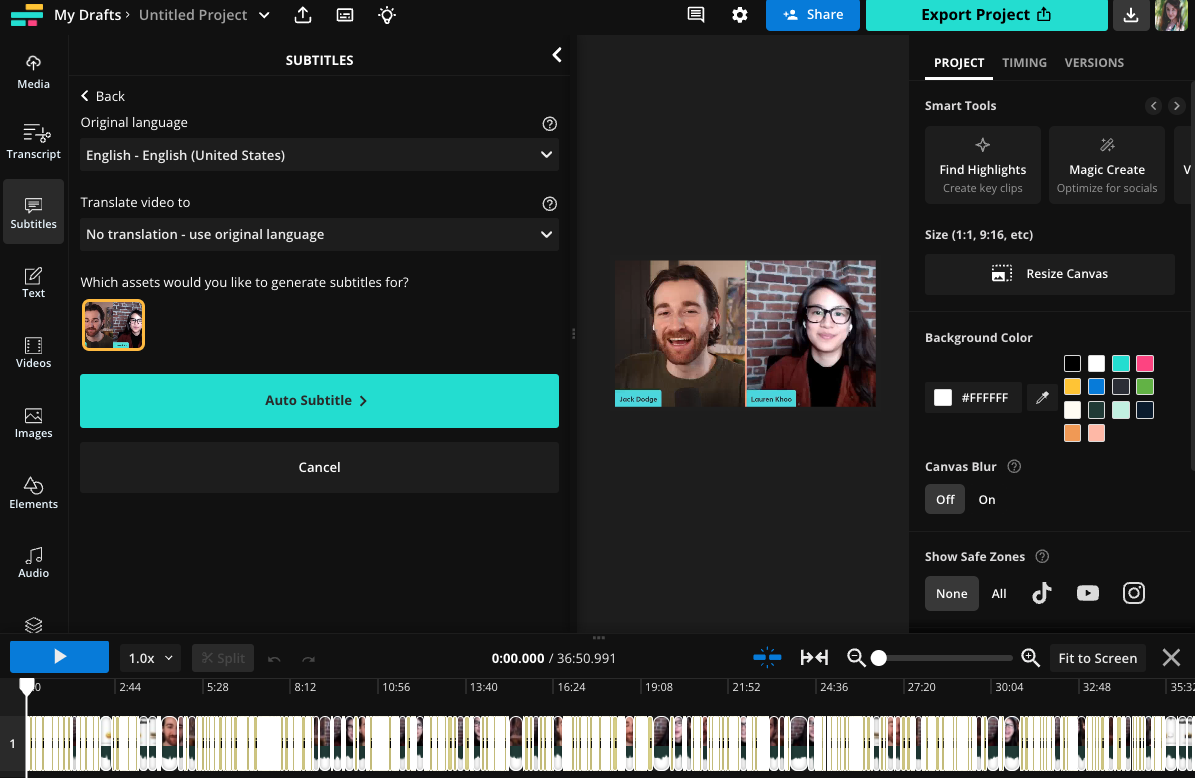
You’ll be given the option to set your subtitles language as either the video’s original language or translate it to a different language. Make your selection then hit “Auto Subtitle” to generate your subtitles.
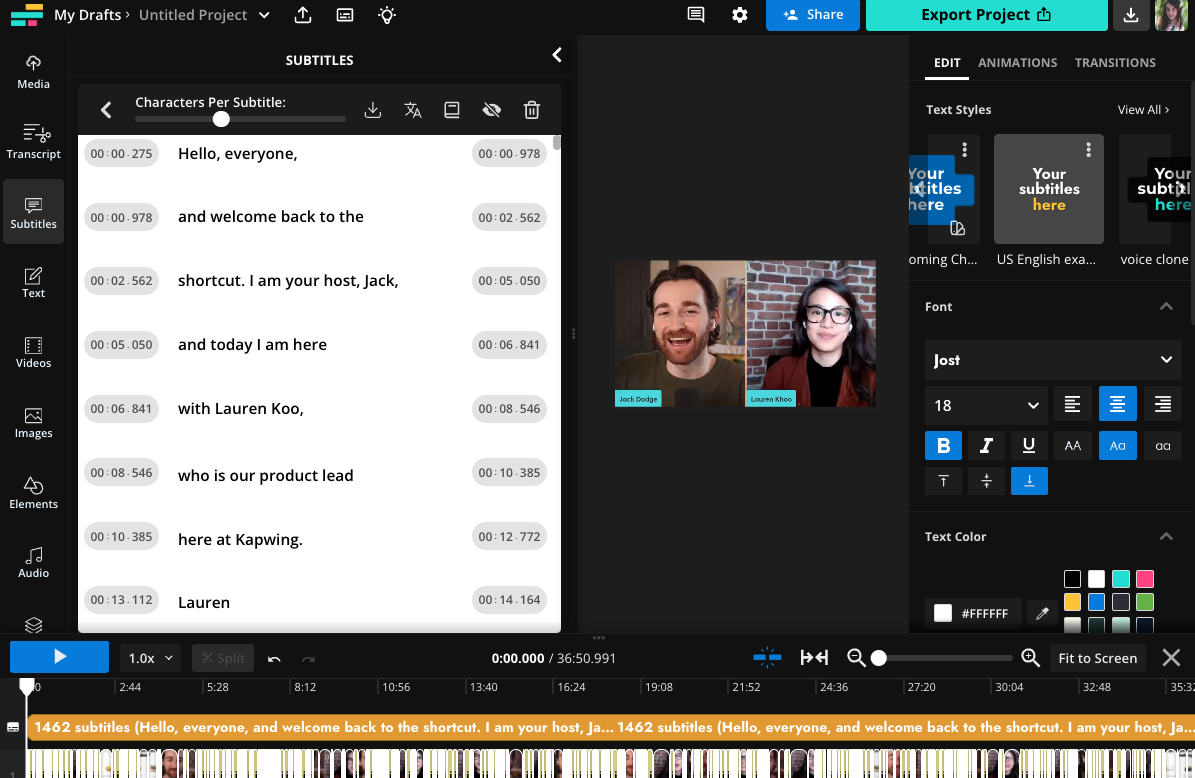
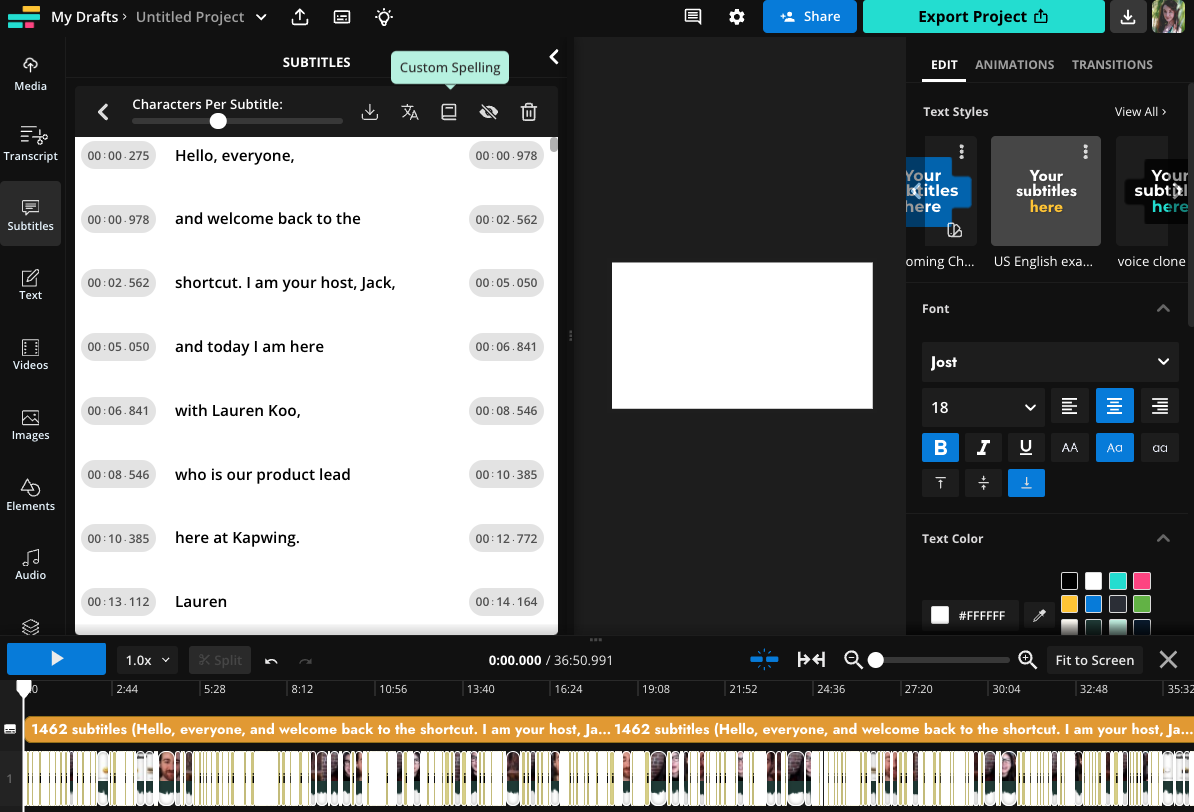
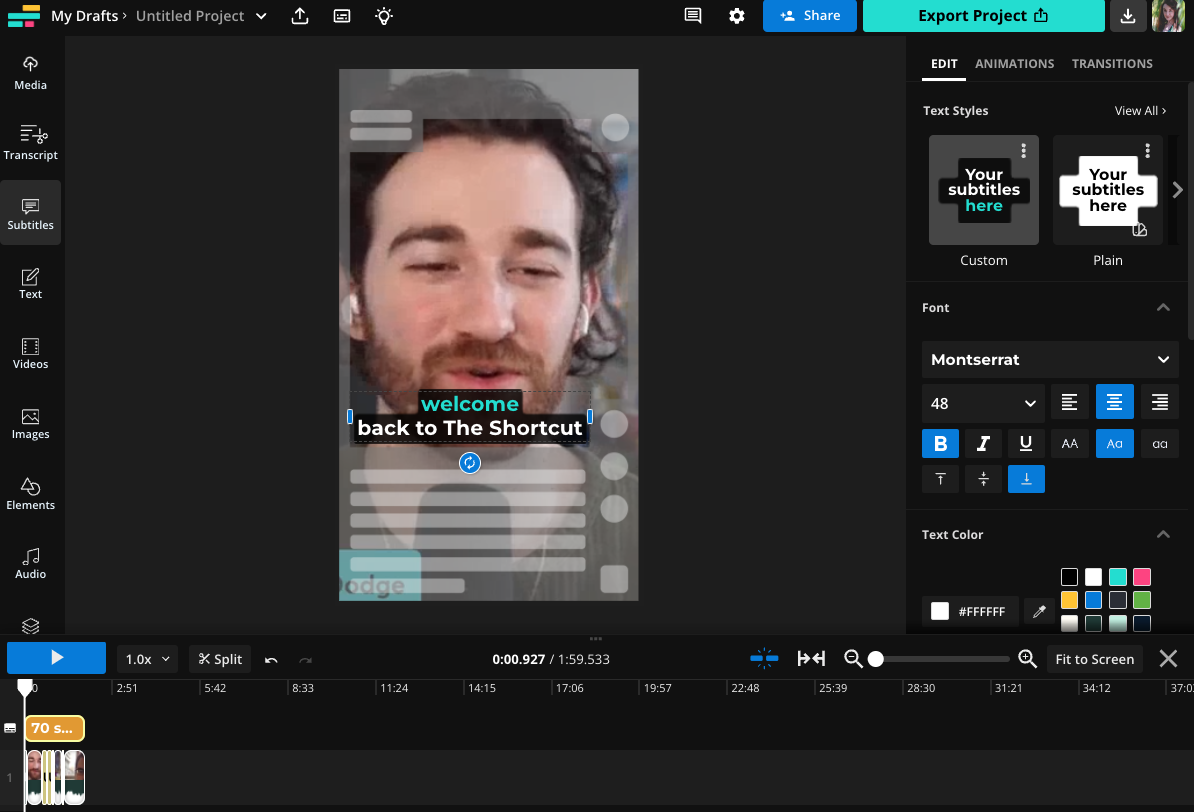
Once your subtitles are ready, you can customize them completely to fit your branding and preferences: choose from preset styles and animations or choose your own fonts, font colors, and animations. You can also control how many characters are in a line and where the subtitles fall in frame for ease of readability.
You can also edit any typos or errors in the subtitles using the subtitle window. While the transcript is fast and accurate, it does sometimes get the spelling of proper nouns or synonyms wrong. For proper nouns that appear often in your videos that get mistranscribed, we suggest adding them to your Brand Kit with Custom Spelling:
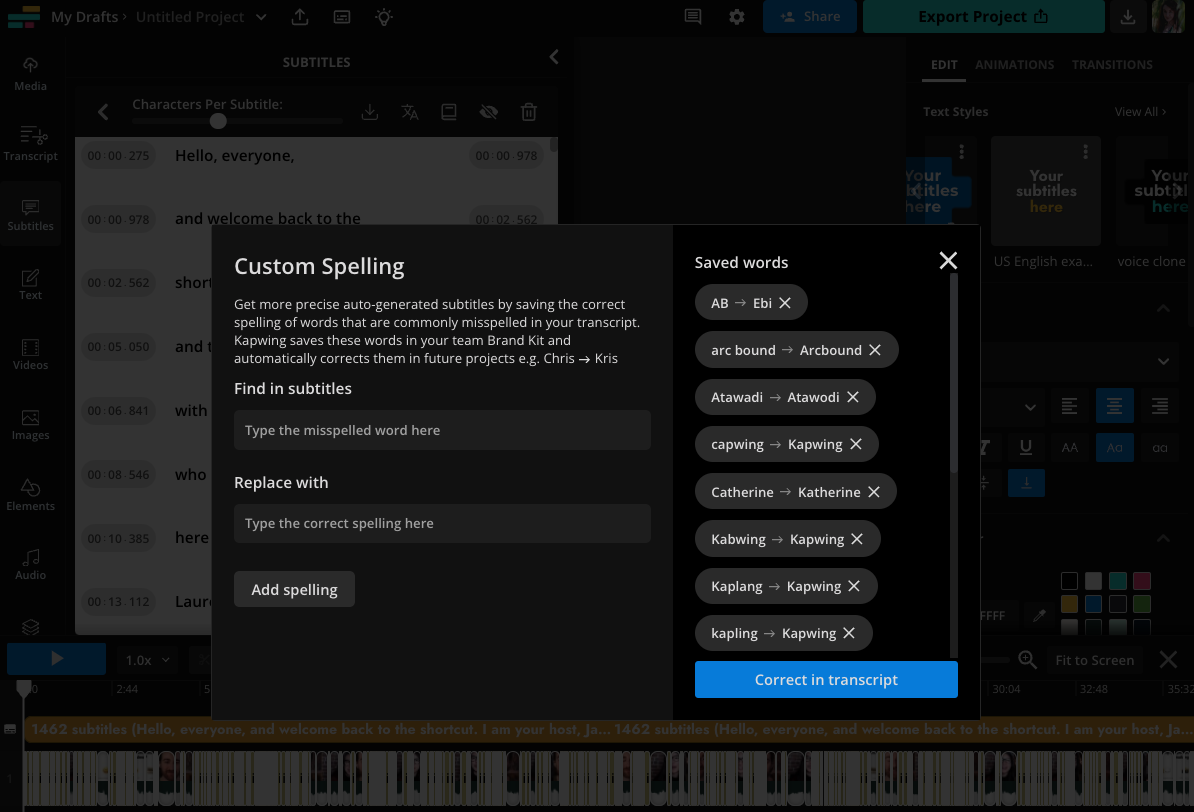
Once added, Kapwing will remember your preferred spelling for all future videos.
For videos with no voice over/talking:
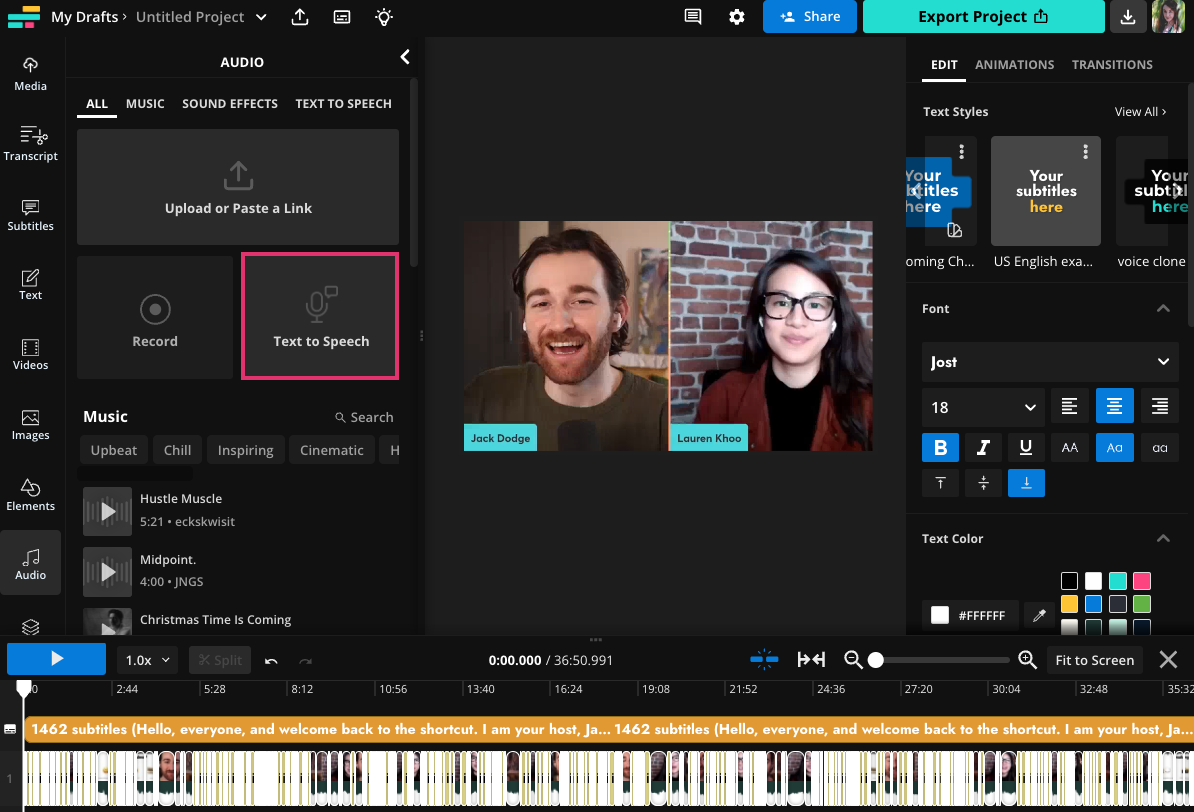
If your video doesn’t have any voiceover and you want to make it more engaging, you can generate a voiceover with Kapwing without having to record anything yourself.
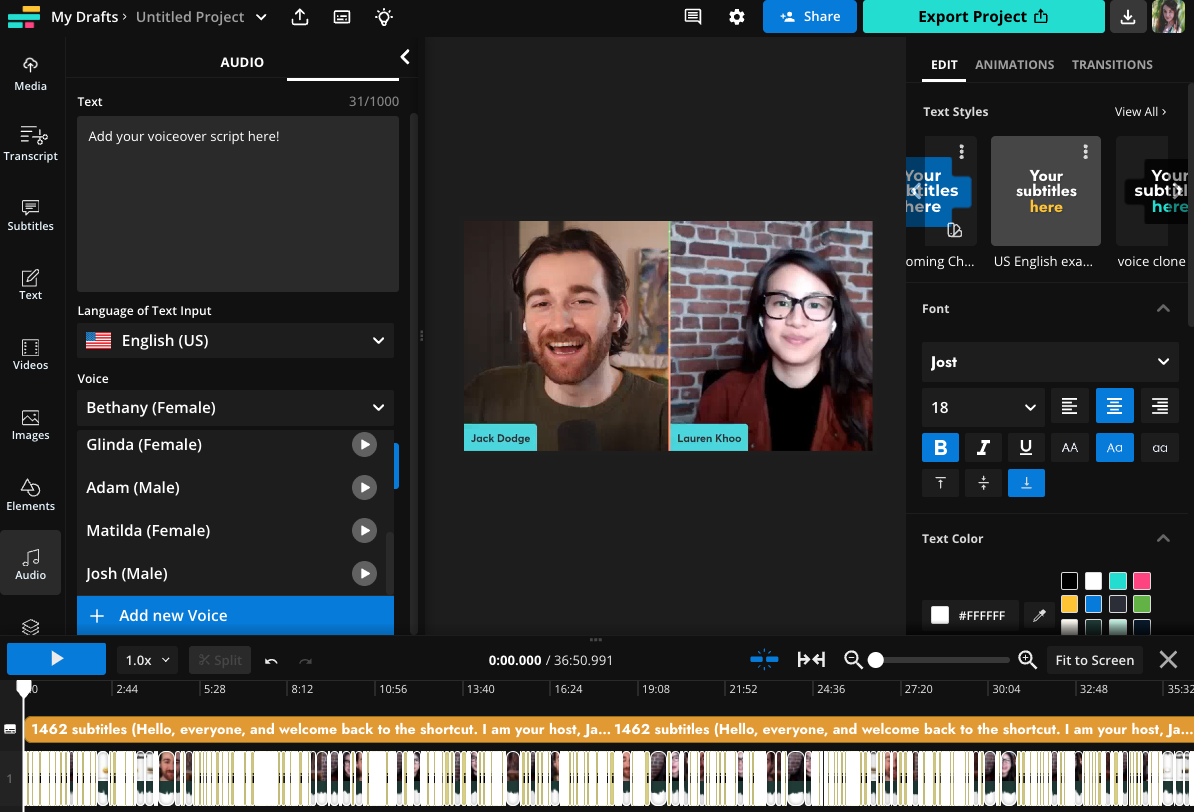
Click on “Audio” in the left-side tab menu then select “Text-to-Speech.”
From here, you can add what you want your voiceover to say and select the language and voice you want to say it in. There are over twenty languages to choose from with unique, realistic-sounding AI voices.
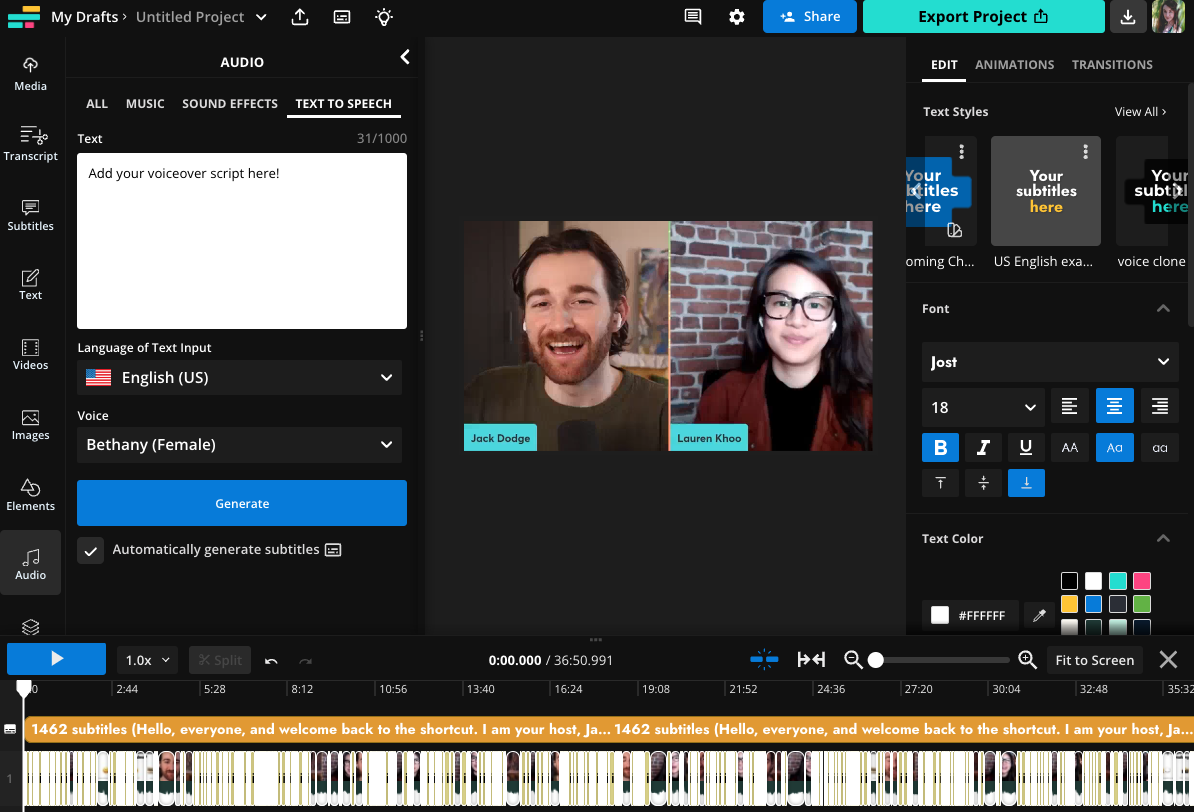
You can also create your own AI-generated voice with Kapwing’s voice cloning tool. Open the Voice drop-down menu and scroll down until you see “Add new Voice.” Upload a few samples of yourself speaking and Kapwing will generate a new AI voice that sounds like you.
Now you can create realistic sounding voice overs to your videos. Generating a voice over will automatically generate subtitles, too, which you can edit and customize as normal.
Step 3: Add transitions, overlays, and music/sound effects
Remember how we said most mistakes during filming can be fixed with editing? This is the part where the fixing happens. These edits also give your video that polished look and can even change the energy of the final cut by speeding up the pace, adding visual interest to keep viewers’ attention, and lending the momentum and energy of a soundtrack.
Adding transitions
Viewers expect jump cuts in most videos they watch online, so don’t worry about having “seamless” transitions. That said, we do recommend adding a few moving zoom effects. It will cover up any jump cuts that feel particularly jarring as well as shot continuity issues you want to cover up. Plus, a punchy zoom cut (when used sparingly) can add emphasis and energy to specific moments.
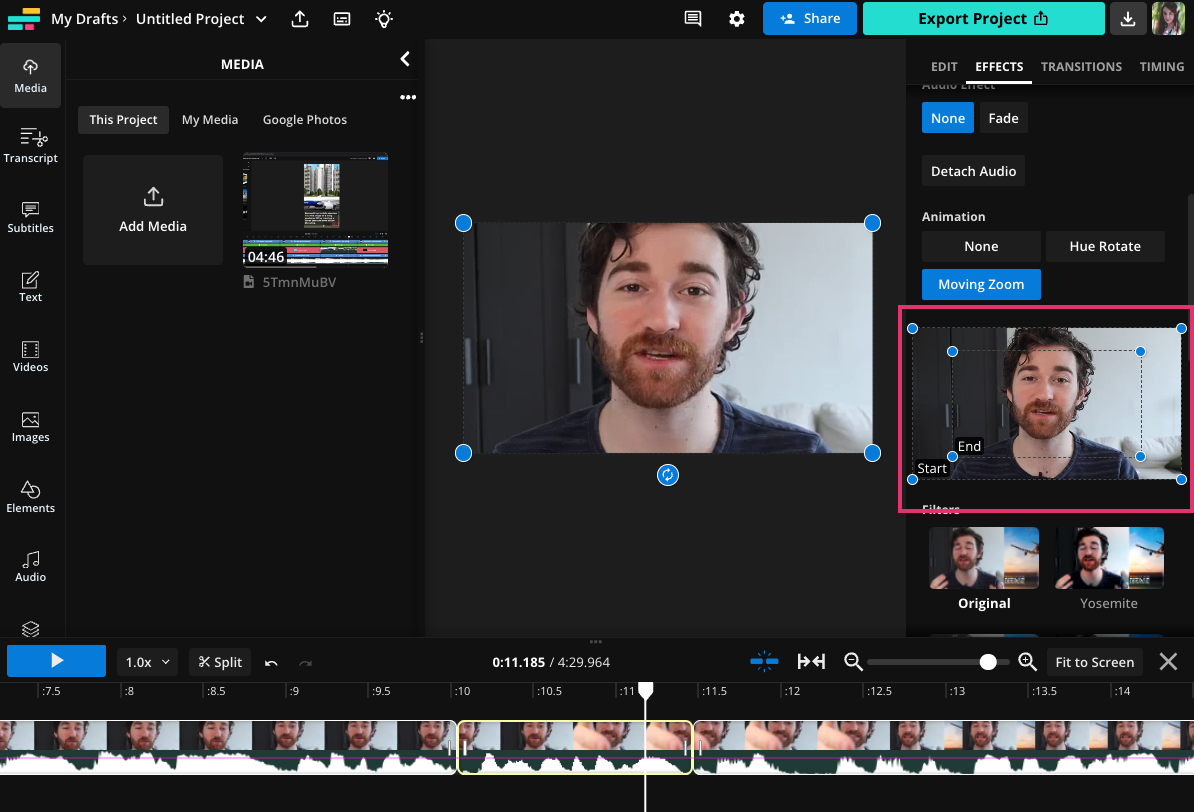
To add a Moving Zoom effect, select the clip you want to edit in the timeline. Then click on the right-side “Effects” menu and scroll down to “Animations.”
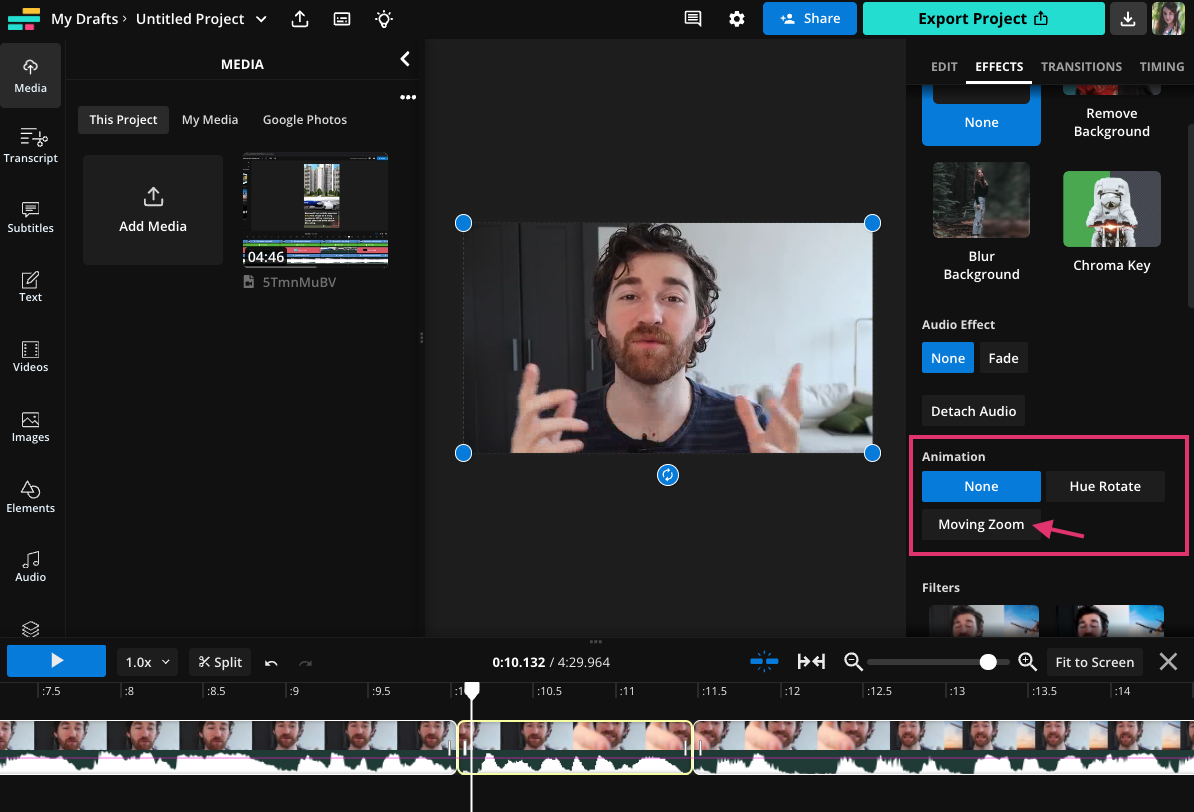
Select “Moving zoom” from the available options. You can control where the zoom starts and ends within the frame in the right-side menu. Drag the crop windows labeled “Start” and “End” to your preferred parameters.
Zoom-ins like these are great for adding emphasis if you’re saying something shocking or important. A long, slow zoom also works well for just adding some visual interest.
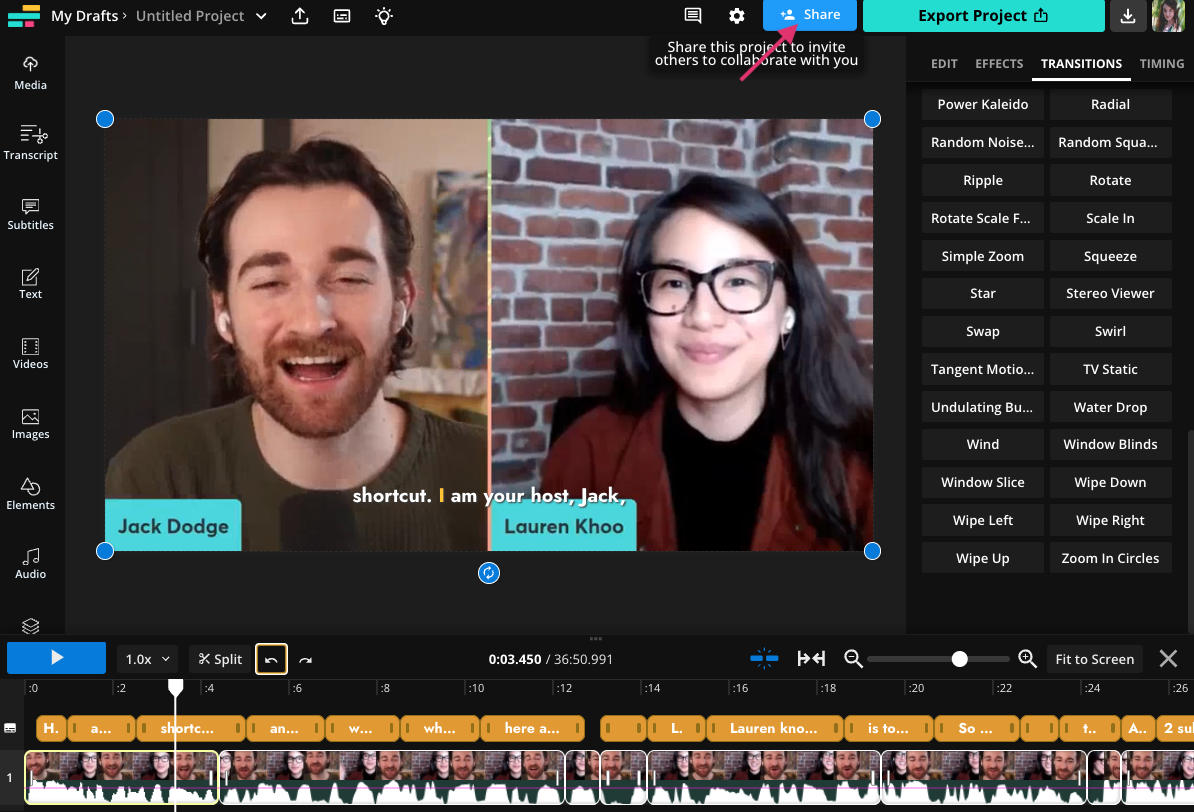
To add a traditional transition between two clips, select the first clip in the timeline, then click on the right-side “Transitions” menu. There are over 70 built-in transitions to choose from that will seamlessly blend one clip into the next for a more polished look.

Set the transition duration and select if you want the transition applied to the beginning or end of the clip—or both.
Adding overlays/b-roll
Another way to add visual interest and cover up jump cuts is by adding overlays and b-roll.
There are a few different types of overlays you can incorporate:
- Lower thirds. Lower thirds are ideal for short-form vertical video, taking up only the lower third of the screen and allowing you to share relevant diagrams, photos, etc. while still having the talking head portion of the video visible.
- Side-by-side. Side-by-side overlays are ideal for longer form horizontal video, allowing you to split the screen to show the graphic or photo on one side with the talking head on the other side.
- Full-frame. Full-frame works for both vertical and horizontal video and is ideal for sharing detailed images that need to be as large as possible for your audience to view.
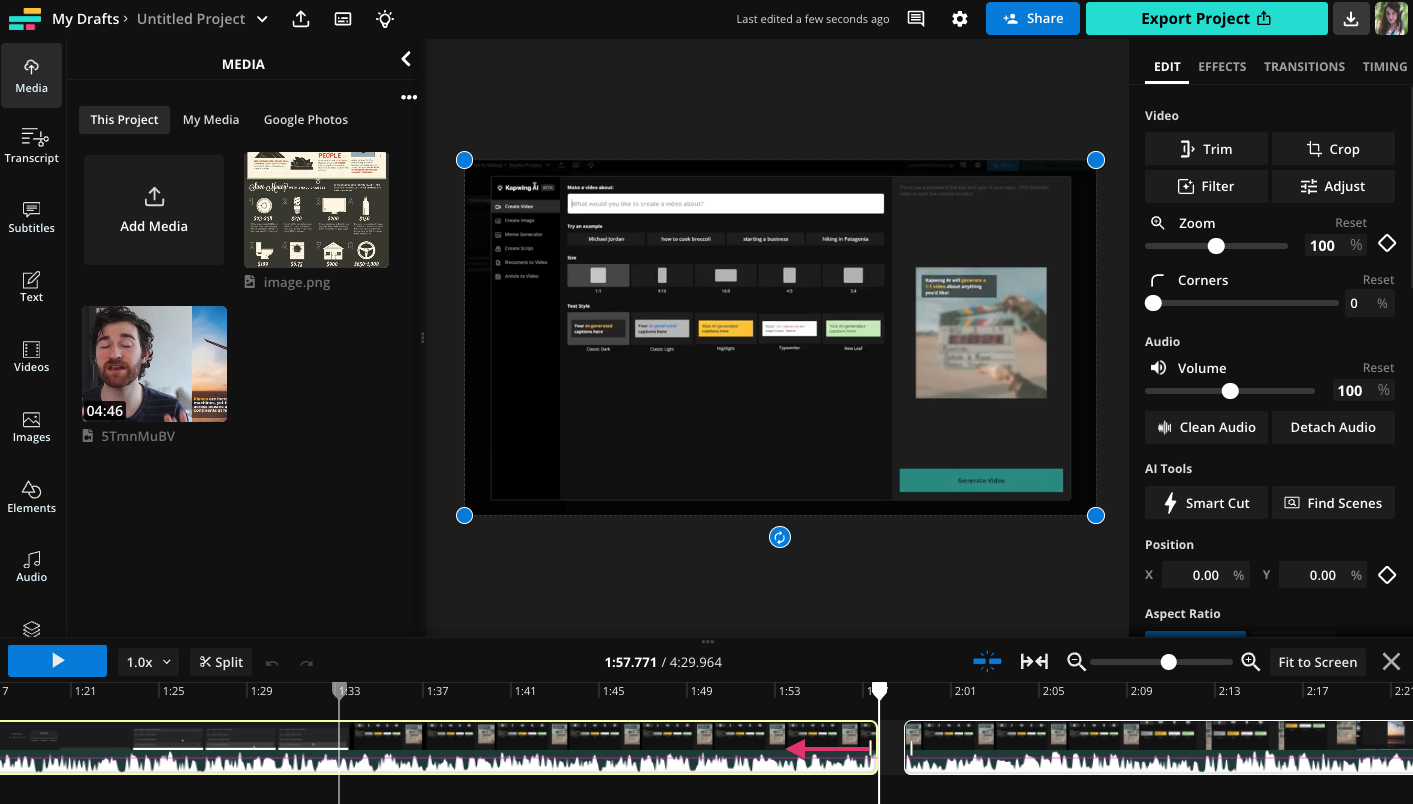
No matter which type you’re adding, the process is more or less the same. Upload your overlay image or video using the “Media” tab in the left-side menu.
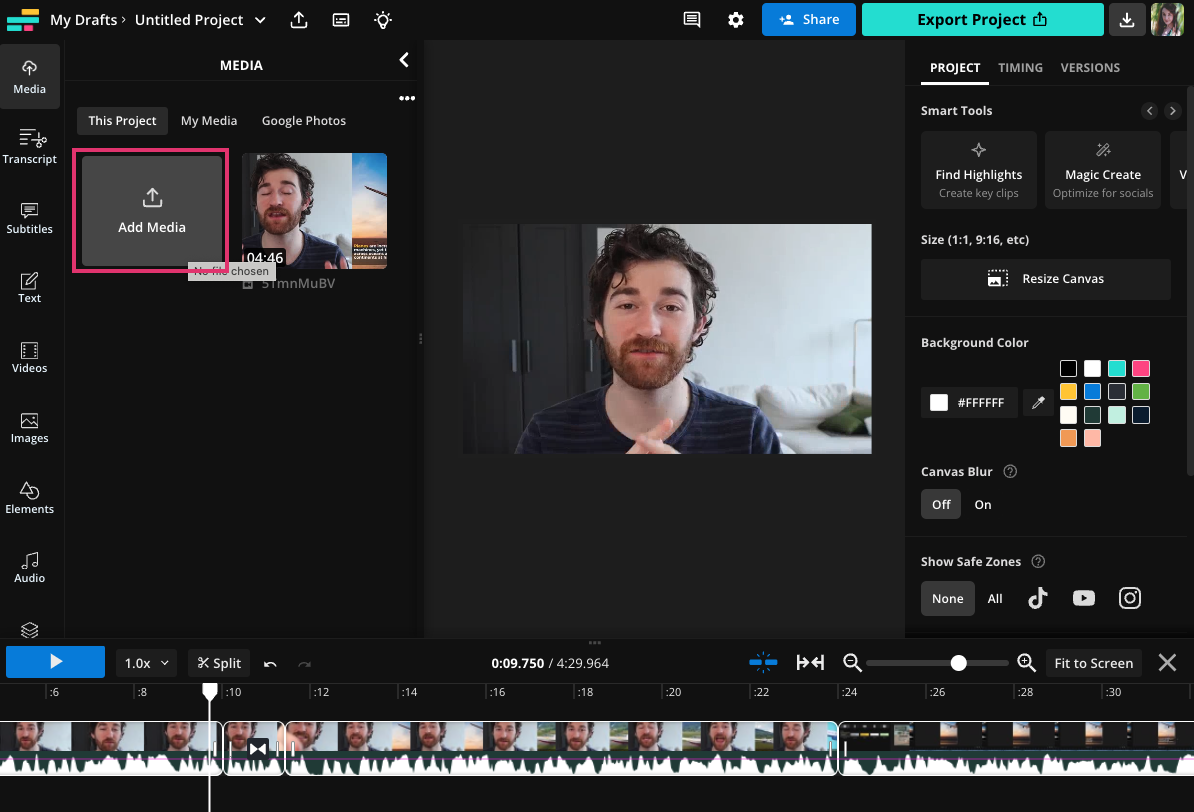
Move the playhead seeker in the timeline to the part of the video where you want to add the overlay, then click the plus button on the image in the “Media” tab to add it to your canvas.
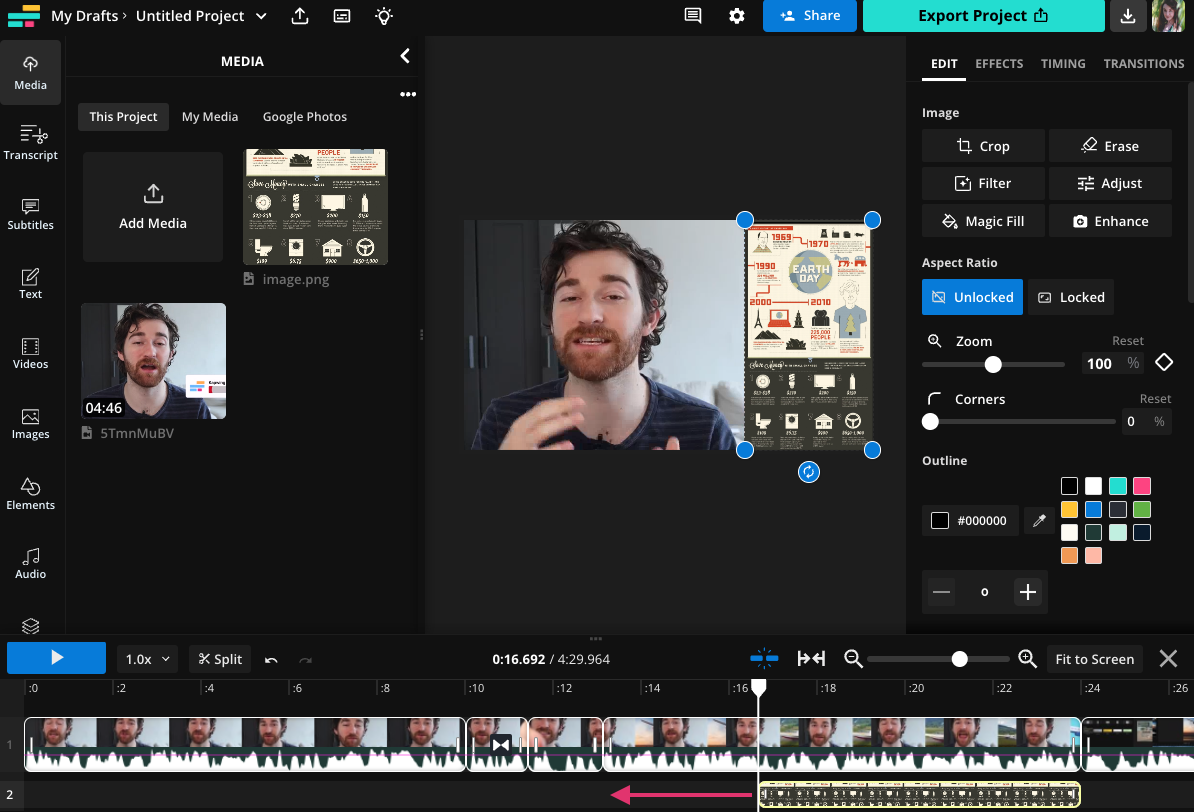
Crop, resize, and move the overlay image to where you want it, then drag that layer in the timeline until it’s the correct duration. You can see in this example that we’ve added a side-by-side overlay.
If you don’t have your own b-roll or overlays, you can search the stock footage library built into Kapwing in either the “Videos” or “Images” tabs.
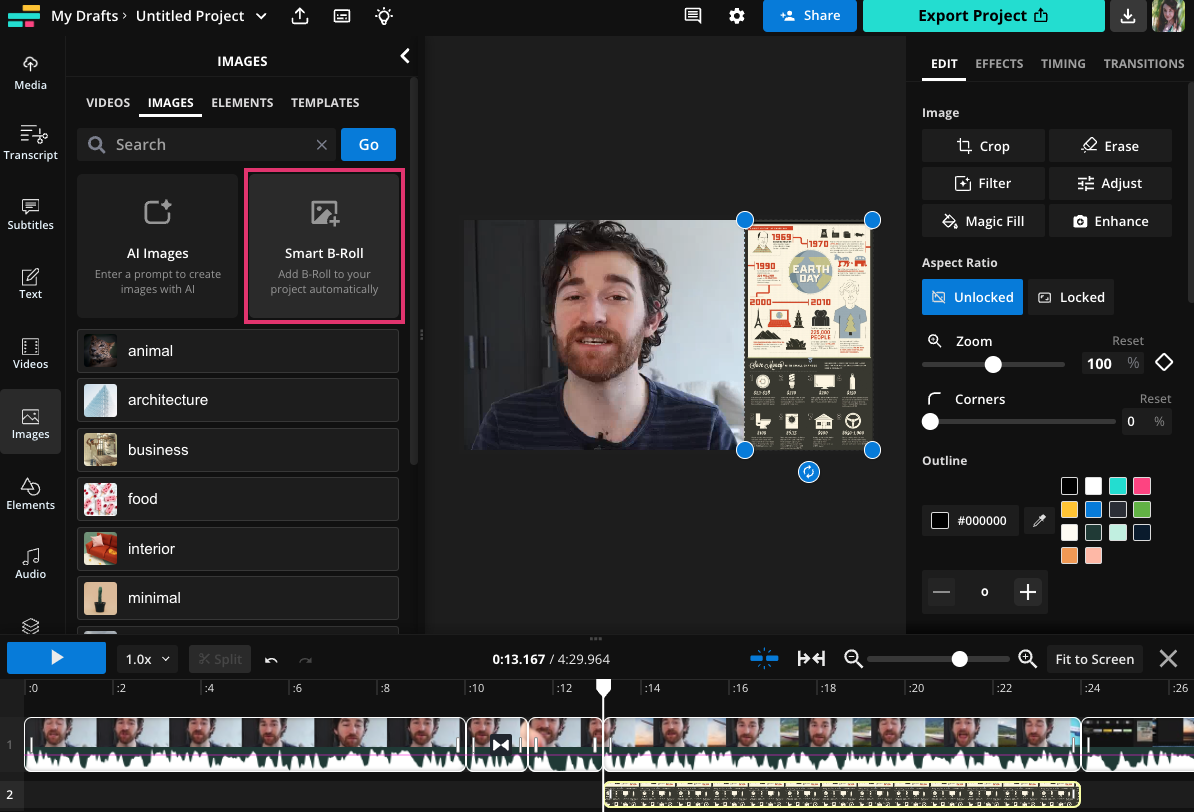
You can also add b-roll automatically with Smart B-Roll, which analyzes your video’s transcript then finds and adds b-roll to selected parts of the video.
Adding music/sound effects
For some extra polish, we recommend adding background music or some well-placed sound effects. If you have a track in mind (and the license to use it), upload it to the Media tab. You can also search Kapwing’s extensive built-in stock audio library.
Navigate to the “Audio” tab and select “Music” from the top menu. Enter a search term or browse by category, like “Upbeat,” “Chill,” or “Cinematic.”
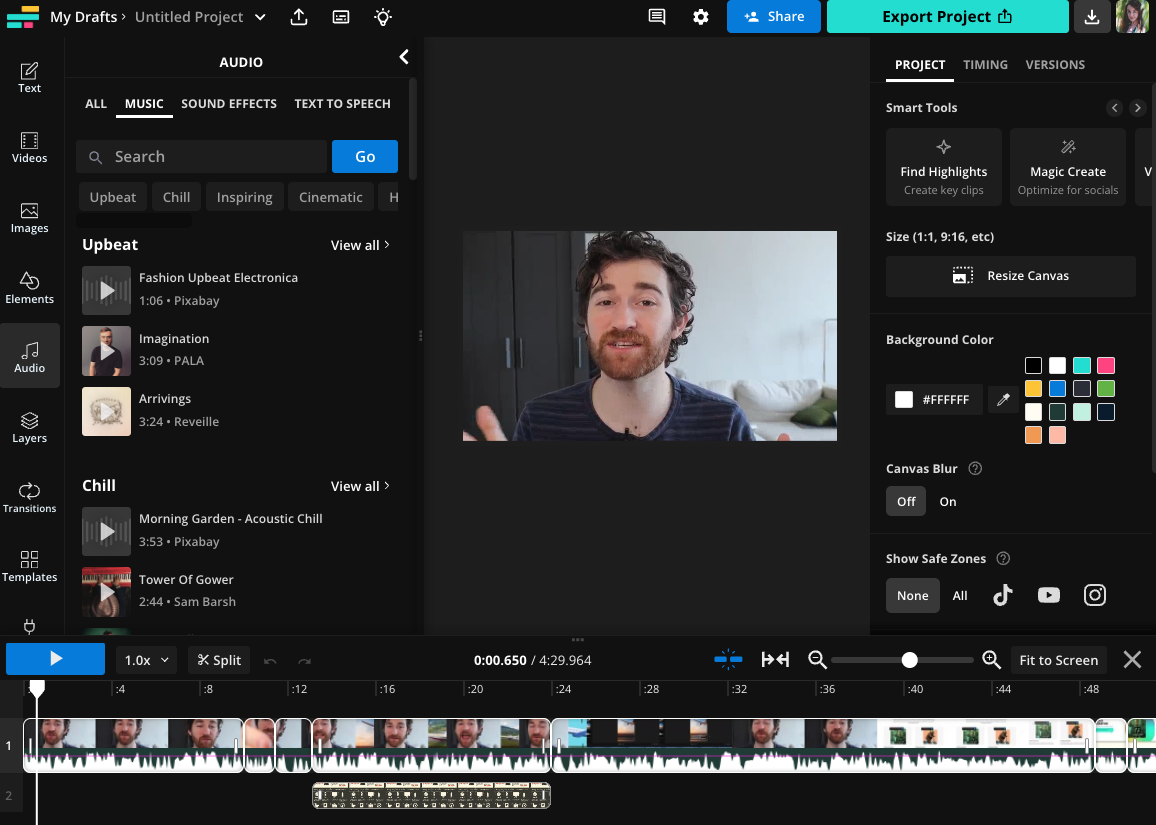
This can really change the tone of your video, so take your time and choose something that matches the energy you’re trying to create with this edit. When in doubt, listen to the tempo of the song. For example, a fast-paced song with a high BPM would work for an energy drink commercial, but probably not a video essay about the importance of solar power.
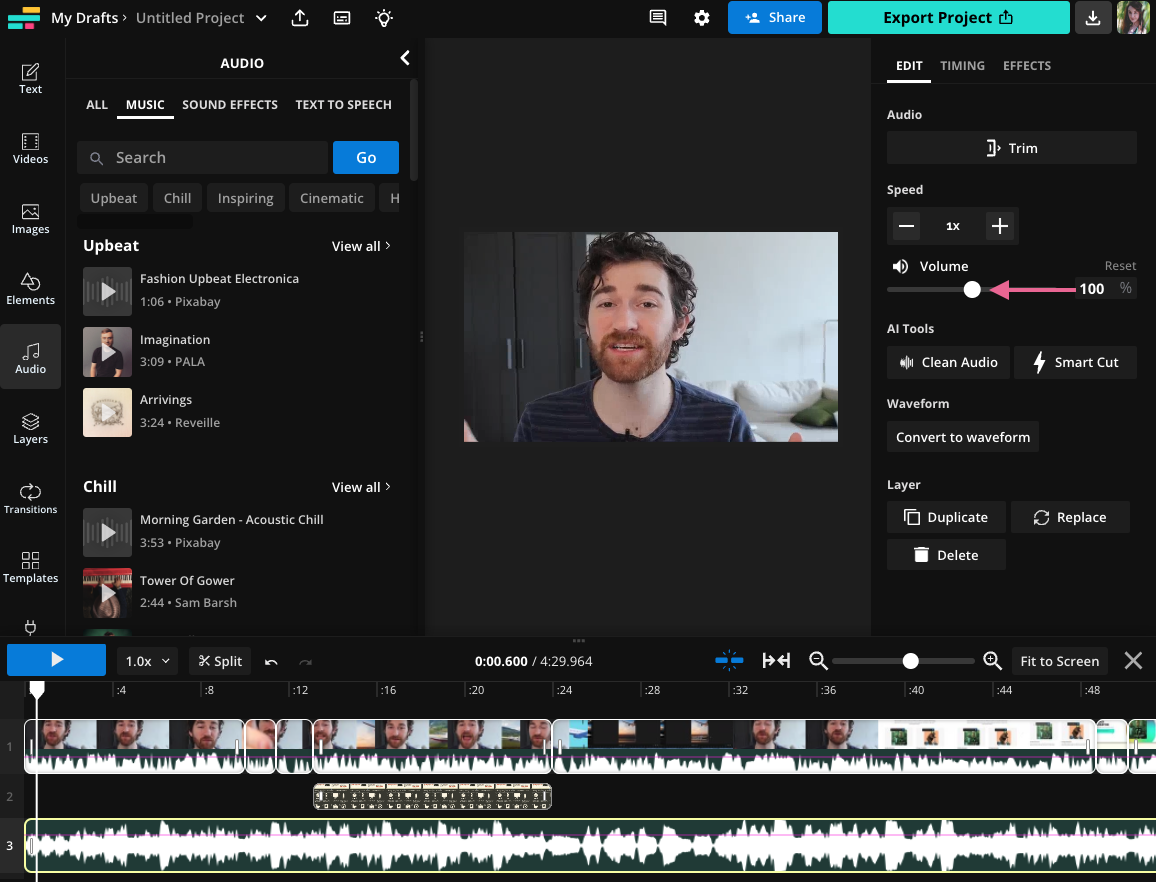
Since this is background music, you don’t want it distracting from the main audio of the video. Select the music track in the timeline, then adjust the volume.
You’ll find sound effects in the Audio tab as well. Used sparingly, these can add comic relief or punch up the drama. You can also use them more practically, for example to overlay the sound of typing on a keyboard over a screen recording of text appearing.
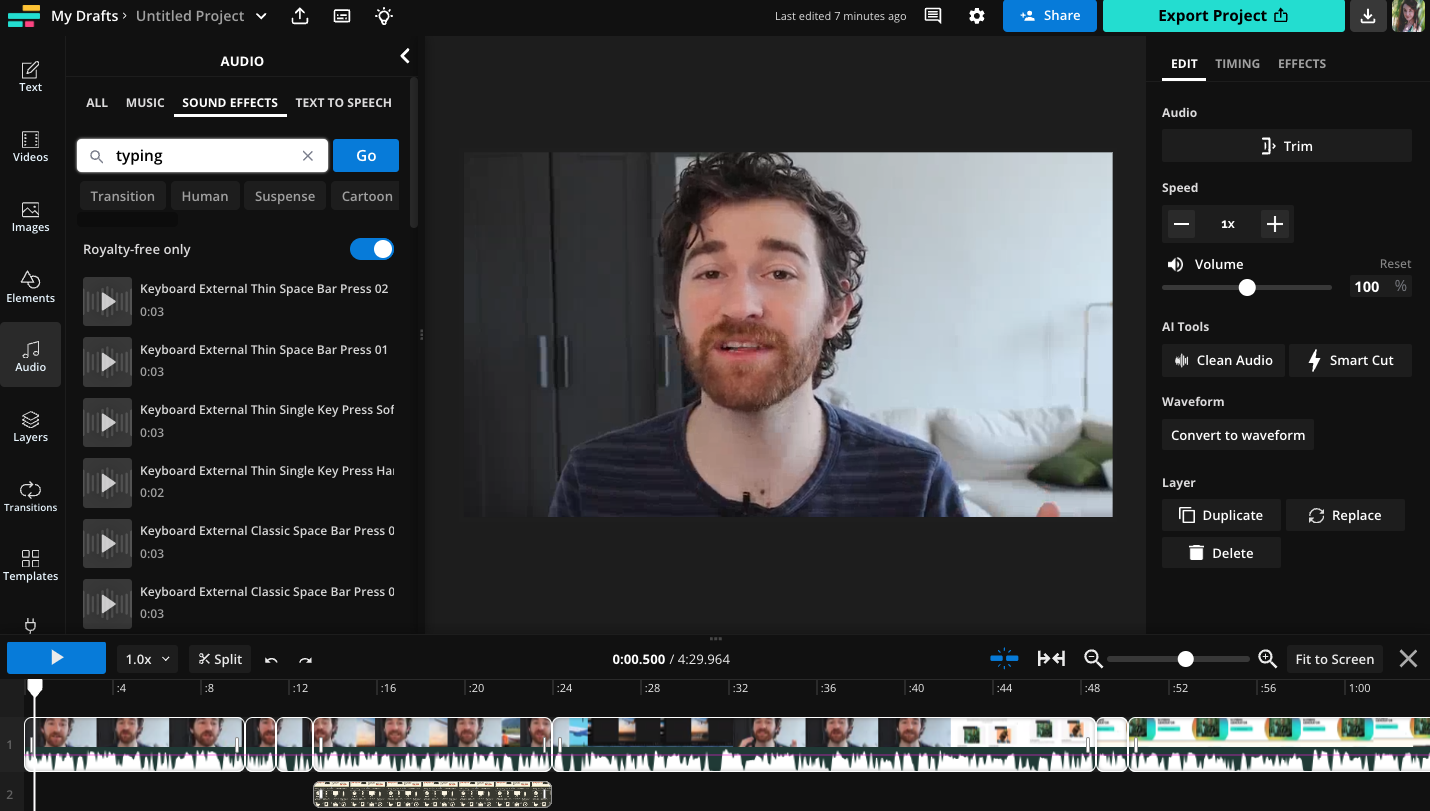
Simply type the sound you’re looking for into the search bar or browse the different categories. Being a Foley artist has never been so easy.
Step 4: Final review and edits
Before hitting export, there are always some final tweaks and adjustments to make.
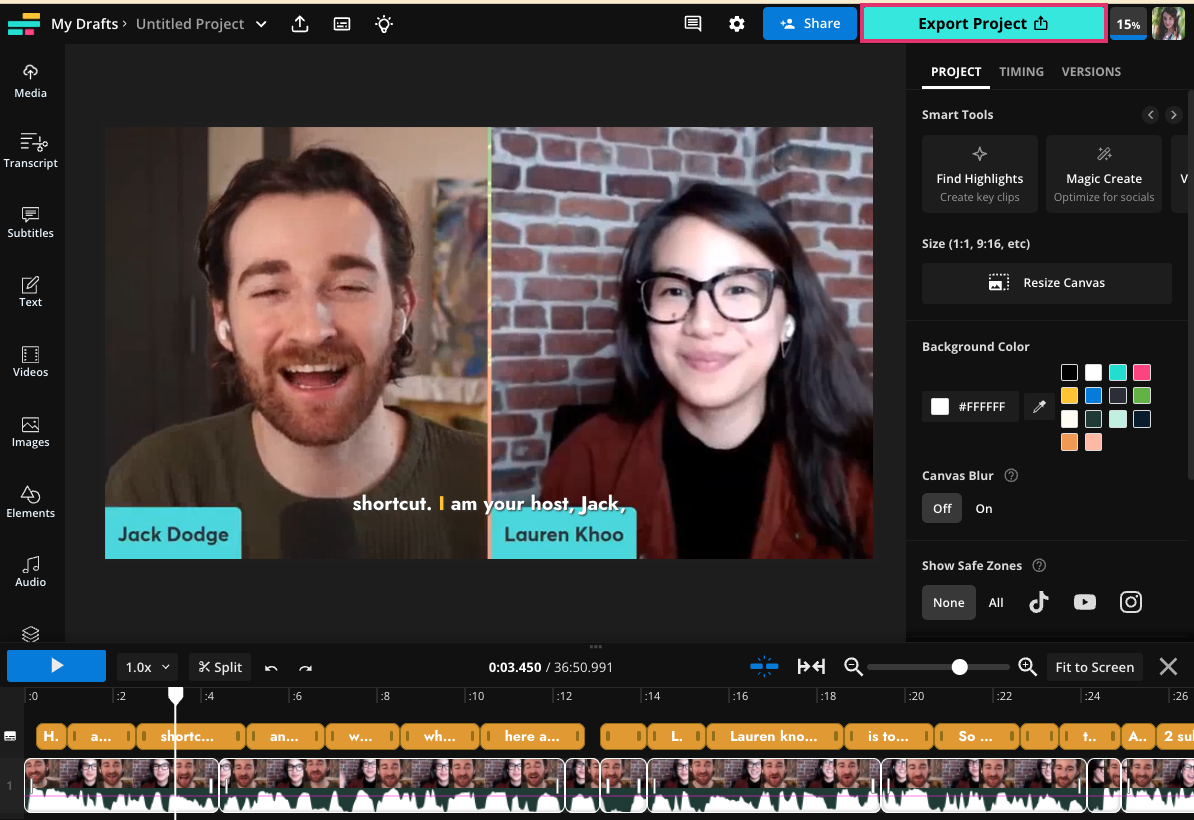
If you’re making short-form, vertical video, one last minute review we recommend is turning on the Safe Zones filter to make sure everything will be visible and legible once you publish on social media. You’ll find the Safe Zones filters in the right-side tools menu.

Select the channel you’ll be publishing on to see a transparent overlay on your video preview. This represents the user interface for Instagram Reels, TikTok, or YouTube Shorts. As you can see in this example, the subtitles here are covered up by what will be the Reels caption, meaning viewers wouldn’t be able to read them.

You can edit as usual while Safe Zones is turned on, so we just moved the subtitles up a little bit. Problem solved. 🎬
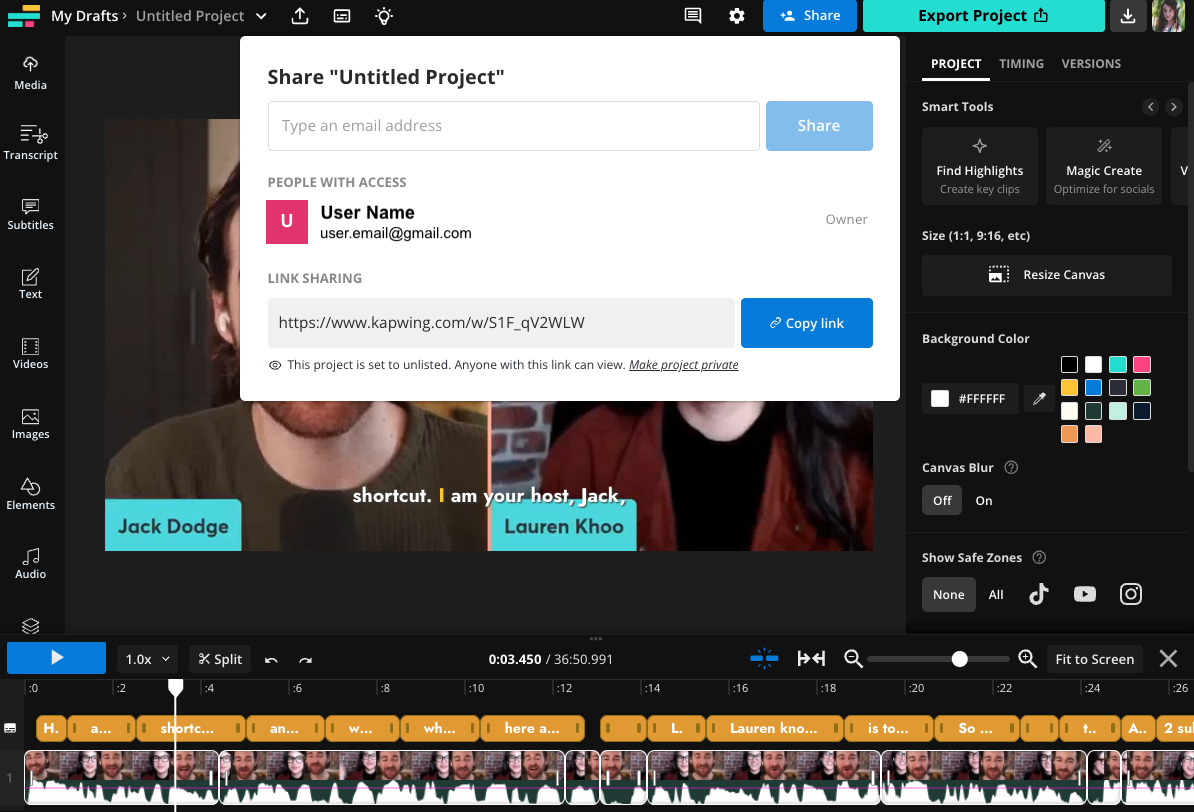
Another step in creating publish-worthy video content is getting feedback from teammates and stakeholders at your company. Click the “Share project” button at the top of the editor.
From here, you can copy a link to share or share directly to your collaborator’s email address. People with shared access to the project can make edits or leave timestamped comments with suggestions, feedback, and requests.
Finally, you’re ready to save your finished project. Hit the export button and then download to your device. You’ll also be able to see the export history of past versions you’ve saved.
How to repurpose an existing video
Repurposing content is a great way to get more value out of each asset. The most common way to repurpose video is by taking long-form video and turning it into short-form content for social media.
Of course, you can do this manually—scrubbing through the video or searching the transcript for moments that would make good social clips. We recommend using a clip-finder to speed up the process, though.
For this tutorial, we’ll show you how to use Kapwing’s Repurpose Studio to automatically create social-ready clips from your existing videos.
Step 1: Upload your existing video
In your Kapwing workspace, select the “Repurpose video” button to open the repurposing workflow. This will open the auto clip maker, also known as Repurpose Studio.

Upload your video from your device or paste a link to the video, if it’s already published somewhere online.
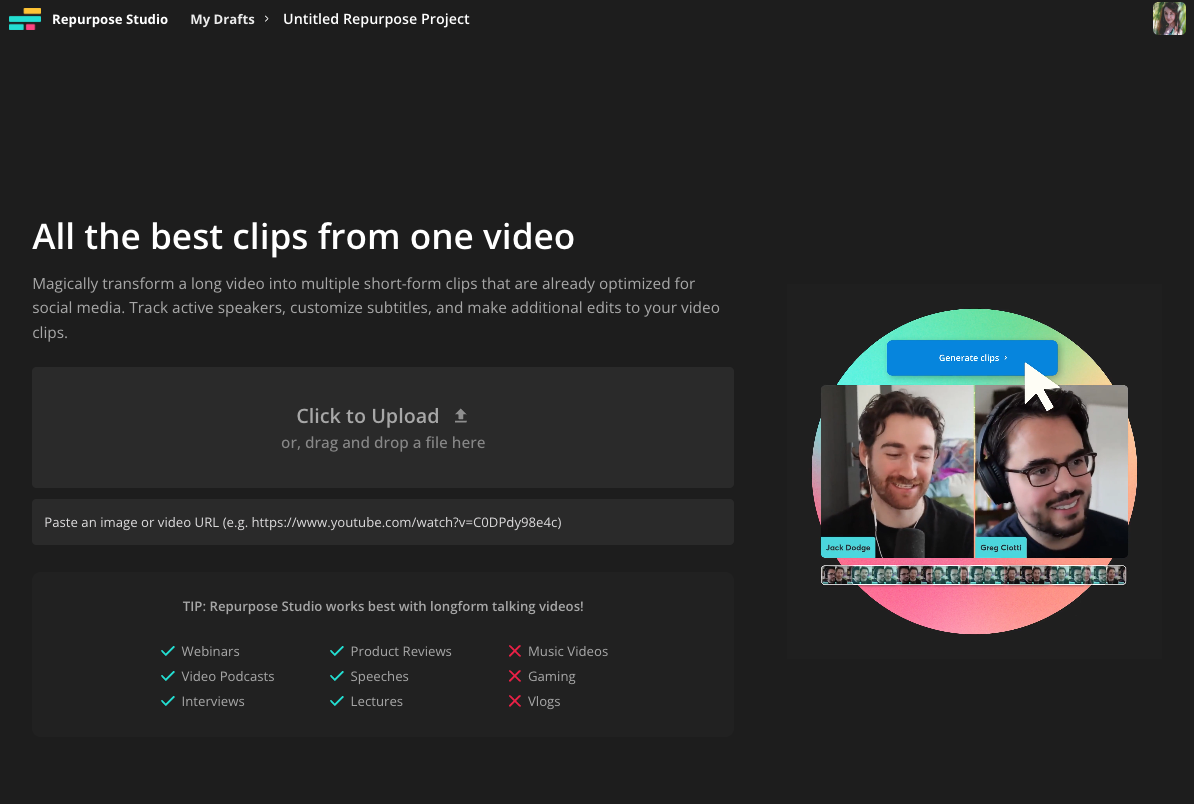
Once your video has been uploaded, hit “Generate Clips.”
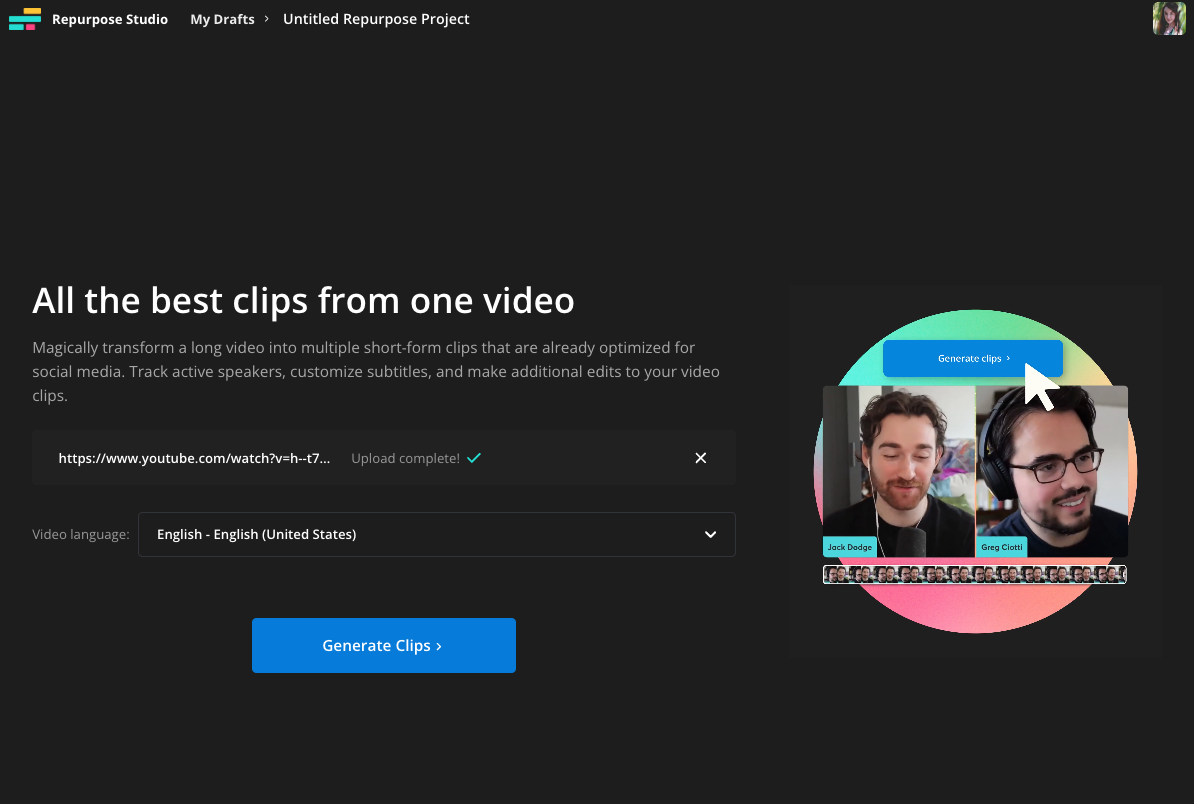
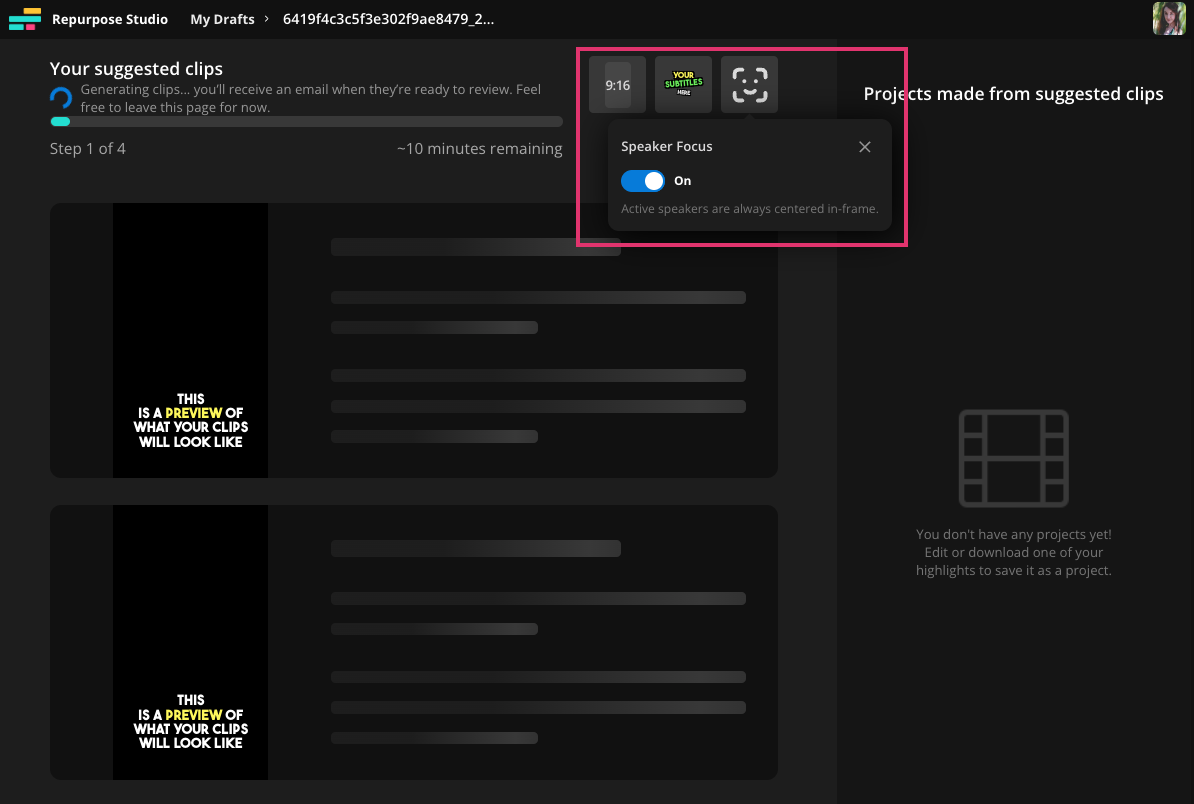
Depending on the length of your video, it could take up to 10 minutes for Kapwing to analyze the transcript and choose and format the best clips. You’ll receive an email when they’re ready for review.
While you’re waiting, you can select the size and subtitle style of your video clips. You can also toggle Speaker Focus, which keeps the speaker in frame for the whole clip, on or off.
Step 2: Choose from the suggested, social-ready clips
Once your clips are ready, you’ll see the previews as well as the transcripts for them right there in Repurpose Studio.
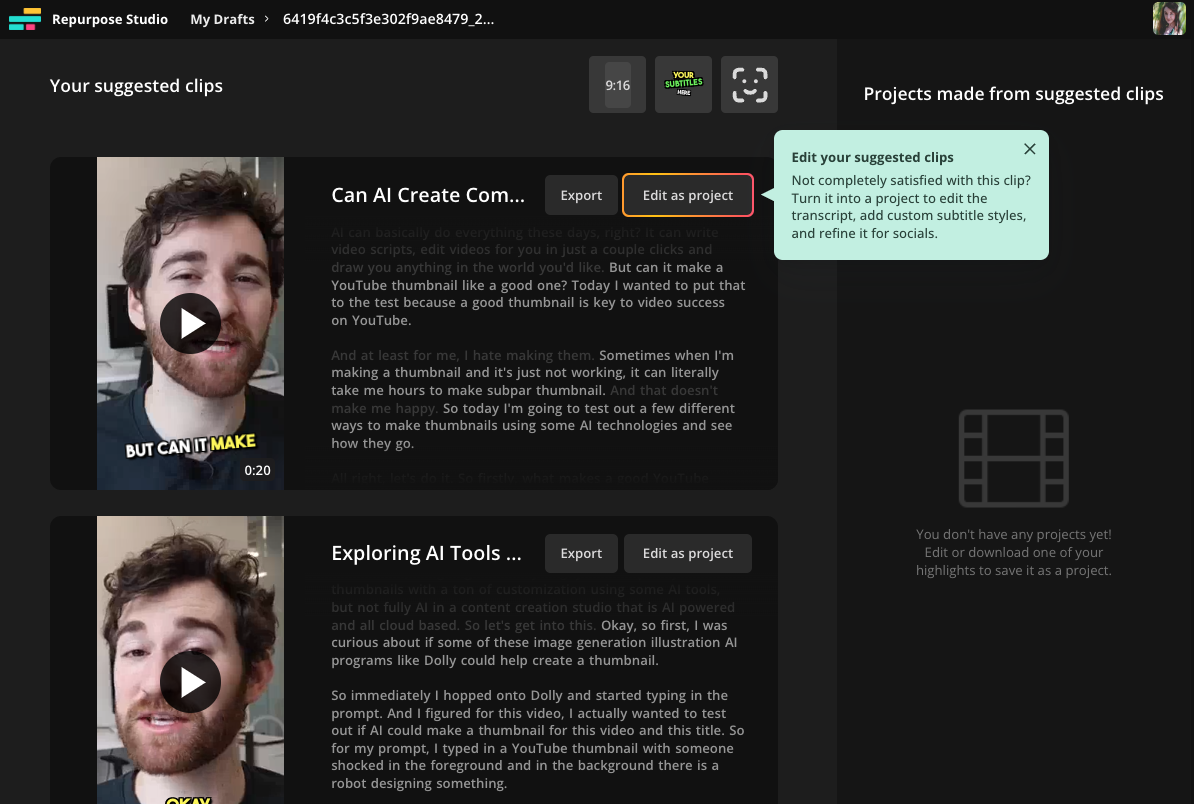
You can choose to export as is or open the clip as a new project and edit it further.
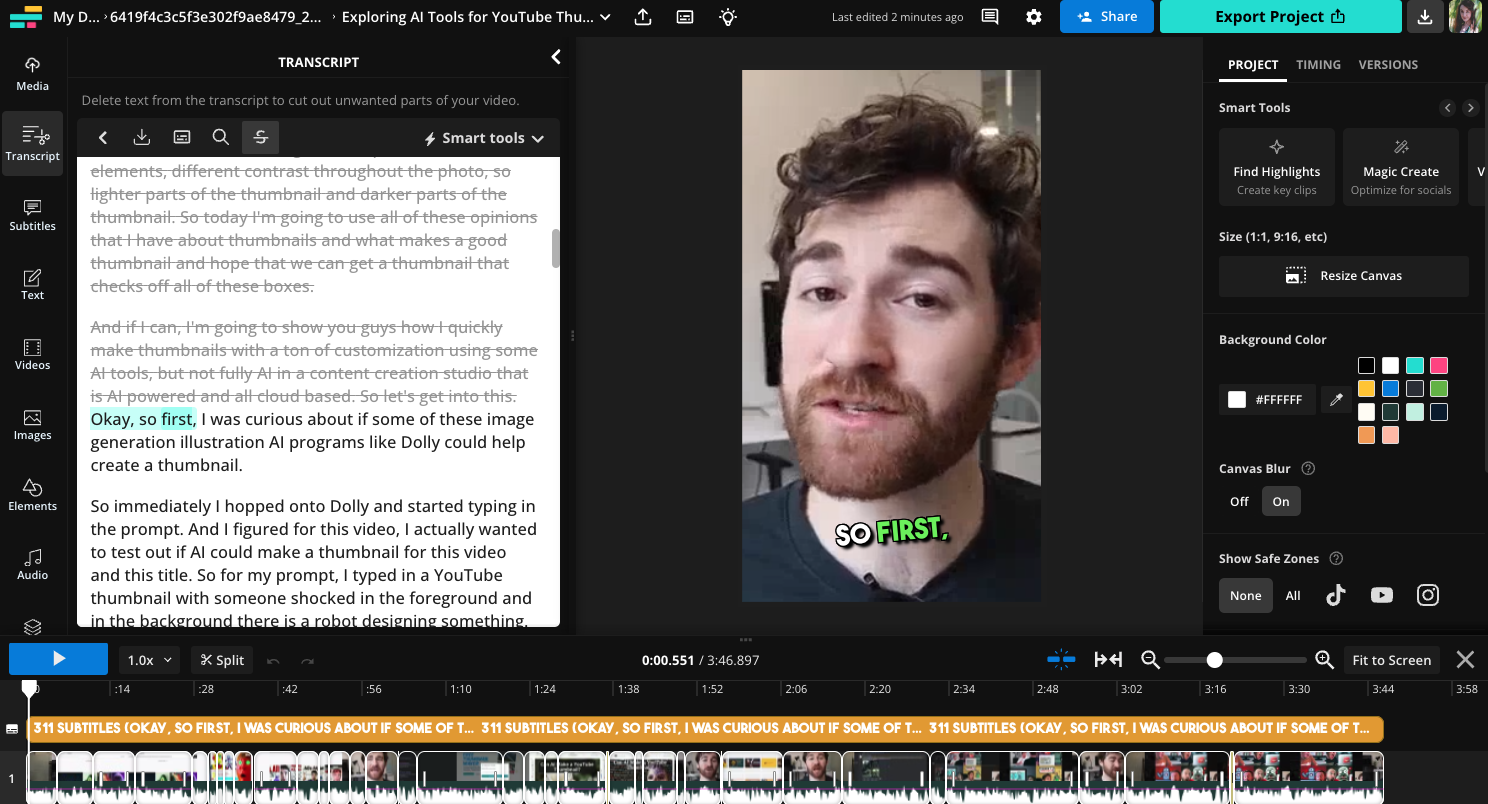
Step 3: Edit your chosen suggested clip
This step is optional! If you choose to edit a suggested clip, Kapwing will open a new project in a new tab in your browser. Here, you can edit the entire clip as if it were a video you created from scratch in Kapwing.
In this example, we’ve opened the transcript editor. The section Repurpose Studio chose to create a clip works for the most part, but we can clip this first phrase out to make the intro flow better as a standalone piece.
You can also customize the font and style of your subtitles, add overlays, and use Safe Zones filters to double check everything looks perfect before you export.
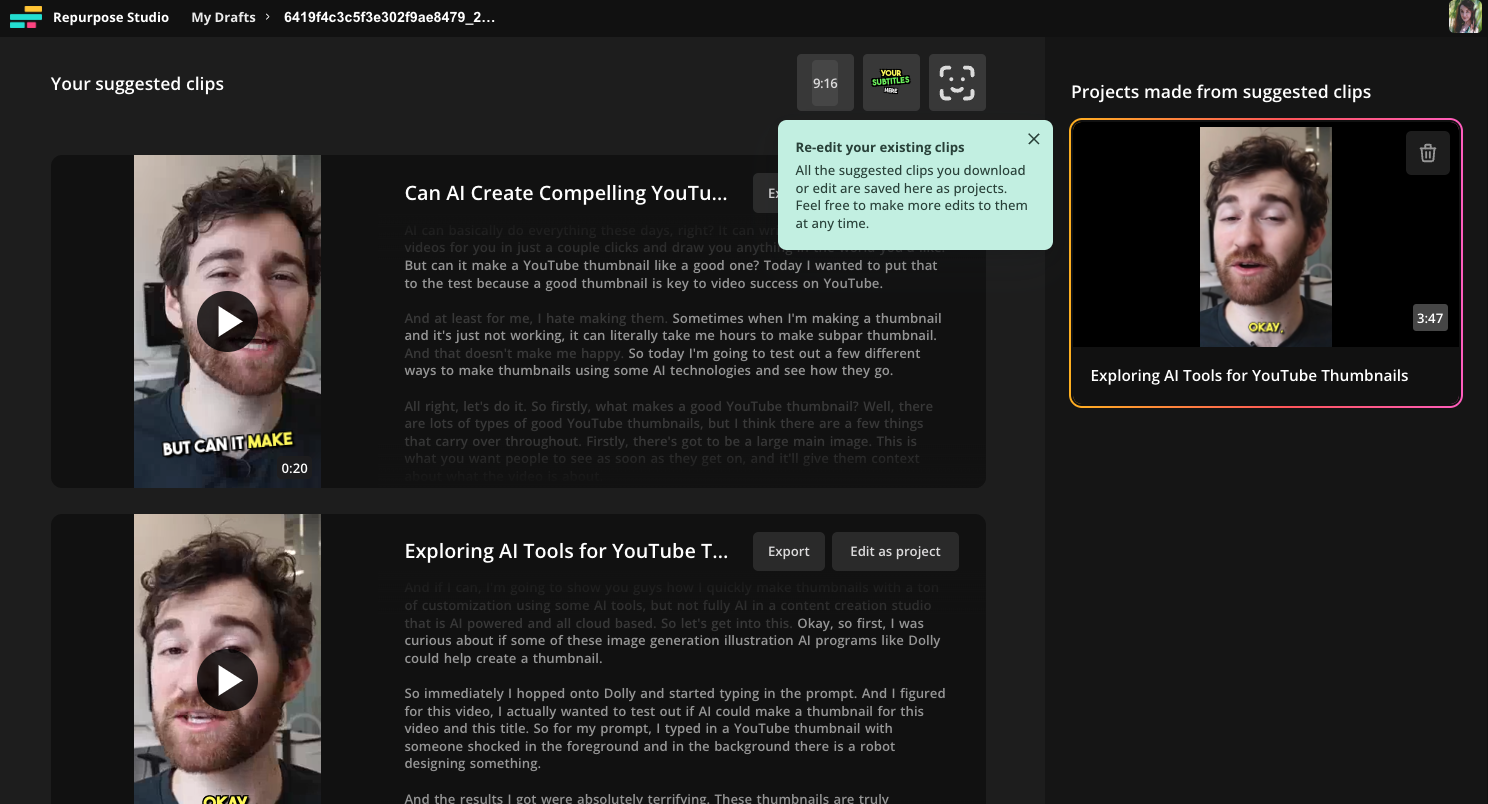
If you reopen your Repurpose Studio project, you’ll see that any projects you’ve created from the suggested clips will be saved in the right side panel so you can easily access and re-edit them all from one place.
And that’s it. It only takes a few minutes to turn an existing, long-form video into multiple, social-ready clips.
Final tips for efficiently editing a video online
As with most things, practice makes perfect, so you’ll get faster and better at editing video the more you do it, however there are a few tips to help you speed up the process from jump.
1. Use keyboard shortcuts for quick edits
Knowing the keyboard shortcuts for the editing software you’re using will speed your editing process up exponentially, especially for actions you repeat multiple times in a single edit, like clipping and trimming. Here are a few of the most useful shortcuts for editing in Kapwing, similar to shortcuts you might already be familiar with:
- Cut: ⌘ + x (Mac) | ctrl + x (Windows)
- Copy: ⌘ + c (Mac) | ctrl + c (Windows)
- Paste: ⌘ + v (Mac) | ctrl + v (Windows)
- Delete: delete (Mac) | delete (Windows)
- Ripple delete*: ⌘ + delete (Mac) | ctrl + delete (Windows)
- Split: s (Mac) | s (Windows)
You can find more advanced keyboard shortcuts in our Help Center.
*Ripple delete is an editing shortcut that deletes the selected section(s) and shifts everything after the selection left on the timeline. This means you don’t have to drag anything around after you make an edit, saving you time and keeping your project’s timeline in order.
2. Use templates or create your own for your team
Templates are great for jumpstarting your project. In Kapwing, you can use Magic Create to apply any of the custom preset templates to your project. You can also create your own templates as part of your Brand Kit, applying brand colors and fonts, adding frequently used assets and logos, and saving preferred aspect ratios and sizes.
3. Use version history to revert a project to a previous version
Whether you made a mistake or just decided to take the video in a different direction, there’s no need to start over from scratch. Use your project’s version to go back to any of the previous versions that you manually saved or that were auto-saved by Kapwing.
4. Focus on the content of the video first and foremost
We always recommend that creators focus on creating great content. If you do that, the quality of the video can be just good. Don’t sweat the small details. Instead, make sure you keep the goal of your video in mind while filming and editing. This will help you make the right decisions about pacing, energy, tone, and style. Your editing should never obfuscate the message you’re trying to convey.
With these editing techniques and workflows in your toolbox, you’re well on your way to creating great video content. Make sure to bookmark or save this article to come back to the next time you need to edit or repurpose a video. In the meantime, check out our Resources Library for more helpful articles or visit our YouTube channel to learn more about editing with Kapwing.
Create content faster with Kapwing's online video editor →