How to Add Subtitles to Any YouTube Video with These 4 Methods
Learn how to add subtitles to any YouTube video by using these four quick, accurate methods.
Adding subtitles to your YouTube videos is an important step of the video content creation that you shouldn’t overlook.
Both subtitles and closed captions are important for making your YouTube videos more accessible. The deaf and hard of hearing community relies on them to be able to enjoy video content more. There’s also the fact that 75% of people watch mobile video on mute and 80% of viewers are more likely to finish a video with subtitles. Many people who can hear prefer to keep them on—even if they’re watching with sound on.
Right up top, we should note that subtitles and closed captions are similar, but different. Captions include all spoken dialogue as well as descriptions of background noises and music for those who can’t hear them. Subtitles, on the other hand, typically only contain spoken dialogue. Both subtitles and captions can be “open” (embedded into the video) or “closed” (toggled on or off at the viewer’s preference).
In either case, it’s important to offer one or both of these options so that everyone can access your YouTube videos in the way that’s best for them.
How to Add Subtitles to YouTube Videos
In this guide, we’ll go over four different methods to add subtitles or closed captions to your YouTube videos, whether in YouTube Studio, with text or subtitle files, or with a video editing tool like Kapwing.
Let’s get started.
1. Embed the captions in your YouTube video
The most foolproof way to add subtitles to YouTube videos is to bake them right into the video itself. Using this method, your captions will appear on your video without viewers having to open the videturn them on themselves. This is also known as "open captions." Somewhat counterintuitive to their title, open captions are permanently embedded into the video and cannot be turned off by viewers.
This is an especially good idea for YouTube Shorts as we know so many people prefer to watch mobile videos on mute. Plus, having captions on screen has been shown to improve retention as the moving text can help catch and hold viewers’ attention before they scroll.
This method can be achieved in any video editor by adding text overlay timed with your video's audio, but manually adding subtitles is tedious, time-consuming, and completely unnecessary. Instead, we recommend using Kapwing to automatically add subtitles to a video.
Here’s how to do that in just four steps:
Step 1: Upload your video files to Kapwing.
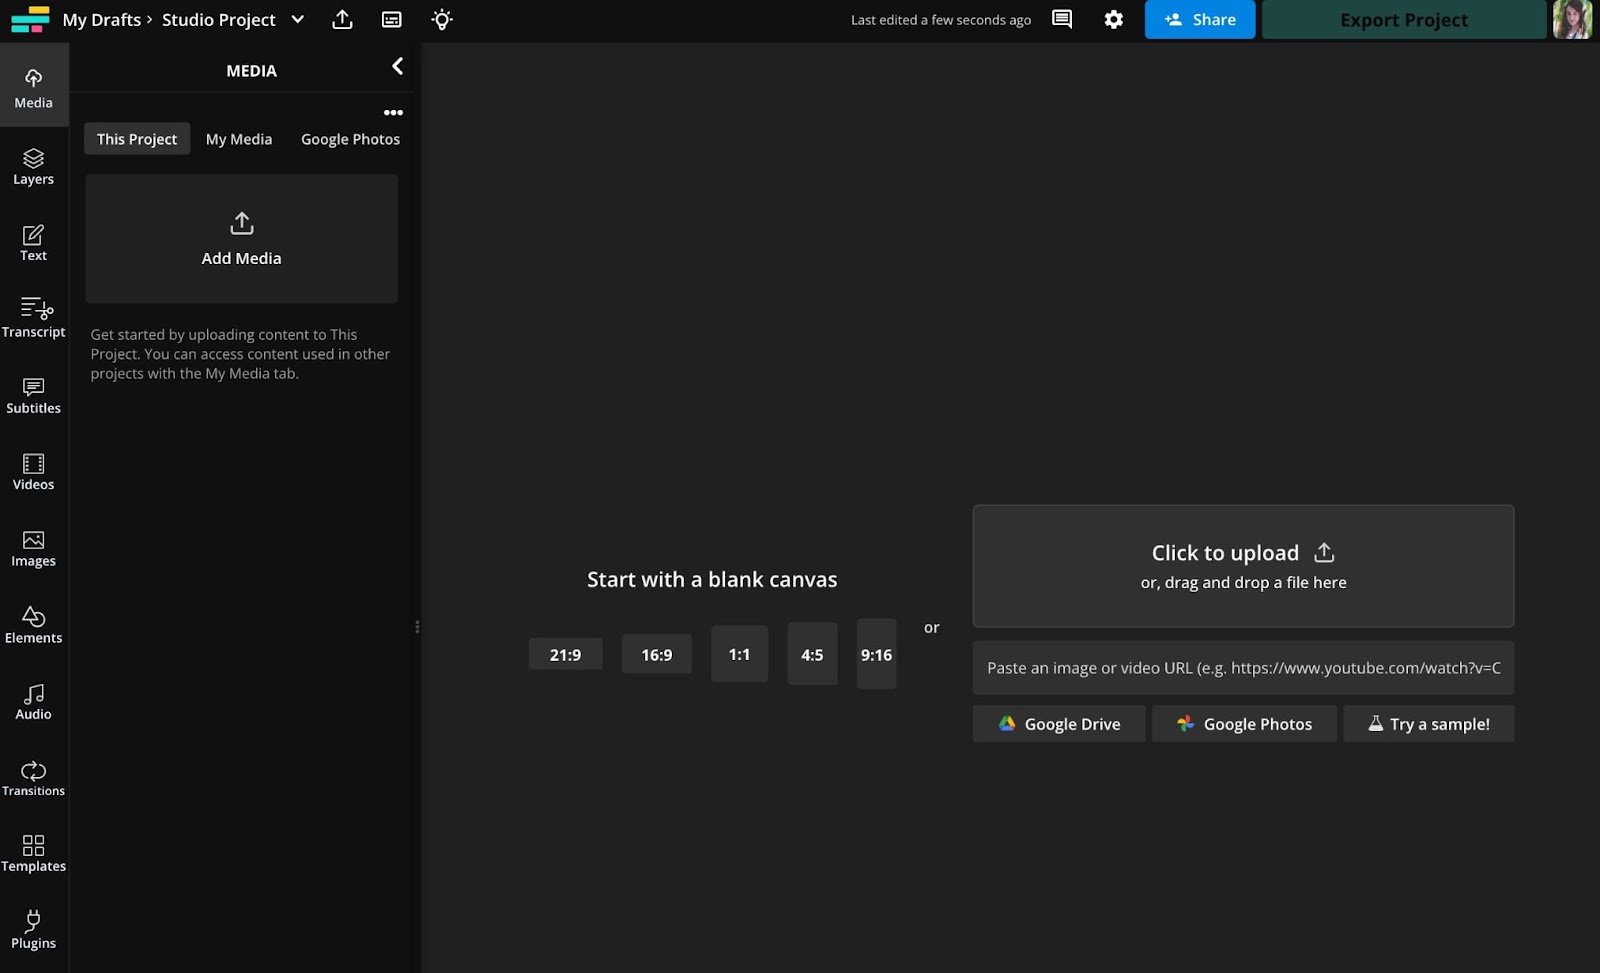
Kapwing is a full studio editor, so you can use it to rough cut and edit your videos as well, not just add subtitles.
Step 2: Use Kapwing’s Magic Subtitles.
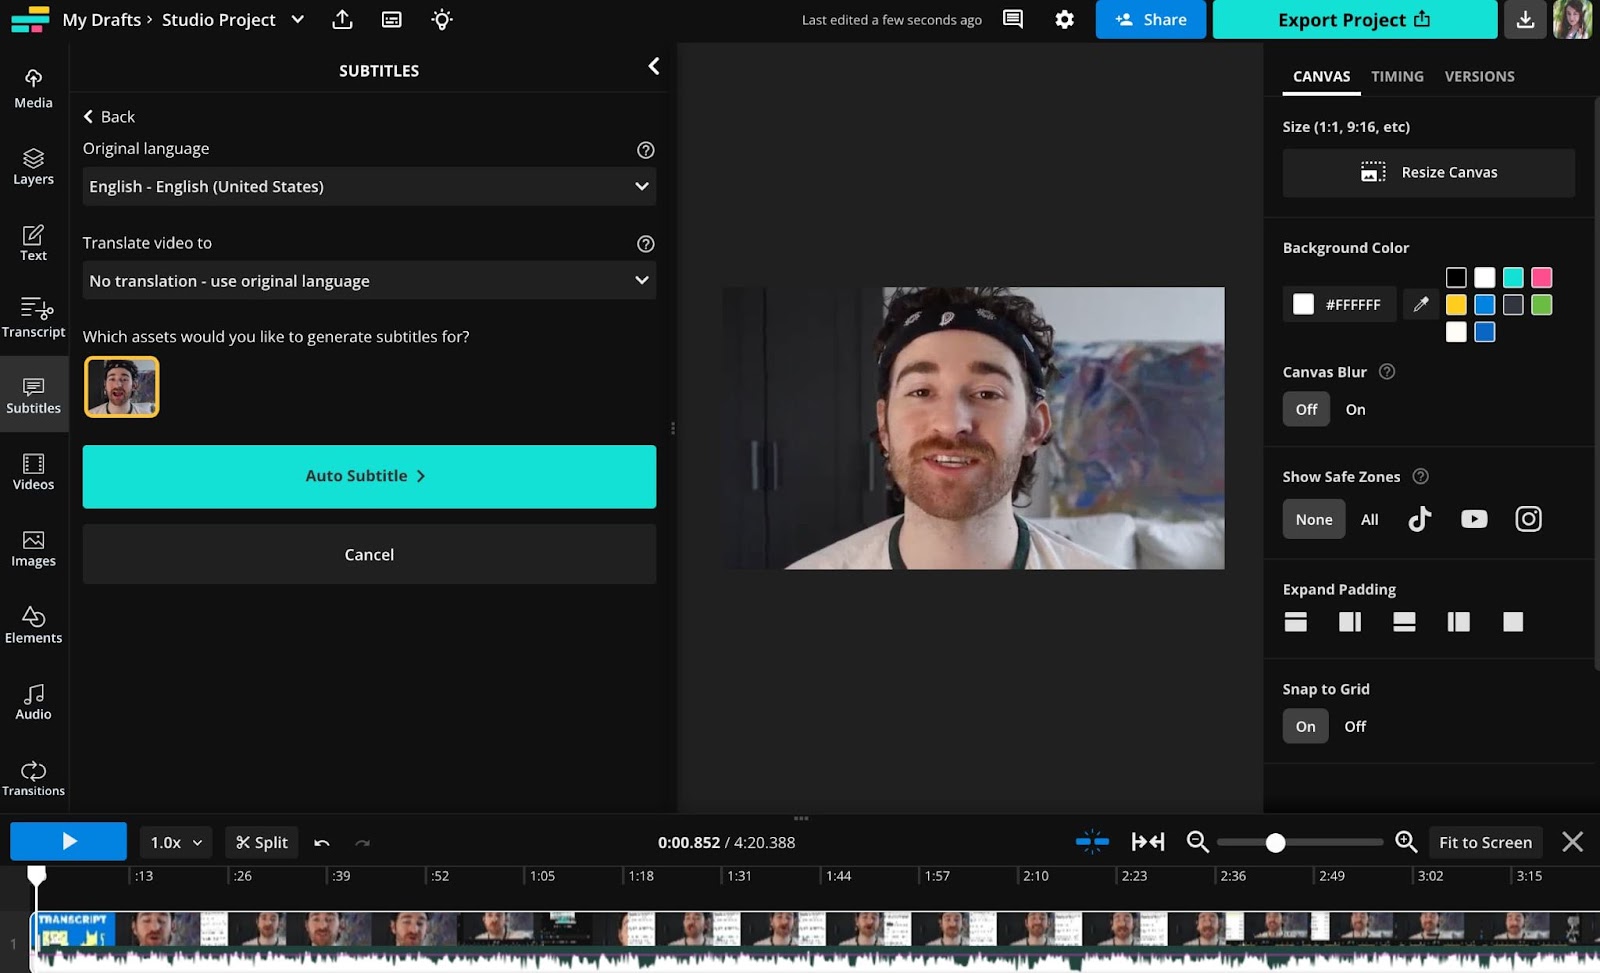
Find this in the Subtitles tab on the left sidebar. Kapwing uses AI to generate subtitles that auto sync with your video. You can even auto translate from your video into a different language to reach a whole new audience.
Step 3: Edit your captions.
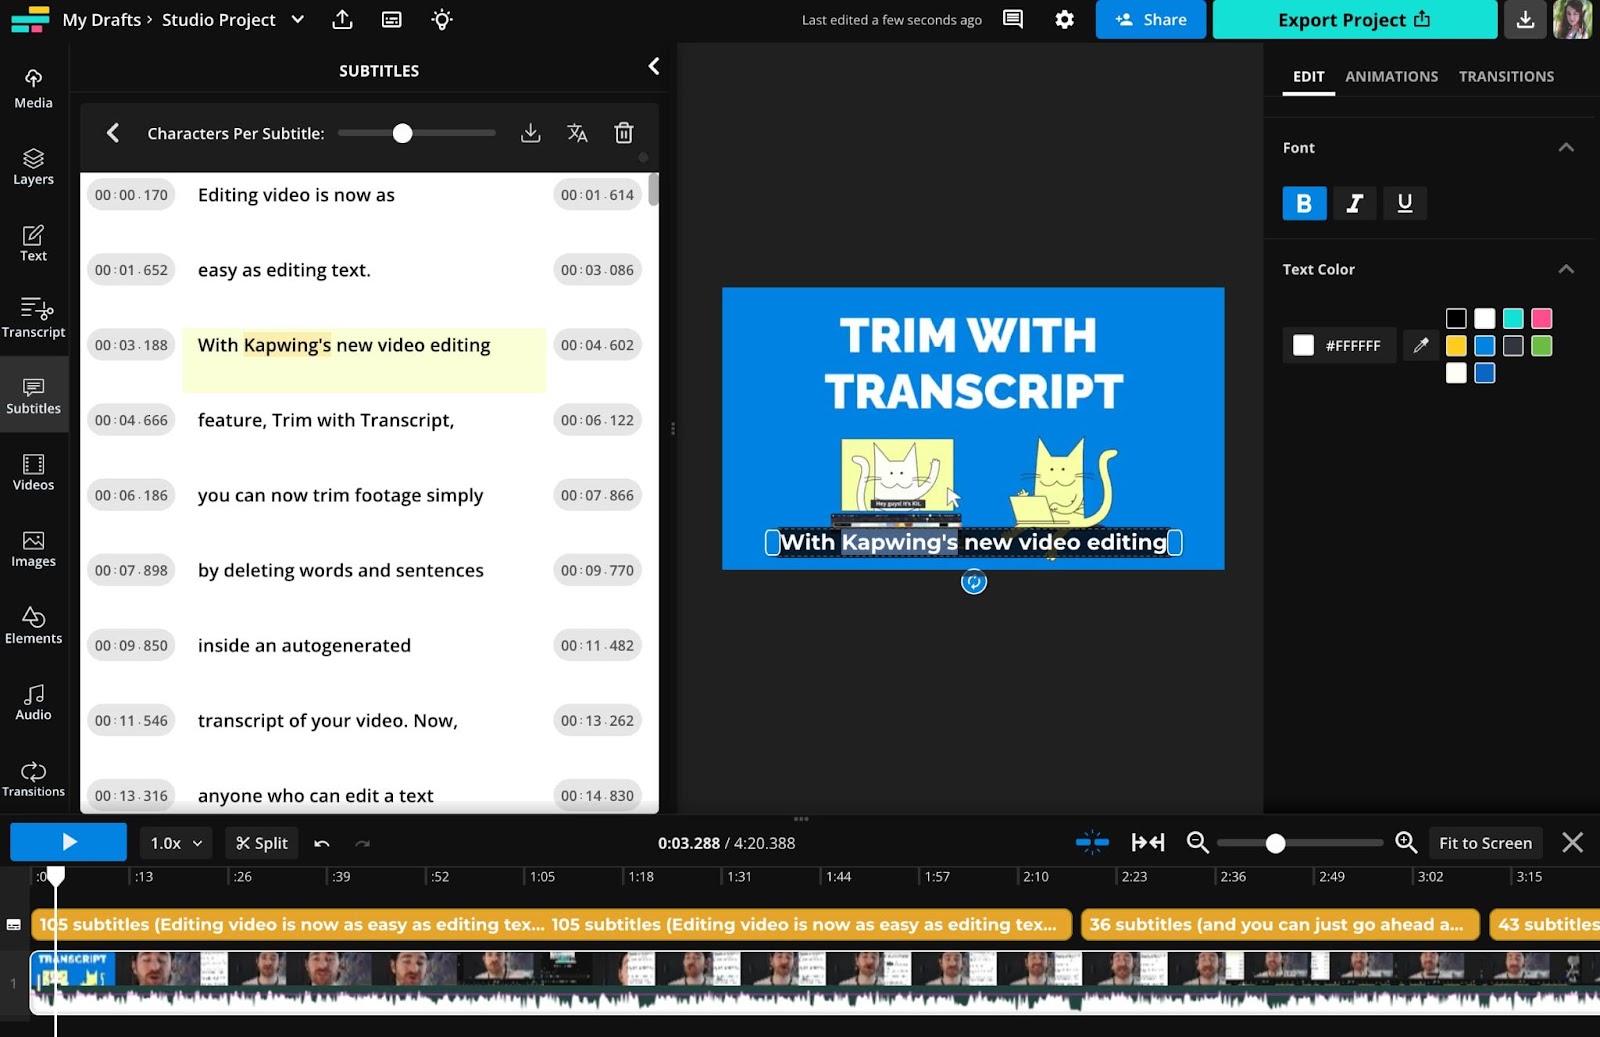
Make any changes to the transcript you need. You can customize the subtitles with animations and custom fonts and colors. Choose from different style presets, like ‘Typewriter,’ ‘Handwriting,’ or ‘Pop Art.’
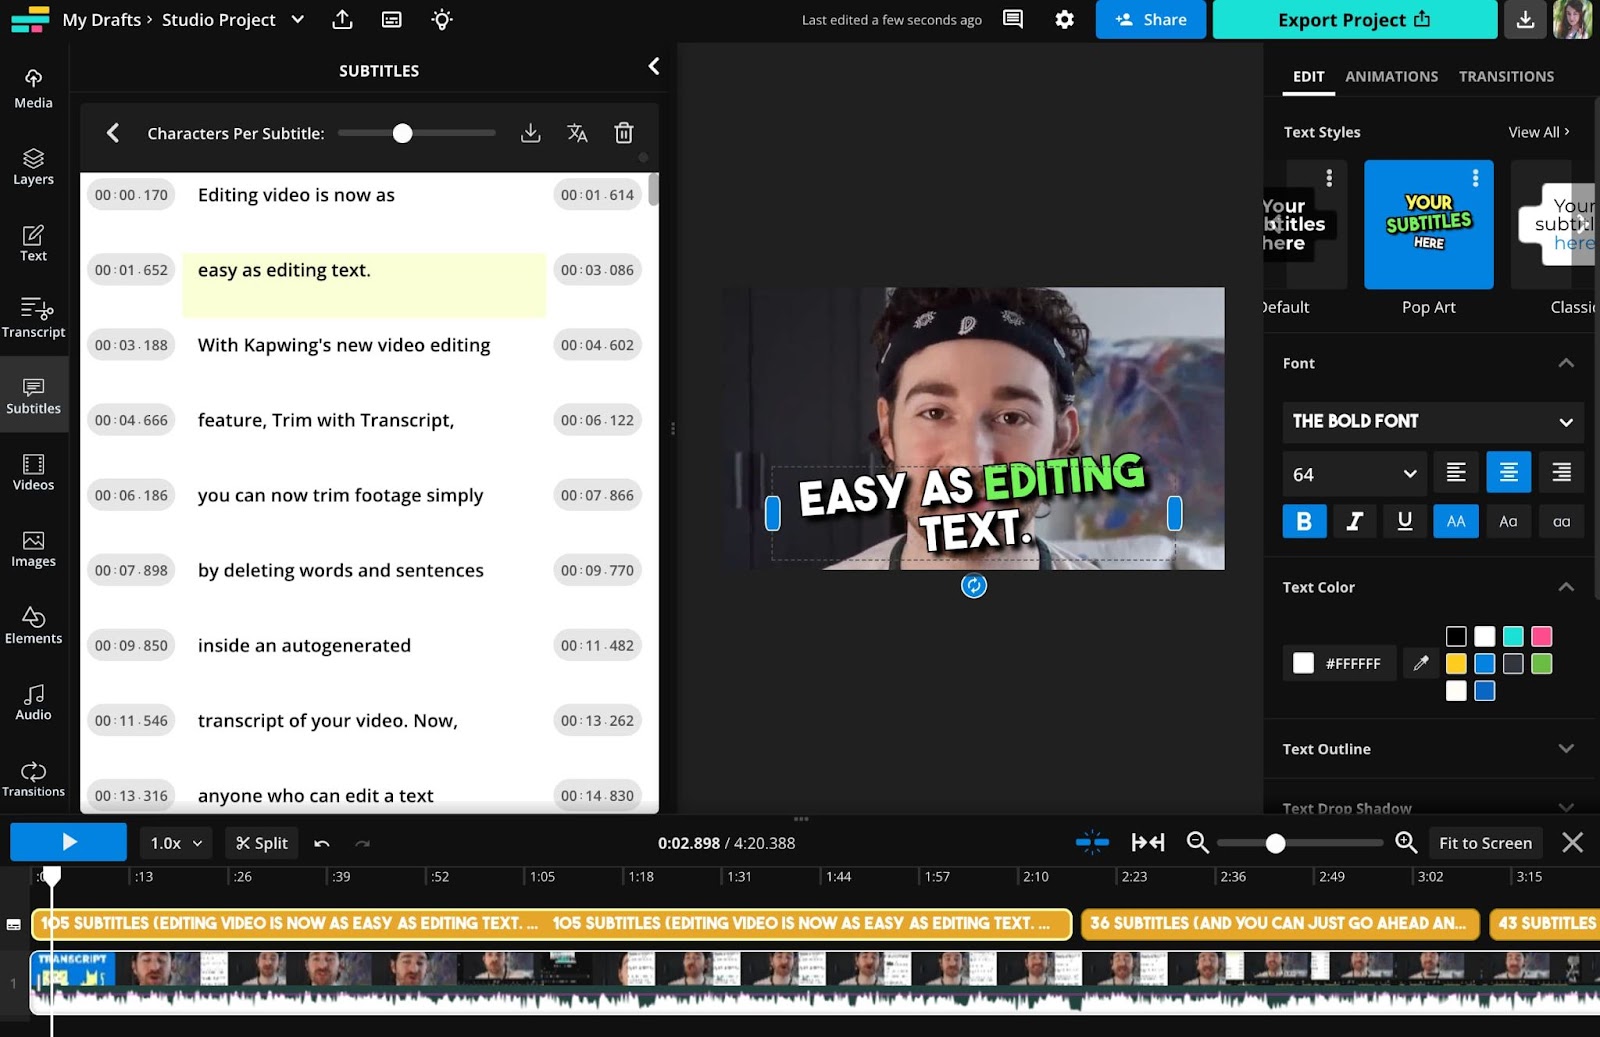
You can also change the size, control how many characters appear per line, and if you’re adding subtitles to a YouTube Short, use the Shorts Safe Zones filter to make sure the captions are placed correctly.
Step 4: Download and publish!
Export your video from Kapwing and upload it to your YouTube channel. No need to worry about uploading a caption file or a subtitles file, since the captions are already baked in.
Done!
2. Create an SRT file for your YouTube video
To create “closed” subtitles for your viewers (aka, subtitles that can be turned on and off), you’ll want to generate an SRT file.
Short for “Subrip Subtitles,” an SRT file is the standard file type for subtitles. When uploaded with a YouTube video, these subtitles files create text that can be turned on or off.
This file contains the text of your subtitles, as well as time codes for when to display each line. The file looks like lines of text, along with time stamps displayed as HH:MM:SS:MS and arrows.
You can make an SRT file to create subtitles by using Kapwing. Follow the steps above to add subtitles to your video. Once you’ve generated your automatic subtitles and are happy with them, click the download arrow in the Subtitles tab.
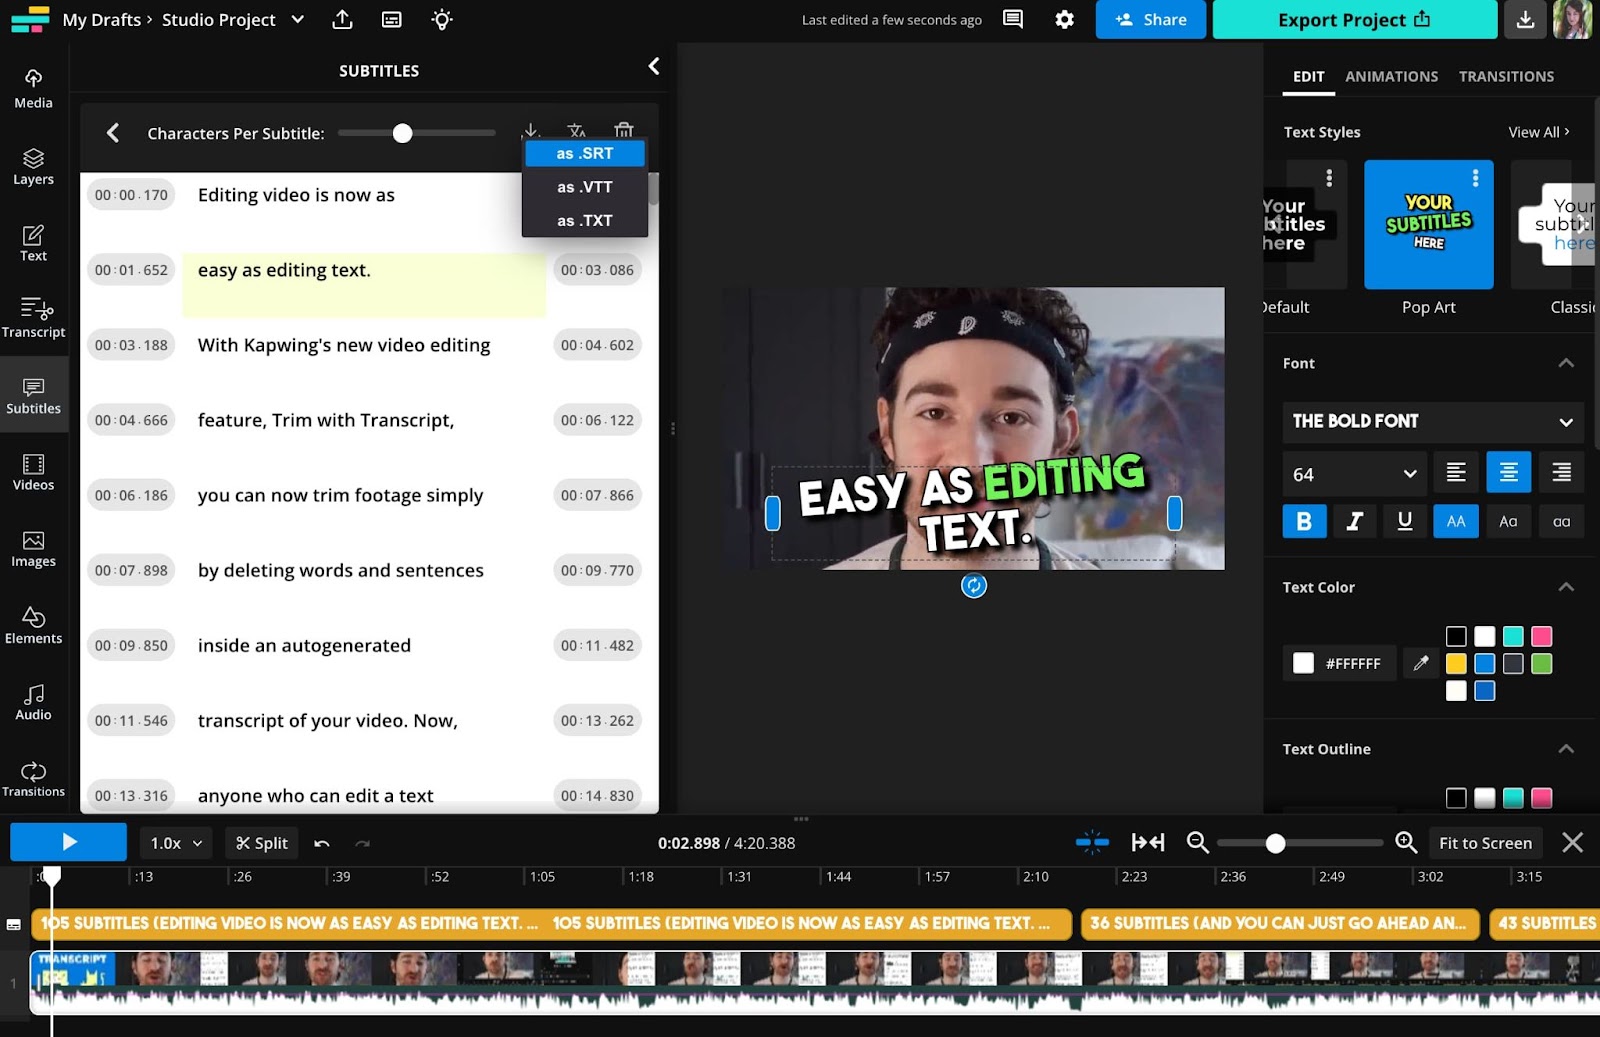
Select “as .SRT” and the subtitles will be saved to your device as an SRT file.
Next, you’ll need to upload the SRT to YouTube. Here’s how:
Step 1: Upload your video to the YouTube Studio as usual.
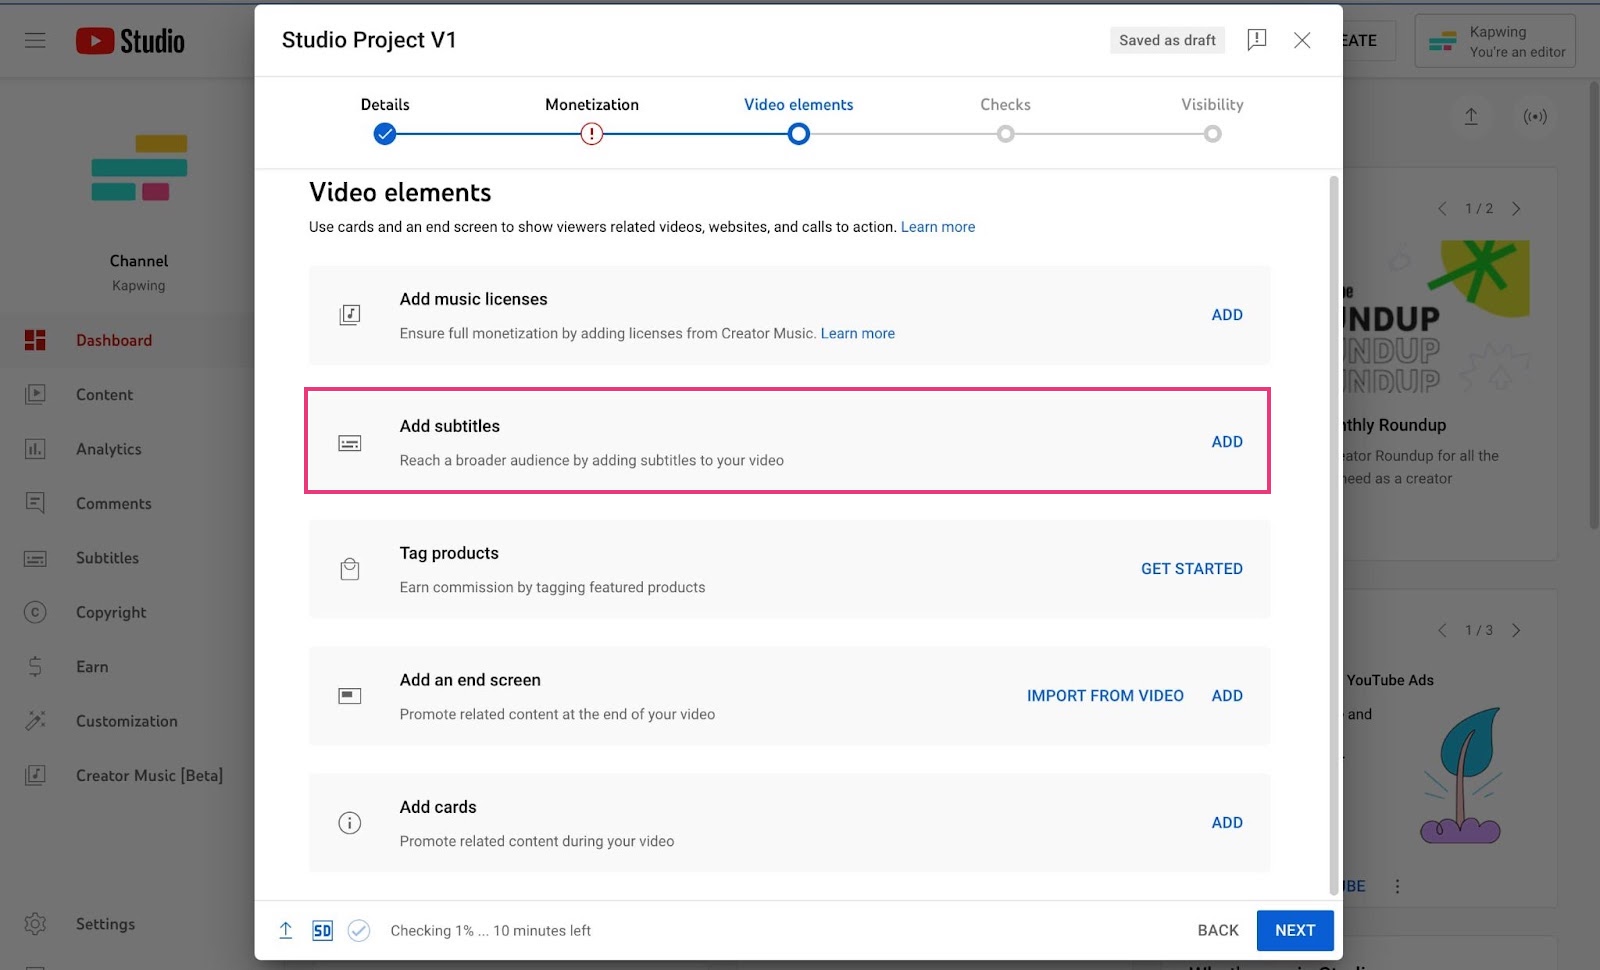
Step 2: Proceed to the Video Elements section. Here, you’ll see an option to “Add subtitles.”
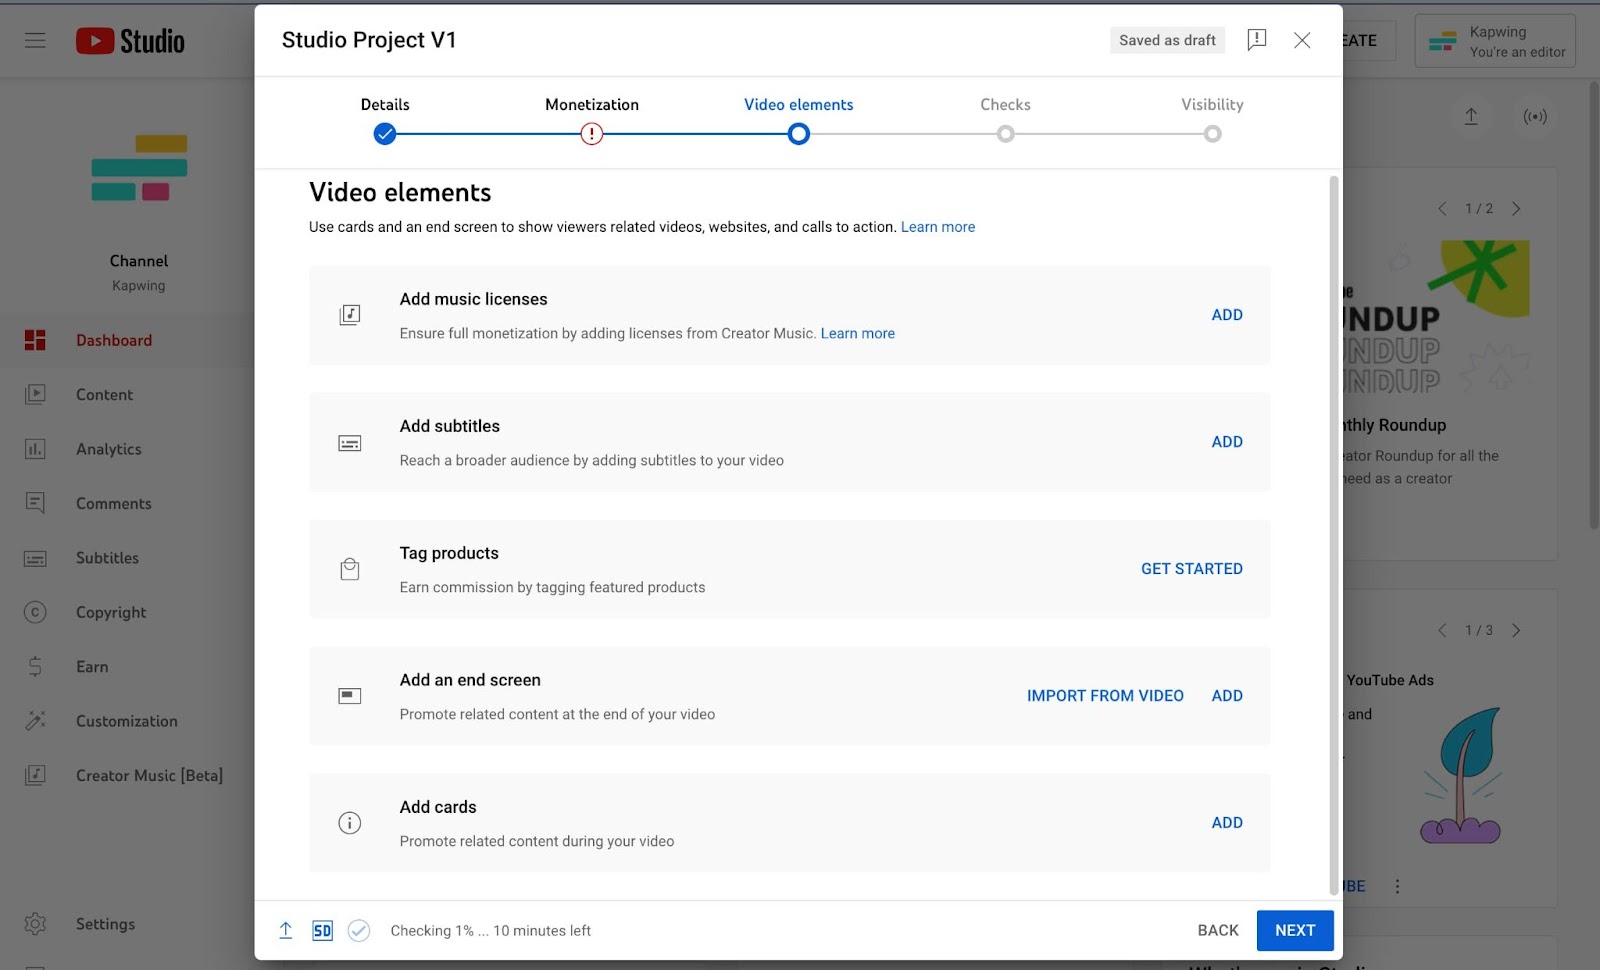
Step 3: Select “Upload file.”

Step 4: Choose “With timing.”
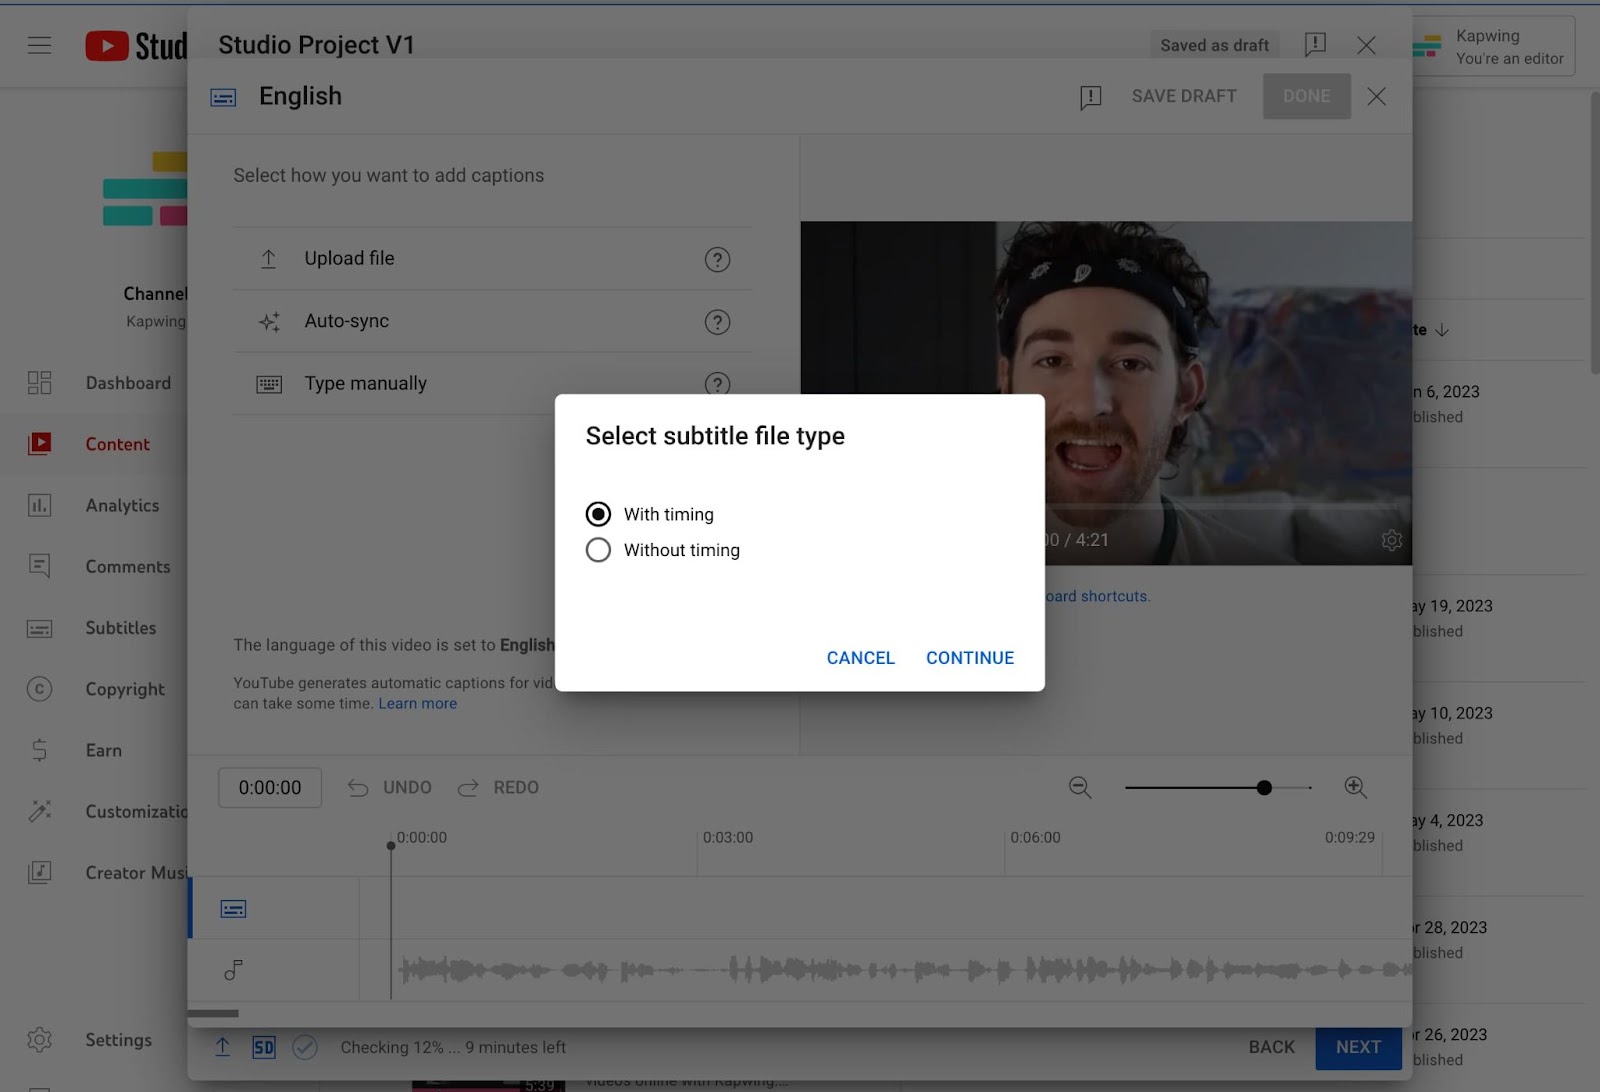
Step 5: Select the SRT file you downloaded from Kapwing from your file finder.
And that’s it. Your YouTube video will now have perfectly timed and accurate subtitles that users can choose to turn on.
If you’d like to add an SRT file to an existing YouTube video, you can do that, too. Choose the video you’d like to add new subtitles to and click “Details” to edit it. From there, you’ll see the “Subtitles” option on the right hand side of the screen. Click into it to view the existing subtitles.
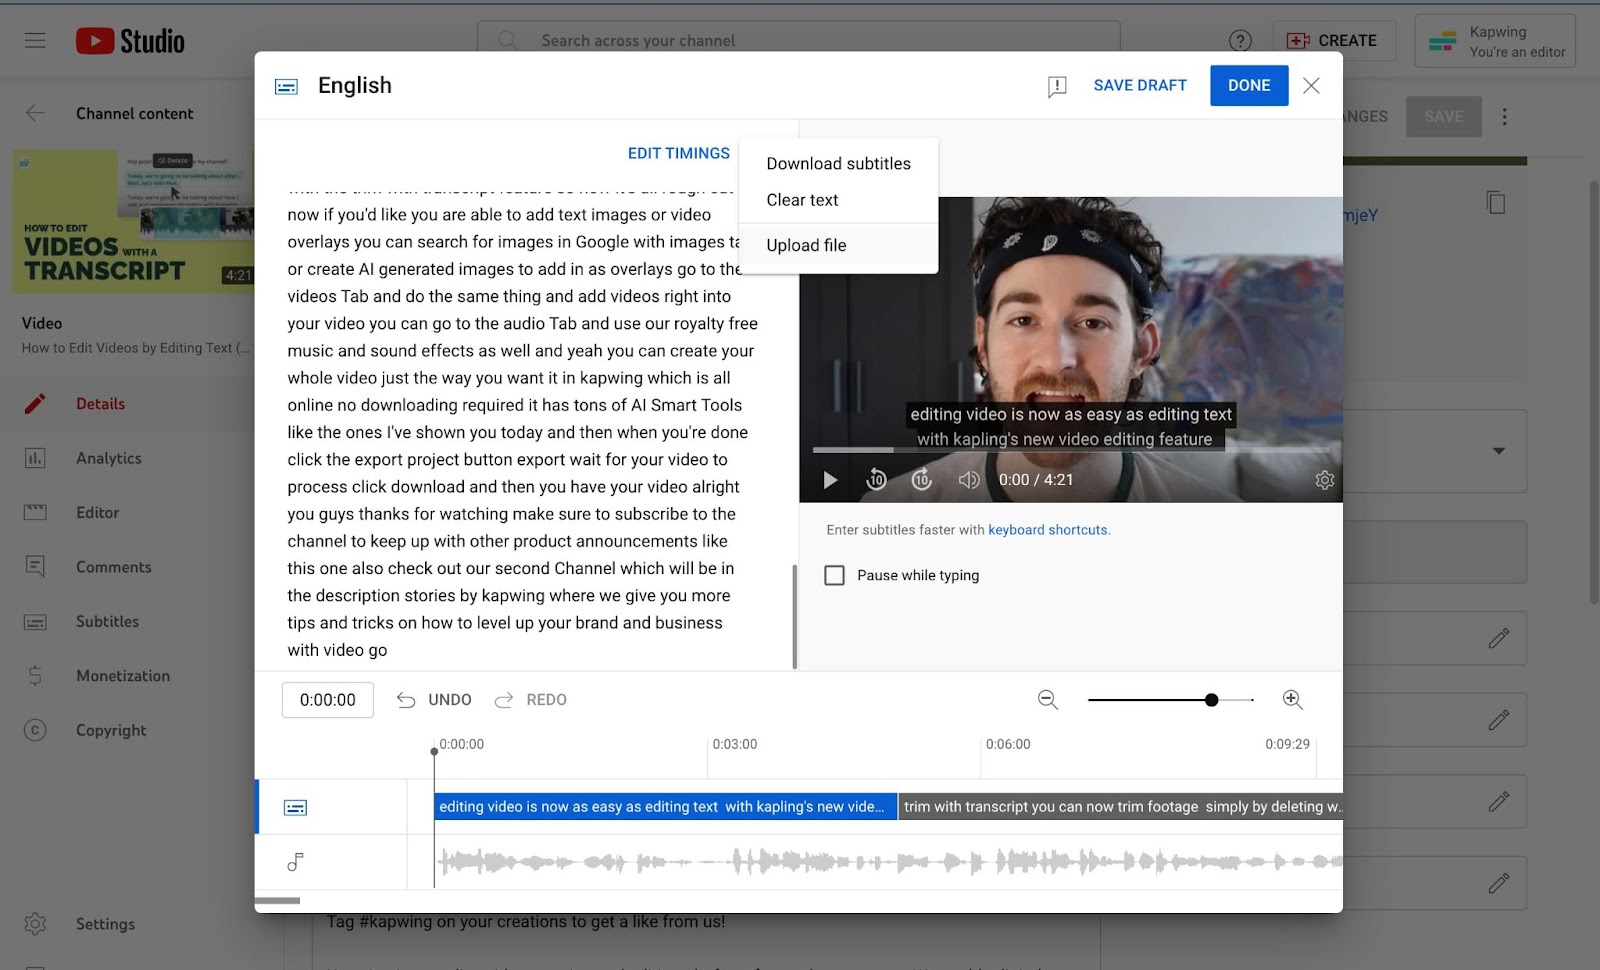
Click the three dot icon next to “Edit Timings” to show the Upload file option so you can upload your new SRT file.
3. Auto-sync your script or transcript
Another option within YouTube Studio is to upload the script or transcript for a video and allow YouTube to autosync the text to the spoken audio in the video.
While YouTube says you can use your video script here, in our experience most videos don’t stick to the original script word for word, no matter our best intentions. Reading directly from a script can feel robotic or cause you to look away from the camera frequently, necessitating too many jump cuts to cover up the pauses.
To avoid needing to heavily edit your synced video subtitles, we recommend using an actual transcript of the video, so it’s word-for-word perfect—or as near perfect as modern speech recognition technology can get us (which is pretty near). You can quickly generate a transcript using Kapwing’s AI-powered transcription tool.
Here’s how to do that, step by step:
Step 1: Upload your video files to Kapwing.
Head to Kapwing.com and open a new project.

You can upload your video directly from your device, from Google Drive or Photos, or from elsewhere online using a URL.
Step 2: Generate a transcript
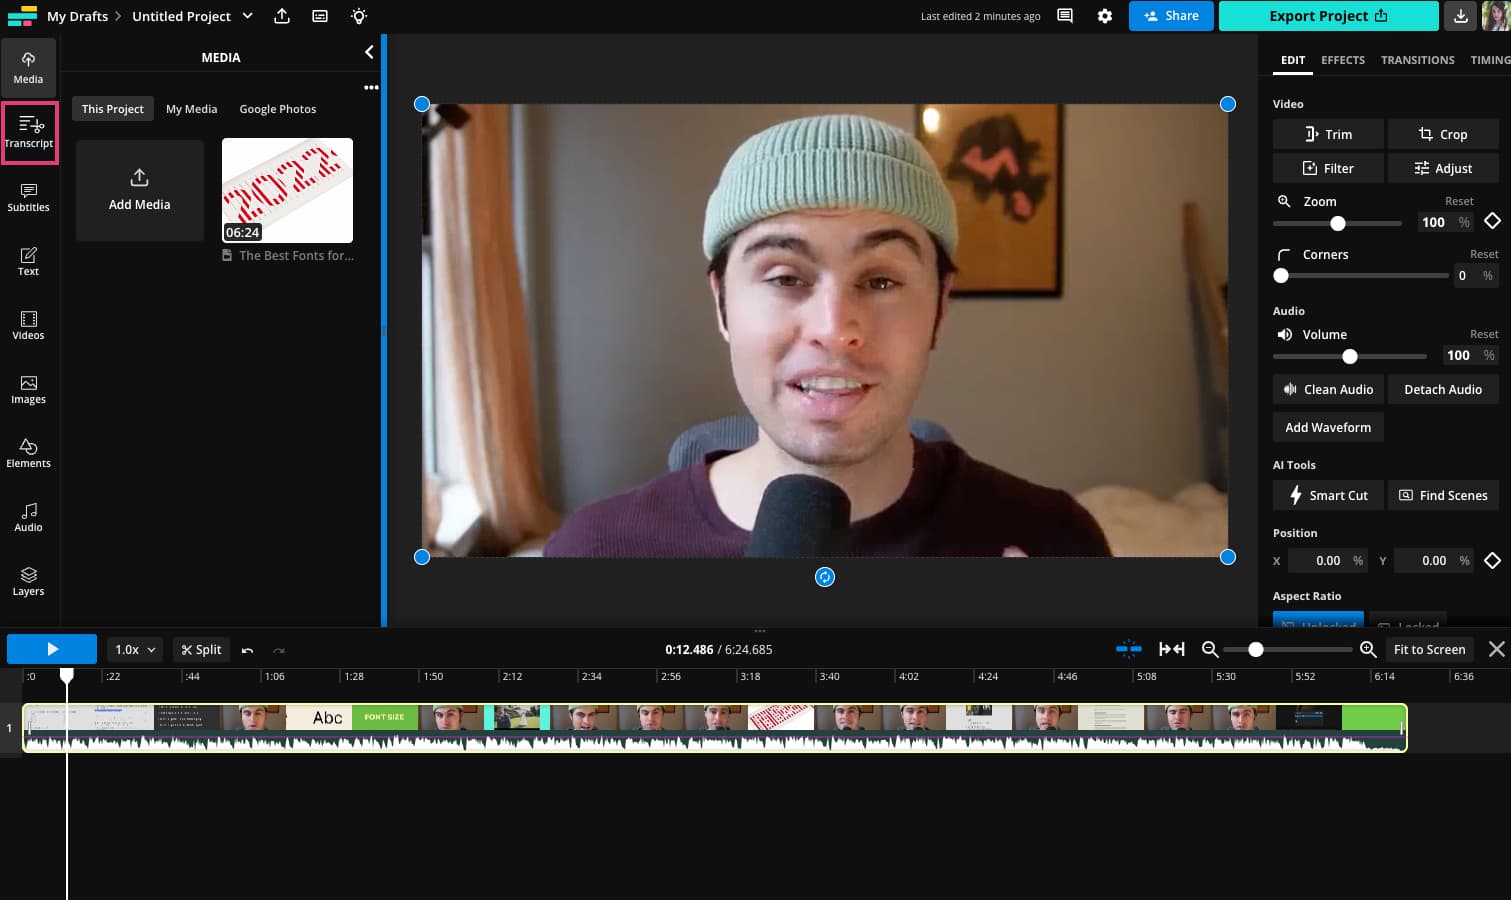
Once your video is uploaded, click on the “Transcript” tab in the left-side menu.
Select “Trim with Transcript” from the available options.
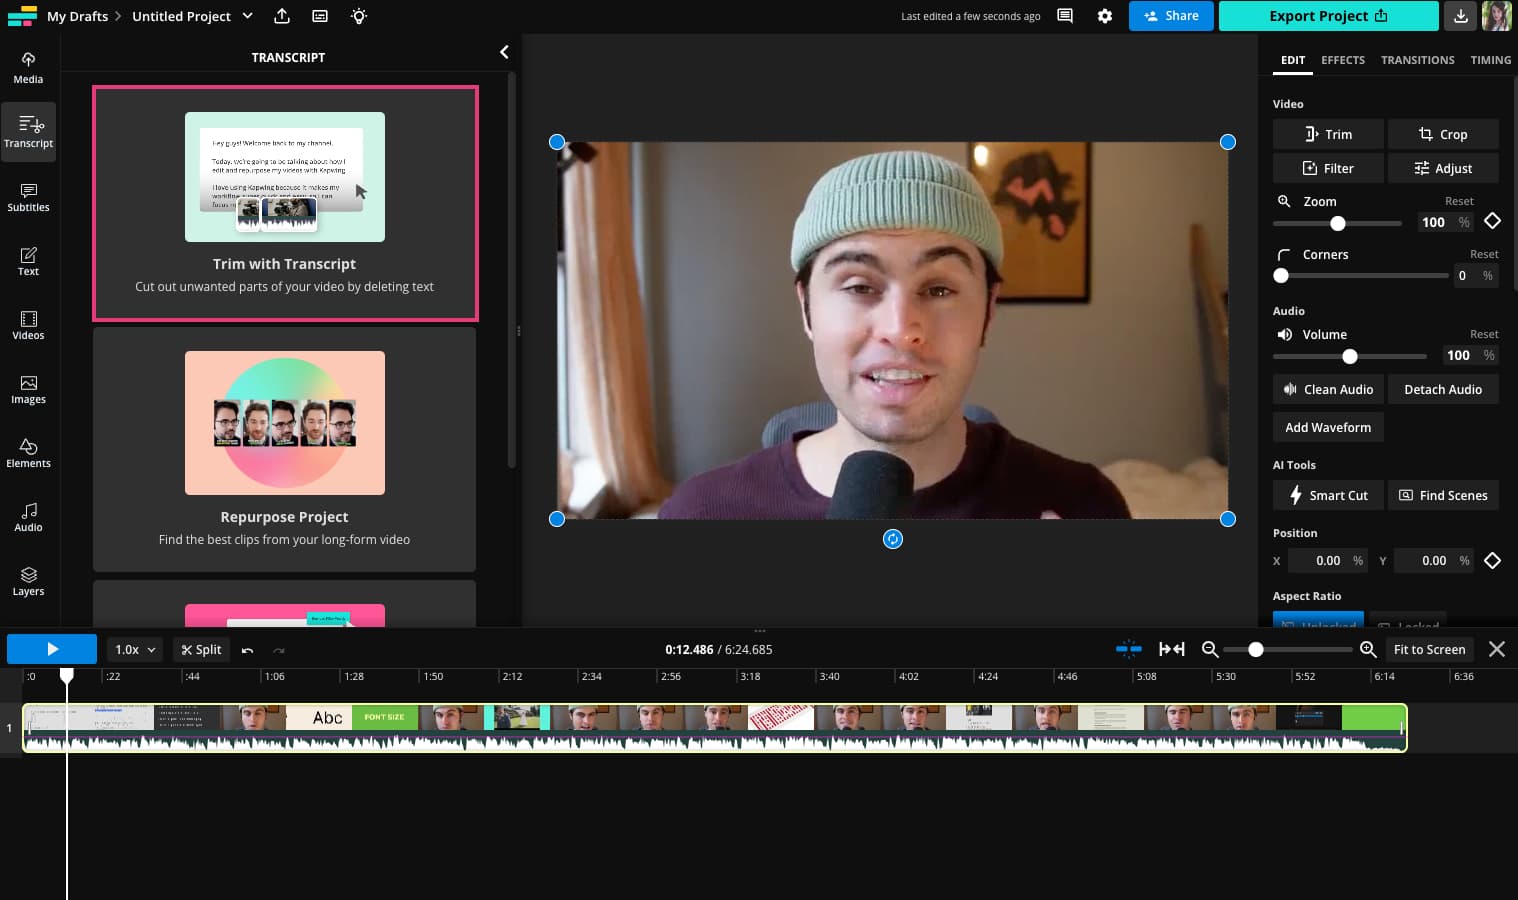
Don’t worry, this won’t actually trim anything just yet. It will simply open the transcript editor for you.
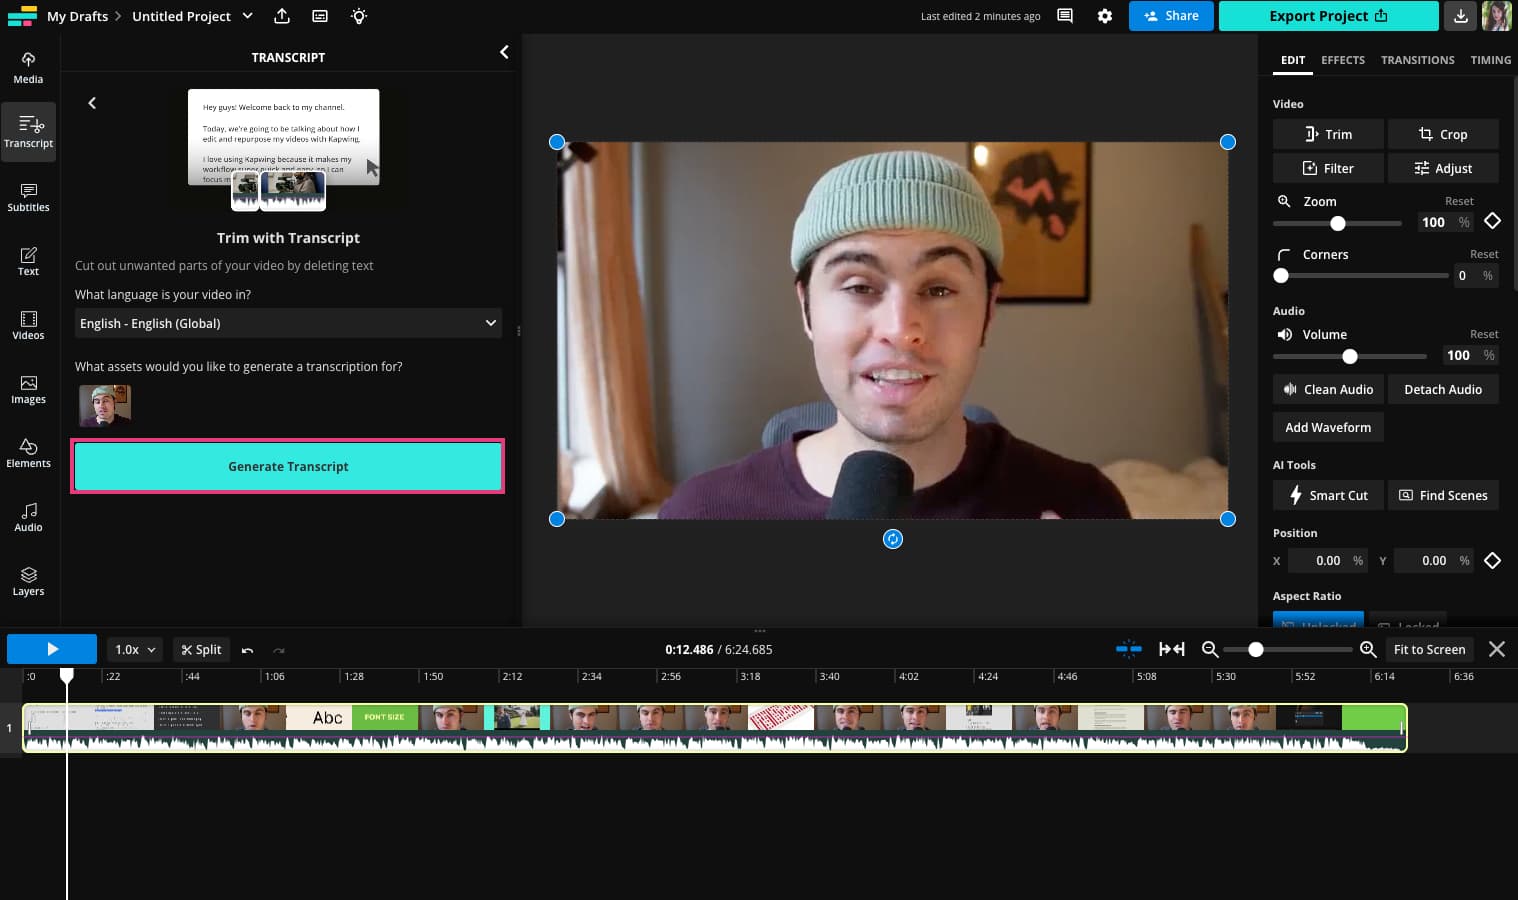
Kapwing will automatically detect the spoken language in your video asset. Confirm that video language in this selection is correct, then click “Generate Transcript.” The process to create automatically generated subtitles may take up to a few minutes, depending on the length of the video.
Step 3: Edit the transcript
Once your video’s transcript has been generated, take some time to review it. While Kapwing’s transcription software is very accurate, it can make some mistakes.
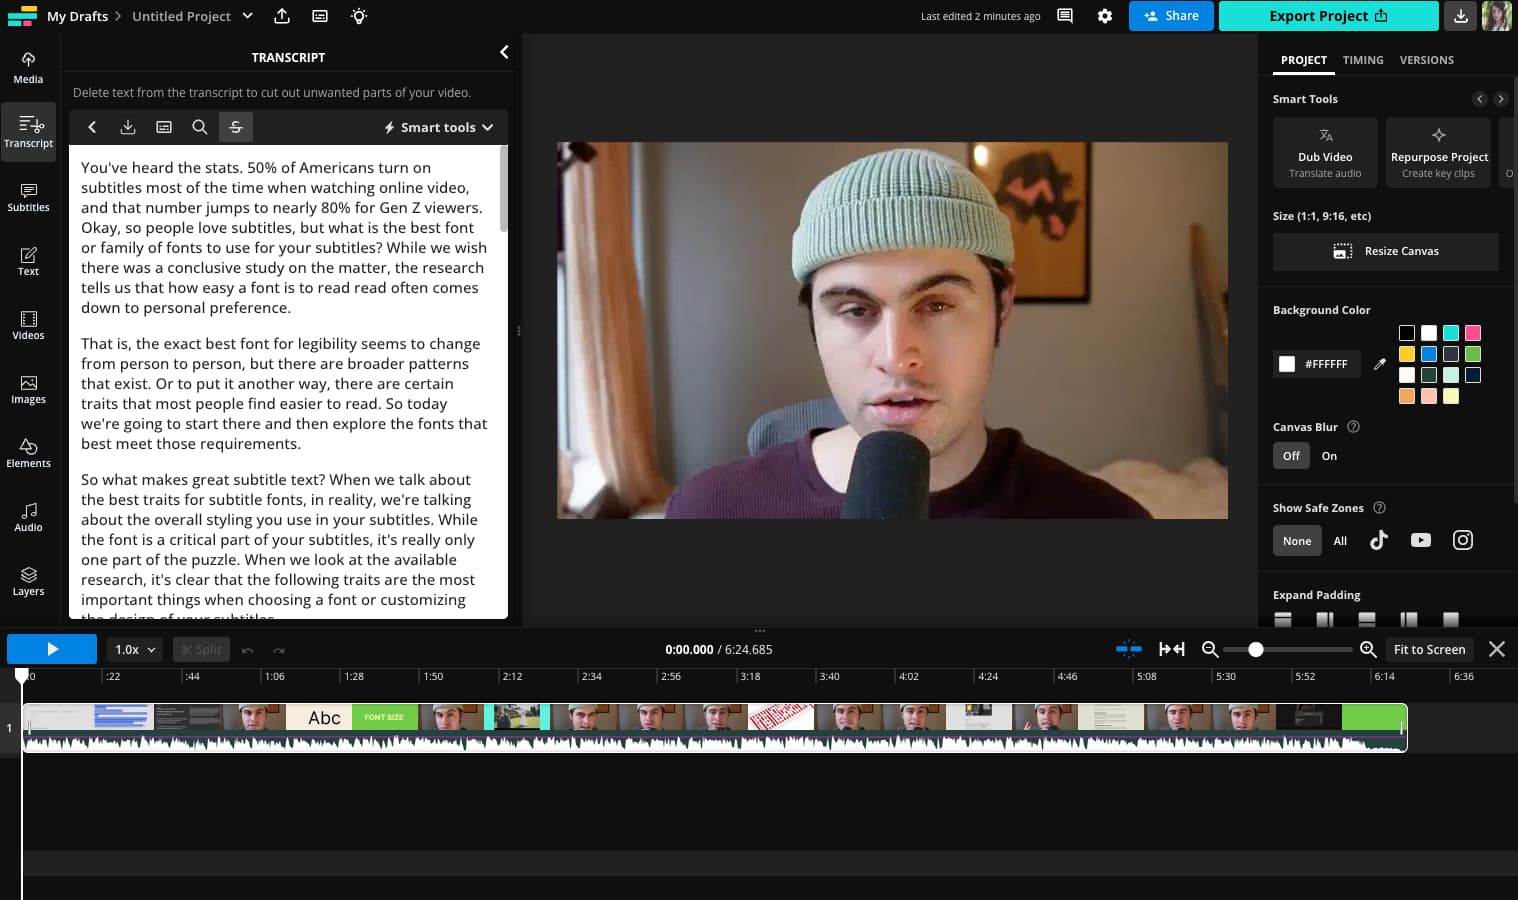
You can edit the transcript in the text box the same way you would edit a text document: cut out words, punctuation, or whole sentences with the delete key; correct spelling and grammar errors; add punctuation throughout; and you can even save spelling corrections to your workspace’s Custom Spelling to save for future projects. This is particularly helpful for proper nouns, like brand names or people’s names.
Step 4: Save your transcript
When you’re happy with your transcript’s accuracy, click on the save icon at the top of the transcript window to save the transcript to your device as a .txt file.
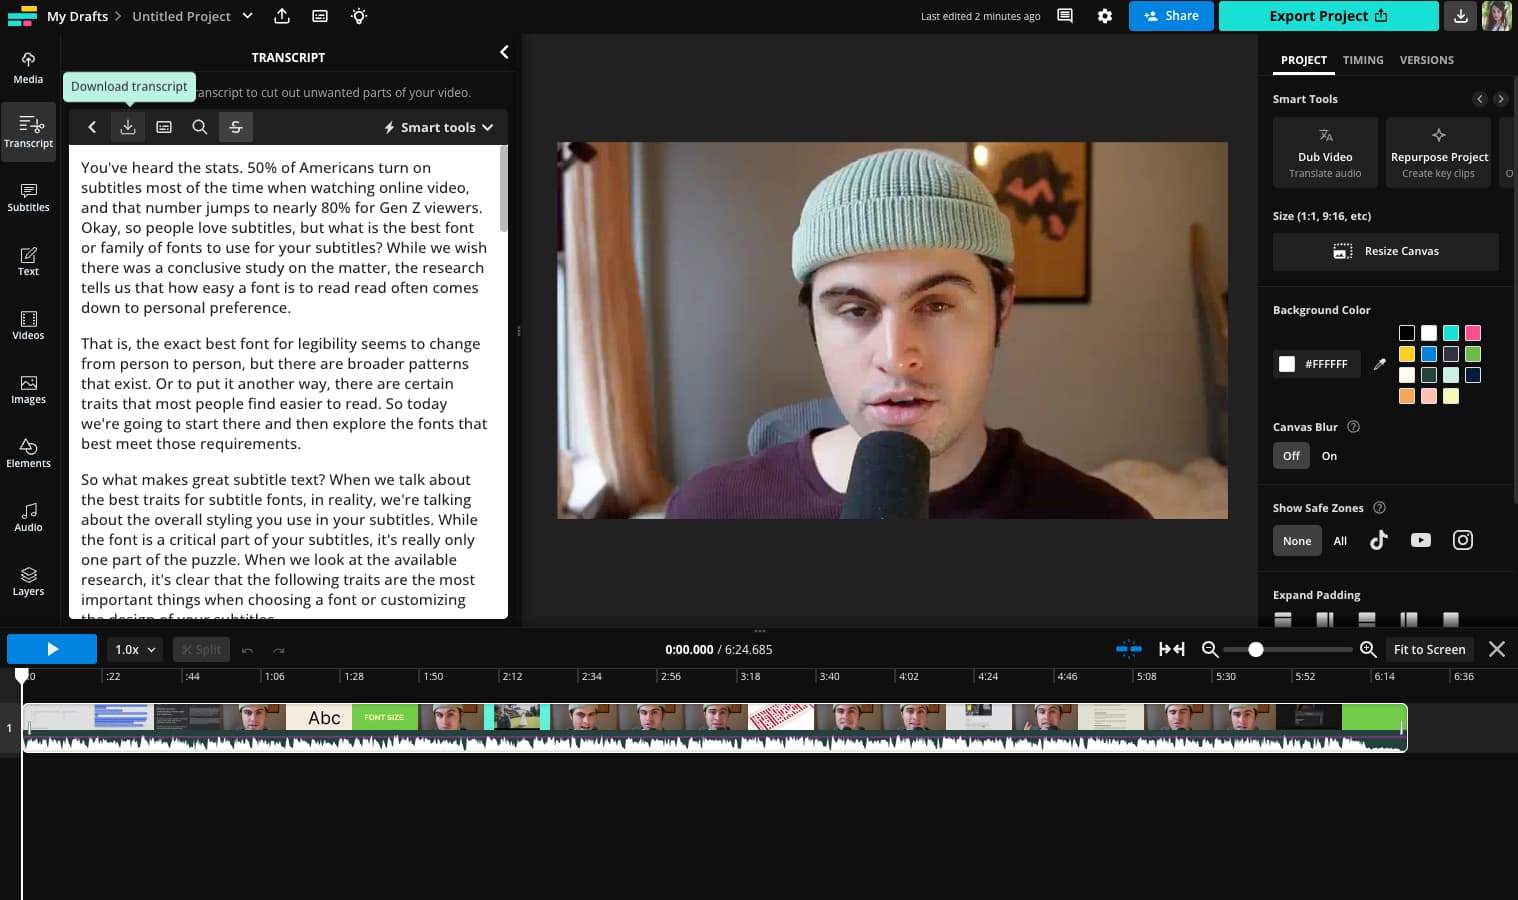
TXT is the supported format for syncing your transcript and video in YouTube Studio.
Now that you have your transcript, it’s time to upload it to YouTube and sync it with your video.
Step 1: Upload your video to YouTube
Upload your video to the YouTube Studio as usual and add the video description, details, and thumbnail. Proceed to the “Video elements” step of the upload process and click on “Add subtitles.”
Step 2: Open the auto-sync tool
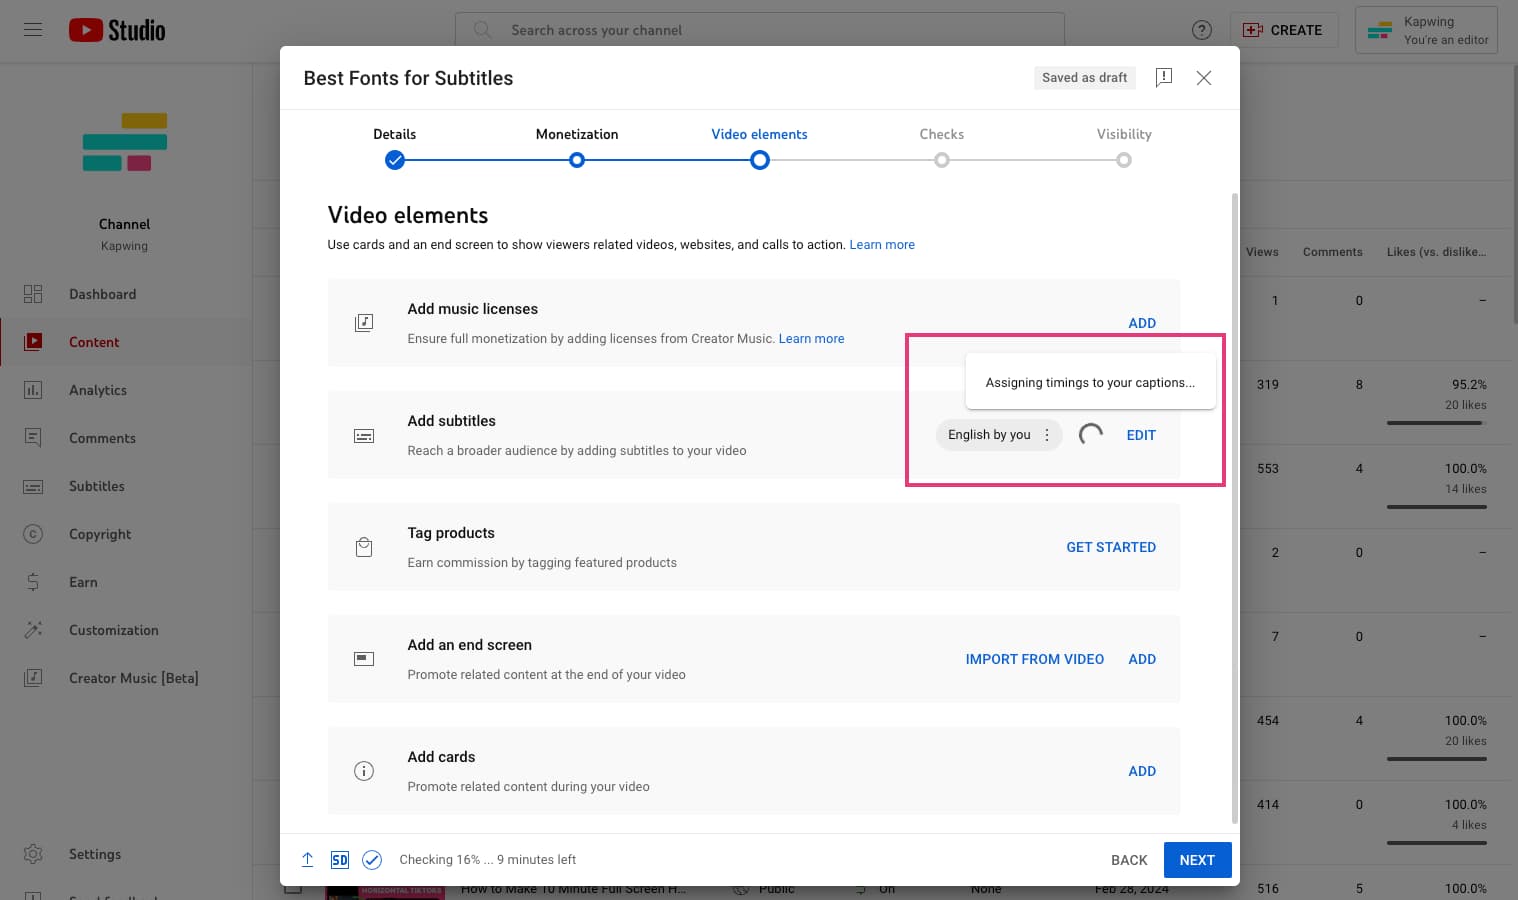
From the subtitles window, click on the auto-sync tool which will open a blank text box next to the subtitle track the video player preview.
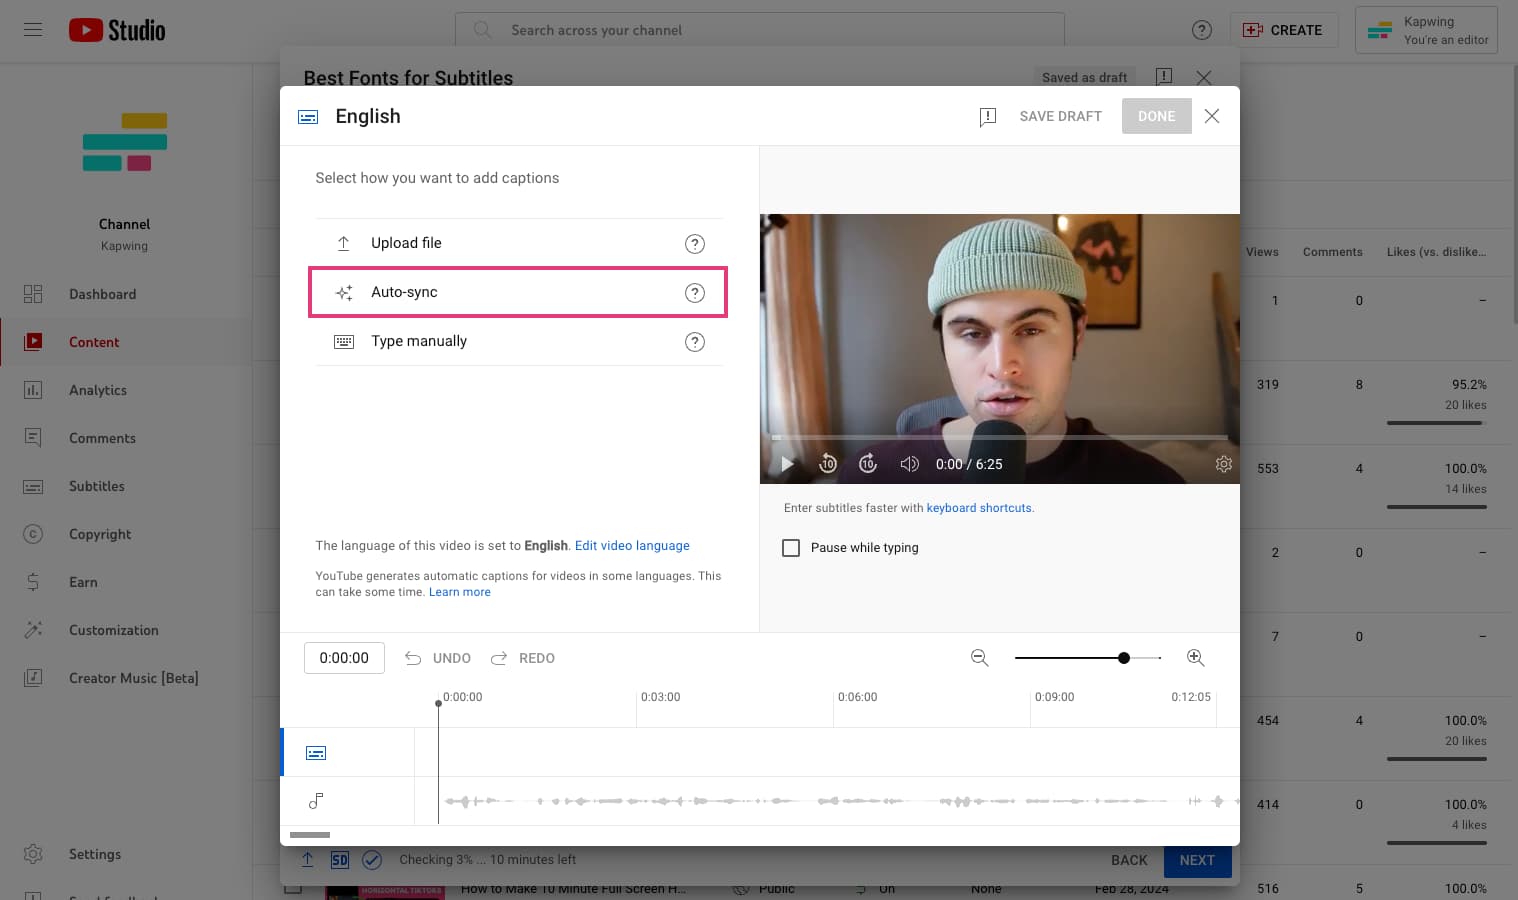
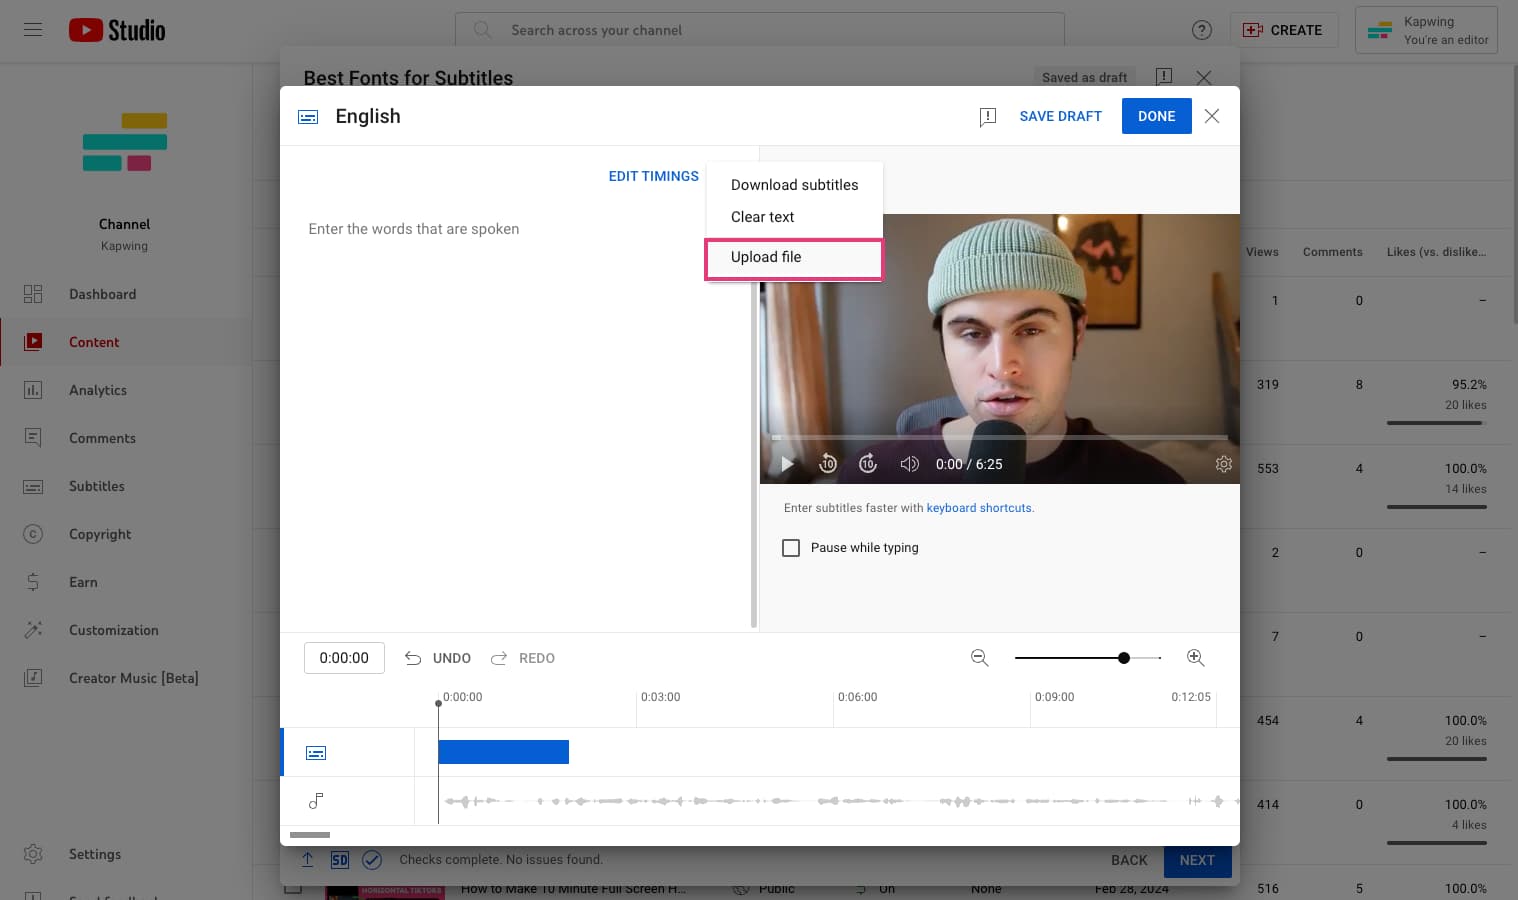
Click on the three dot menu next to “Edit Timings” and then select “Upload file.”
YouTube will ask you what type of file you’d like to upload. Choose “Without timing.”
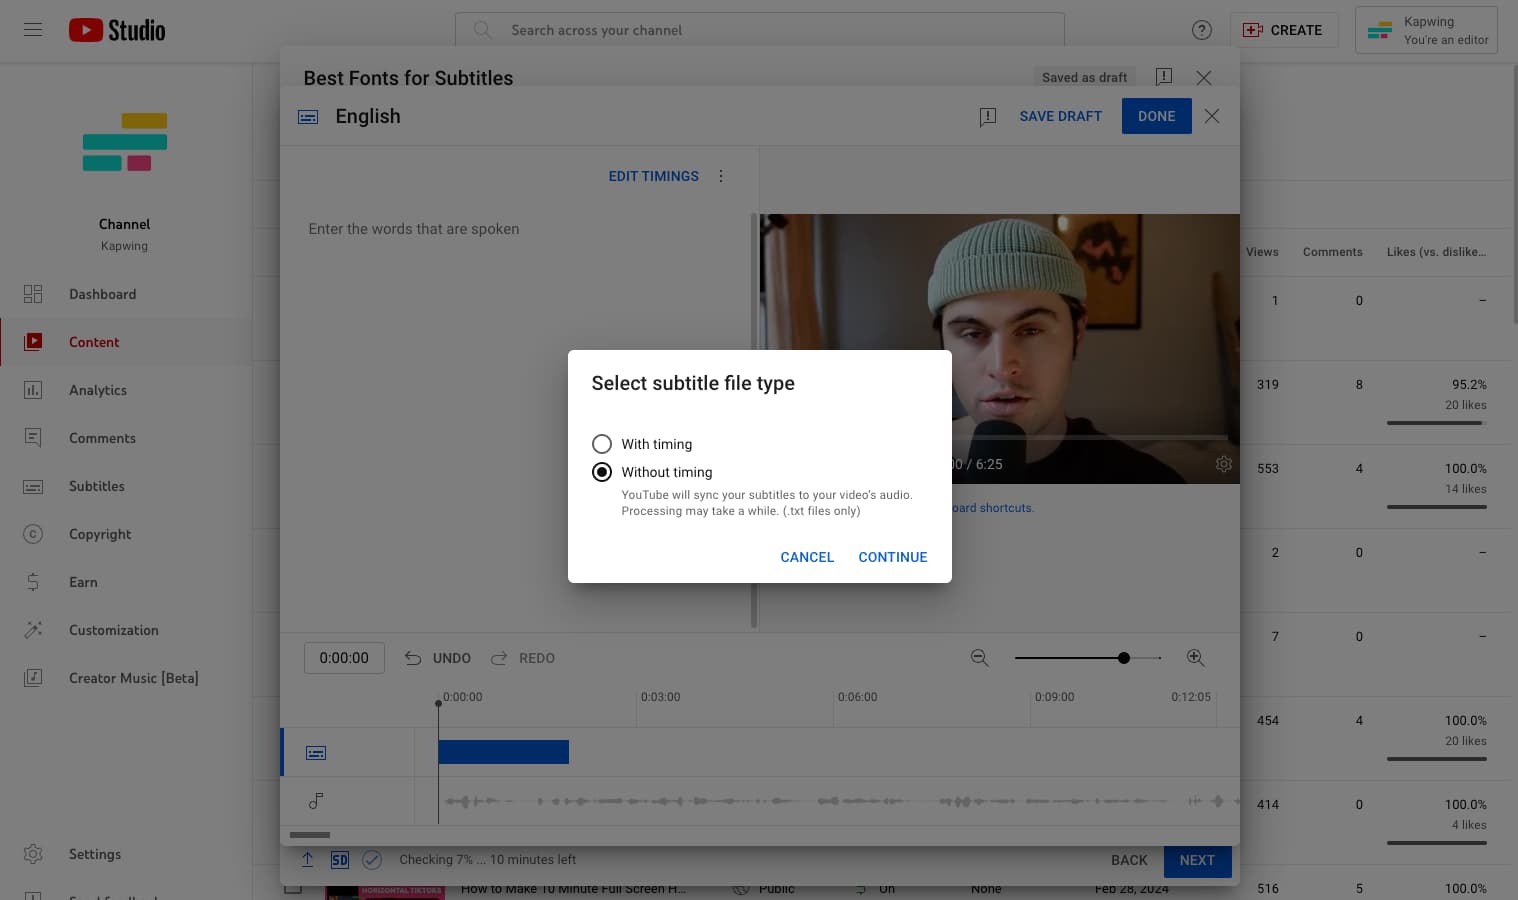
Your transcript must be formatted as a .txt file in order to use the auto-sync feature. Generating a transcript with Kapwing will ensure that it’s the proper format. Once you’ve uploaded it, the transcript will appear in the subtitle window without timings.
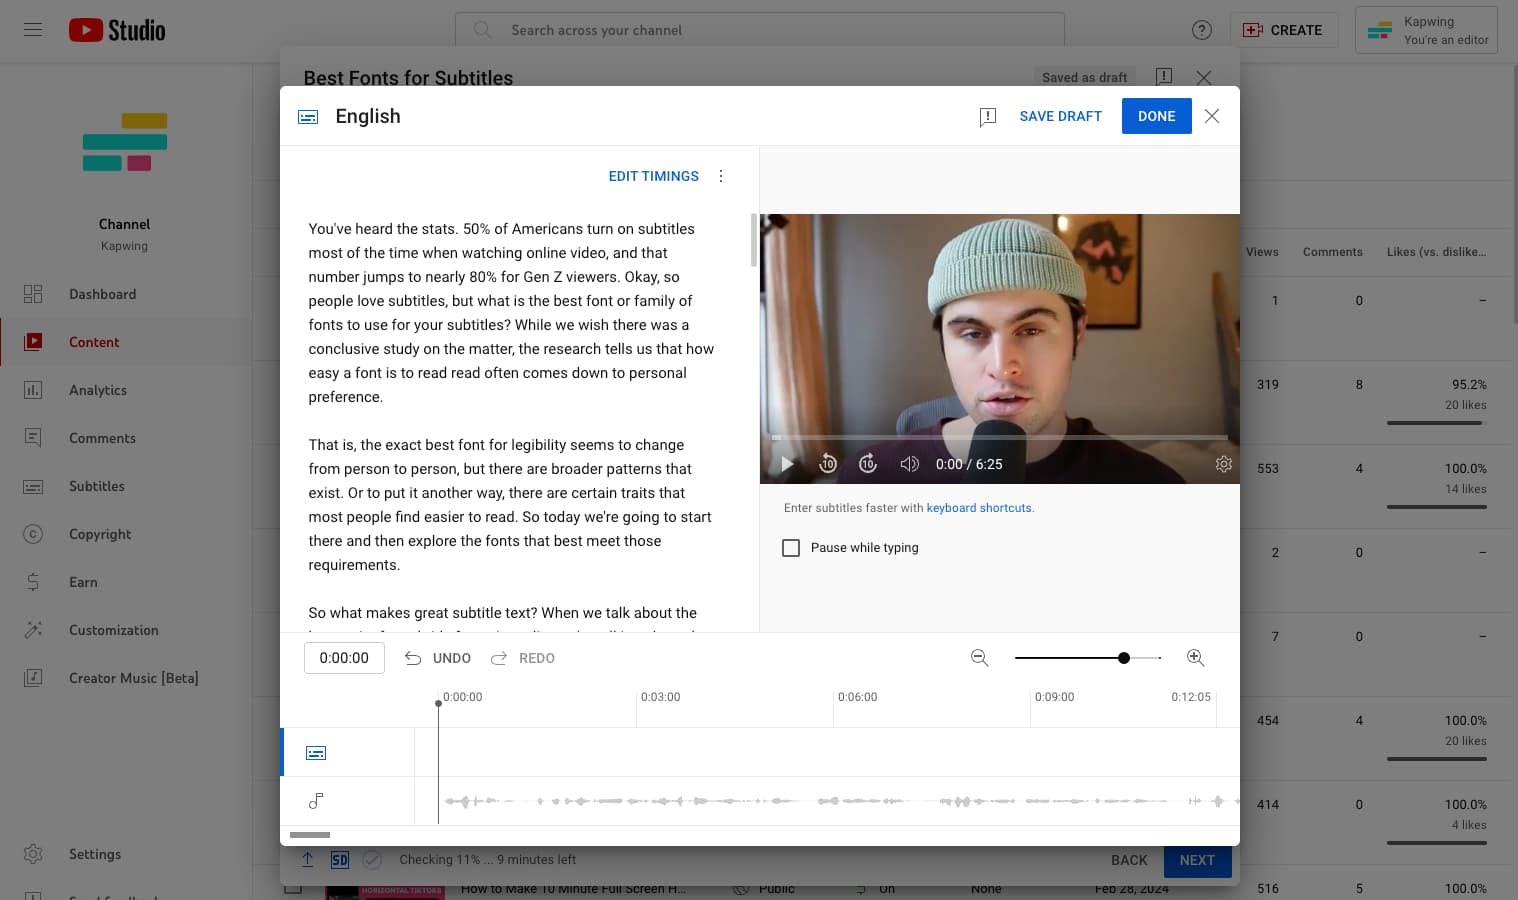
It may take YouTube several minutes or more to fully process the transcript and sync it with your video’s spoken audio. You can hit “Save draft” and close out of the the subtitle editor window while you wait. If you do so, you’ll be able to see the subtitles processing from the main upload portal in YouTube Studio.
Once the transcript has been fully processed and synced, it will look like this inside the subtitles editor.
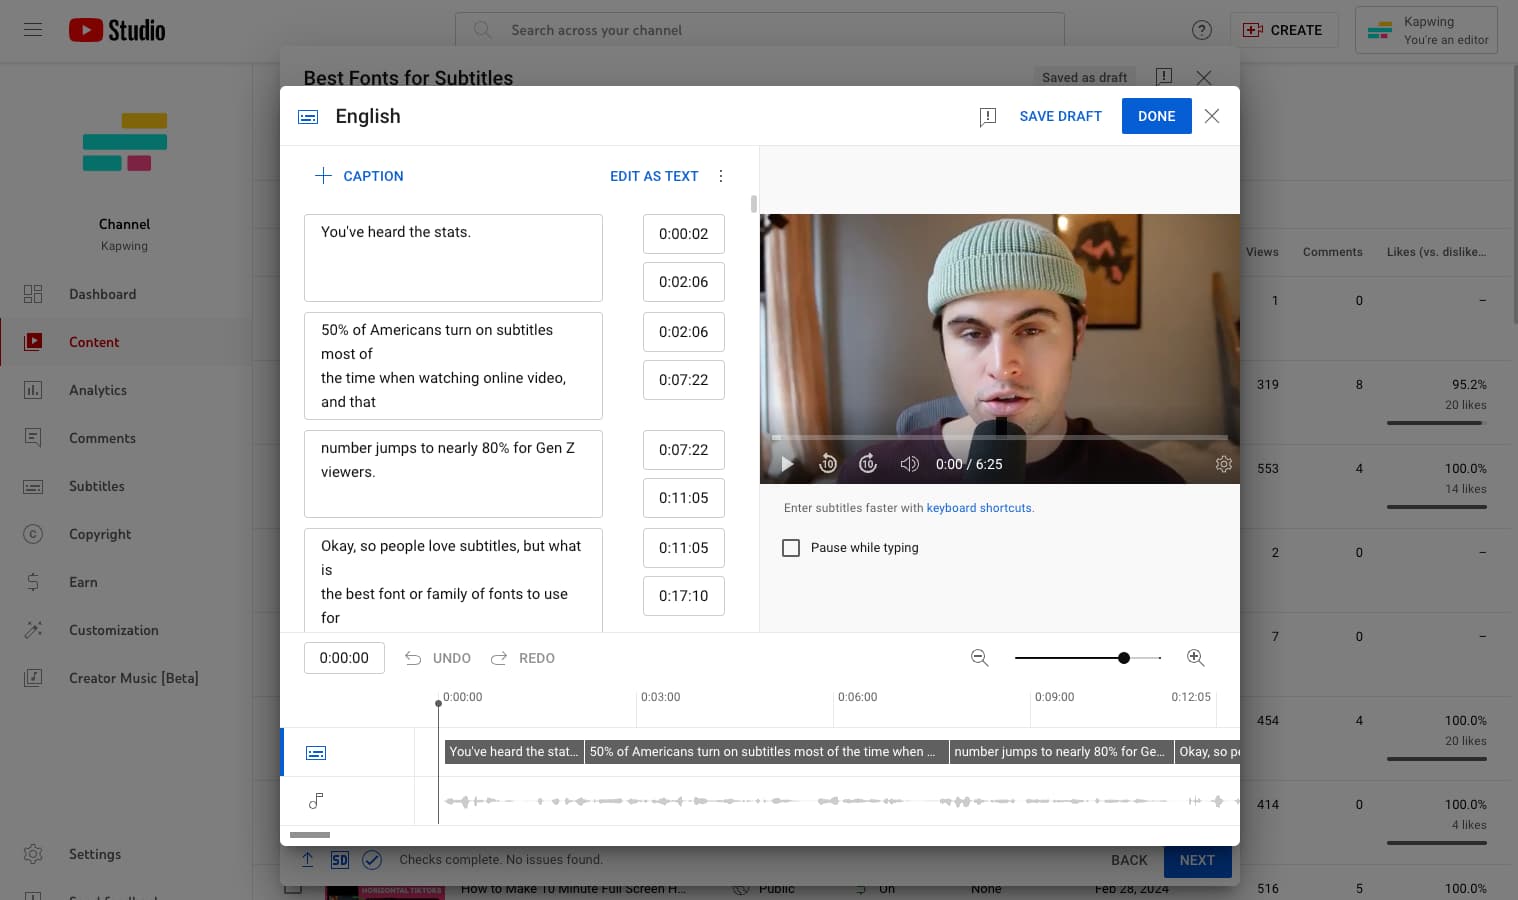
Now the subtitles are fully synced with your video and your video is ready to be published.
4. Let YouTube add auto-captions
Finally, you can let your YouTube account do the heavy lifting. Although YouTube itself recommends creating captions yourself for the best quality, it can also add captions to videos automatically.
YouTube’s auto-captions use speech recognition technology and machine learning to identify the words spoken in a video and add subtitles. It’s only available for videos with spoken words in Dutch, English, French, German, Indonesian, Italian, Japanese, Korean, Portuguese, Russian, Spanish, Turkish, Ukrainian, or Vietnamese.
YouTube needs processing time to add subtitles, so they won’t be available as soon as you upload a new video here. The processing time will vary by the length and complexity of a video.
YouTube also notes that because these captions are automatic, they may not be the most accurate. That said, these automatic subtitles are the default option you’ll see on the majority of YouTube videos. You can tell that the captions have been auto-generated by YouTube because they will have “auto-generated” in parenthesis next to the subtitle language.
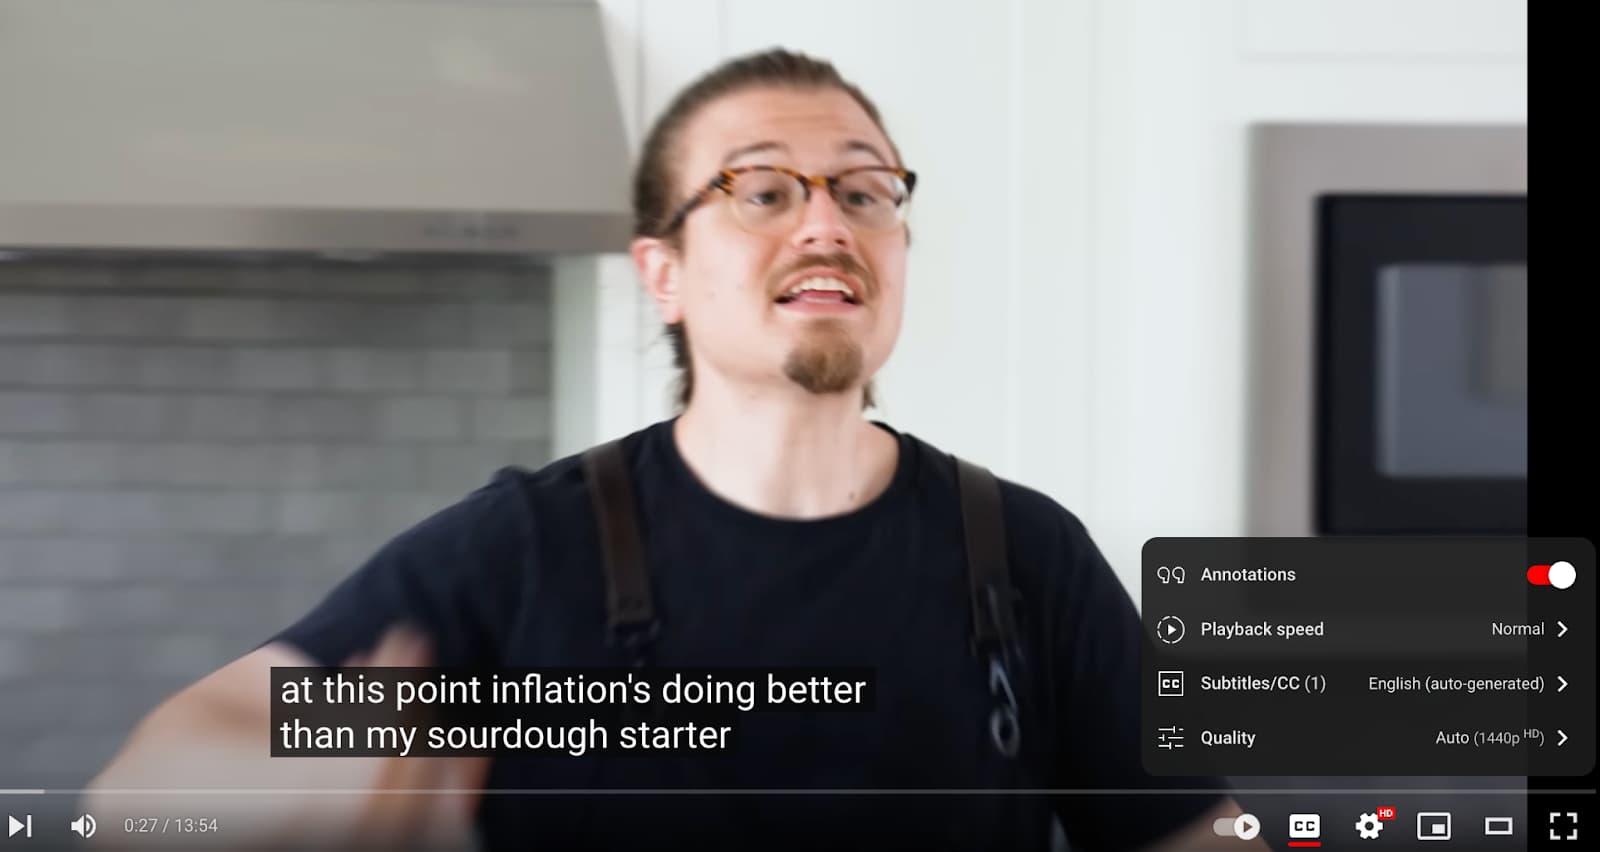
Example from this Joshua Weissman video
Auto-generated captions can be turned on by clicking the gear wheel on any video and selected auto-generated Subtitles/CC.
YouTube uses speech recognition technology and machine learning to scan the video and turn spoken words into text. It’s also capable of auto-translating those captions into different languages.
What you will notice, however, is that YouTube subtitles don’t tend to be very accurate. If multiple languages are being spoken, there are multiple speakers talking at once, or someone has a non-American accent, YouTube subtitles are less likely to be correct.
Thankfully, you can edit these captions to provide a better experience for your viewers. In fact, the YouTube Help Center recommends that you “always review automatic captions and edit any parts that haven't been properly transcribed.”
Here’s how.
How to edit automatic captions on YouTube
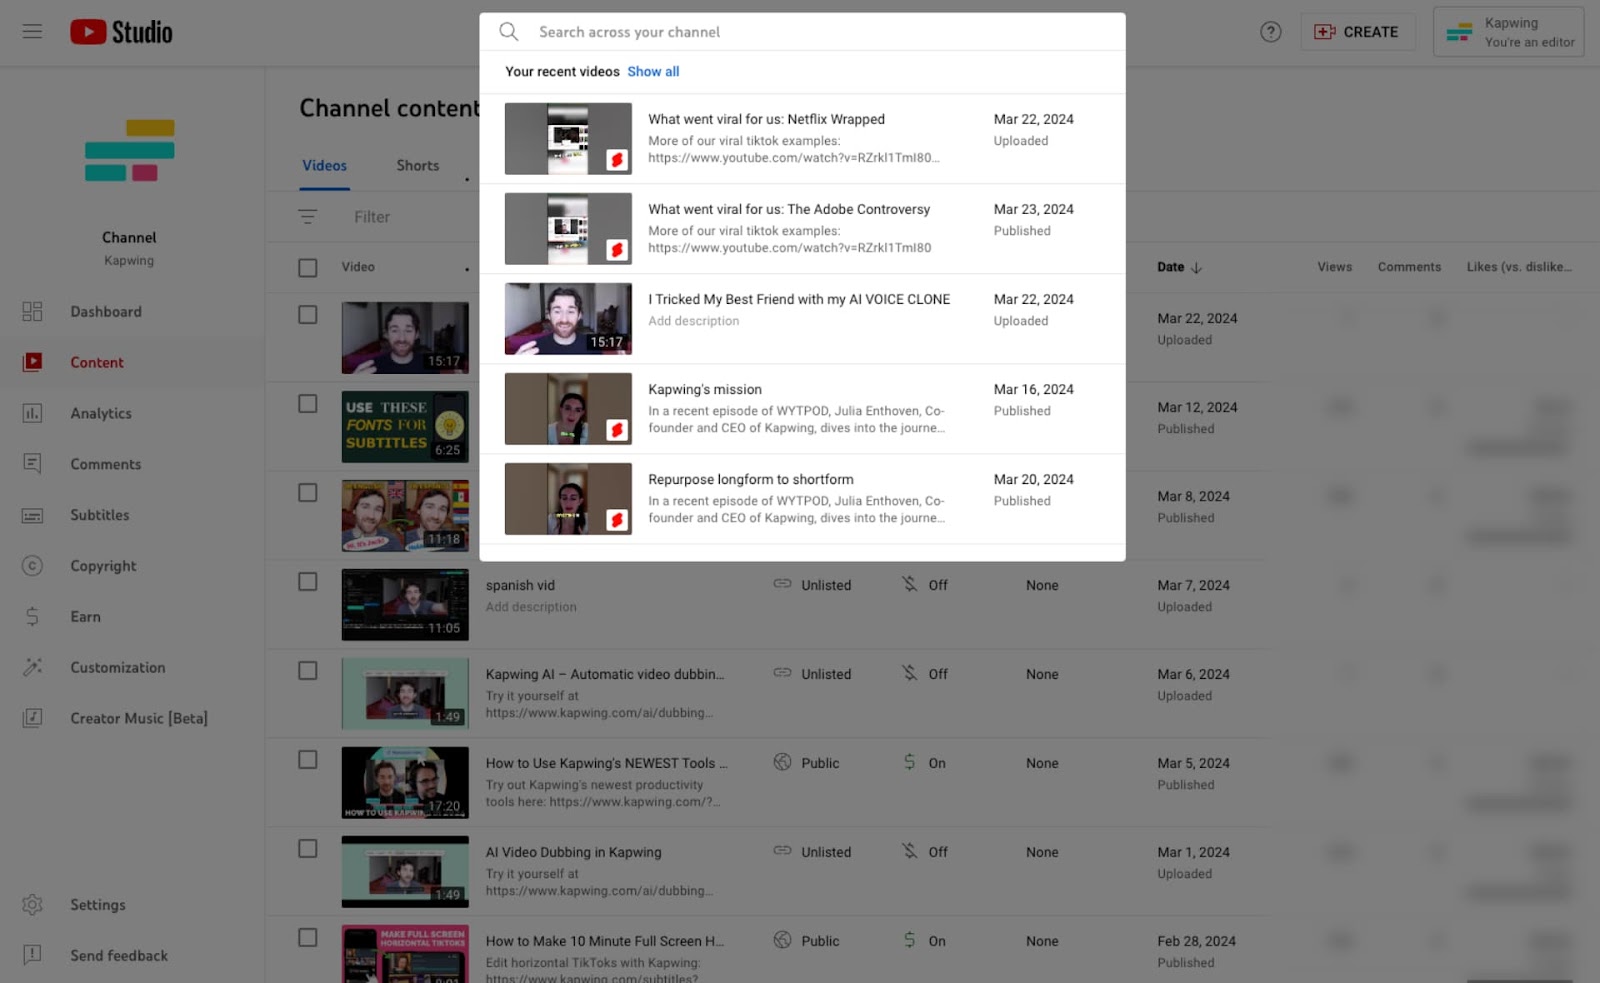
First, navigate to the YouTube Studio. Open the “Content” tab and find the video you want to edit. If this is your most recently published video, it’ll be at the top of the page.
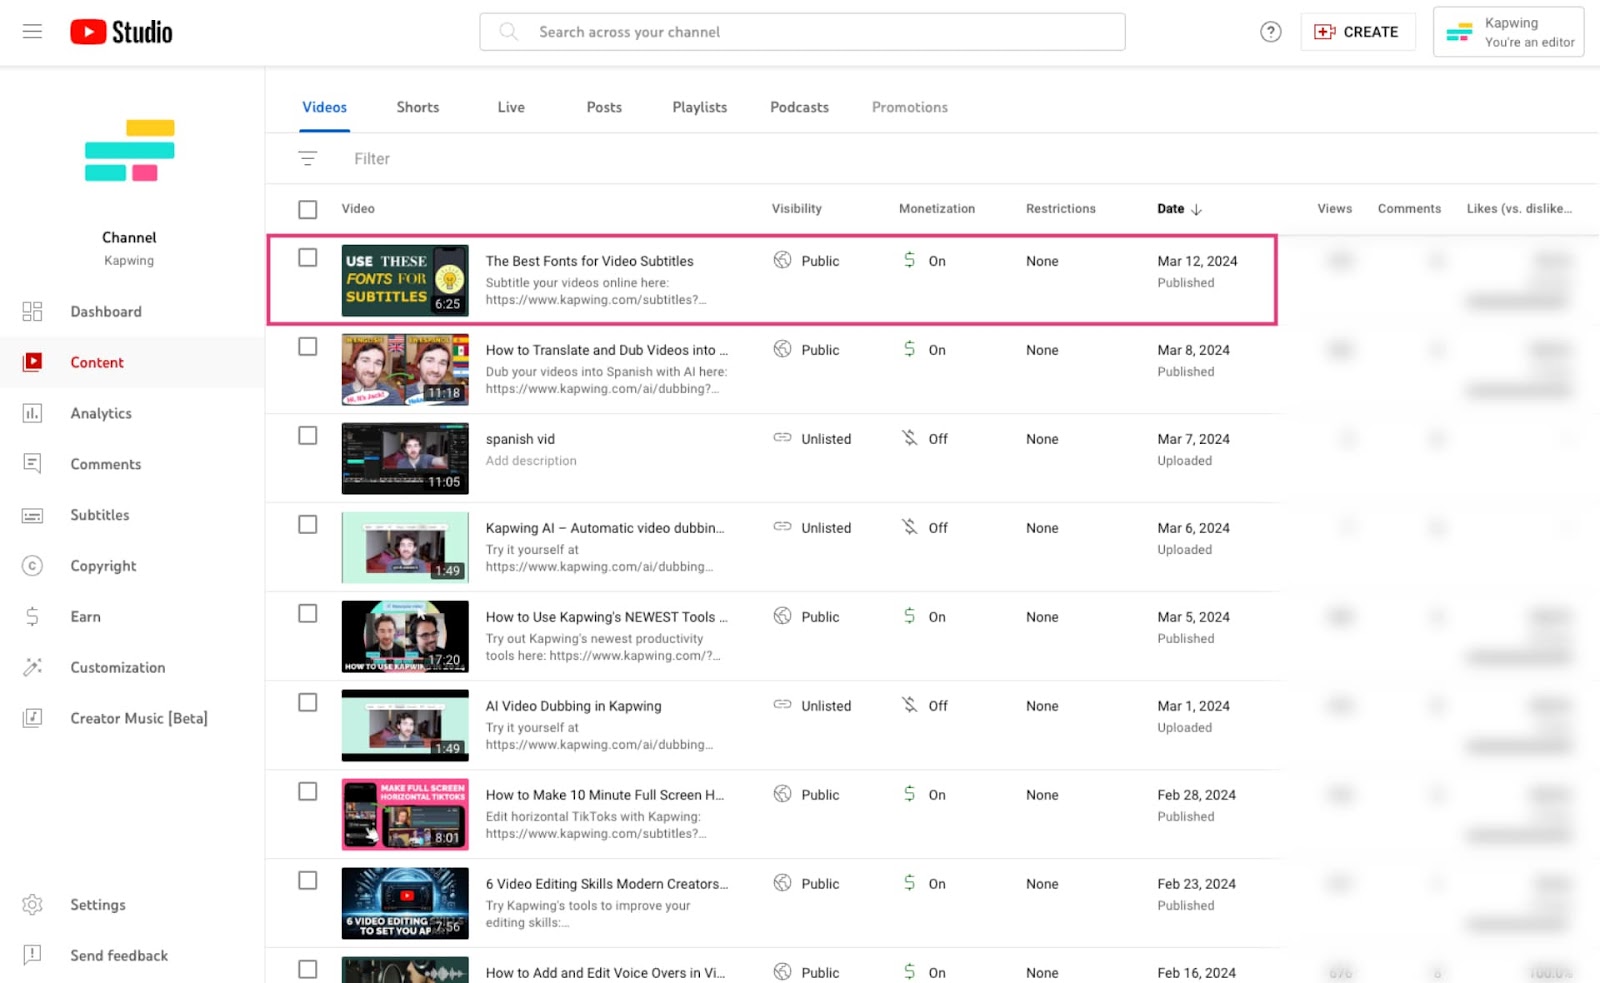
You can also use the search bar at the top of the page to find a specific video by typing in the title of the video.
Once you’ve found the video you’re looking for, click on the “Details” button to edit it, then open the “Subtitles” tool on the right side menu.
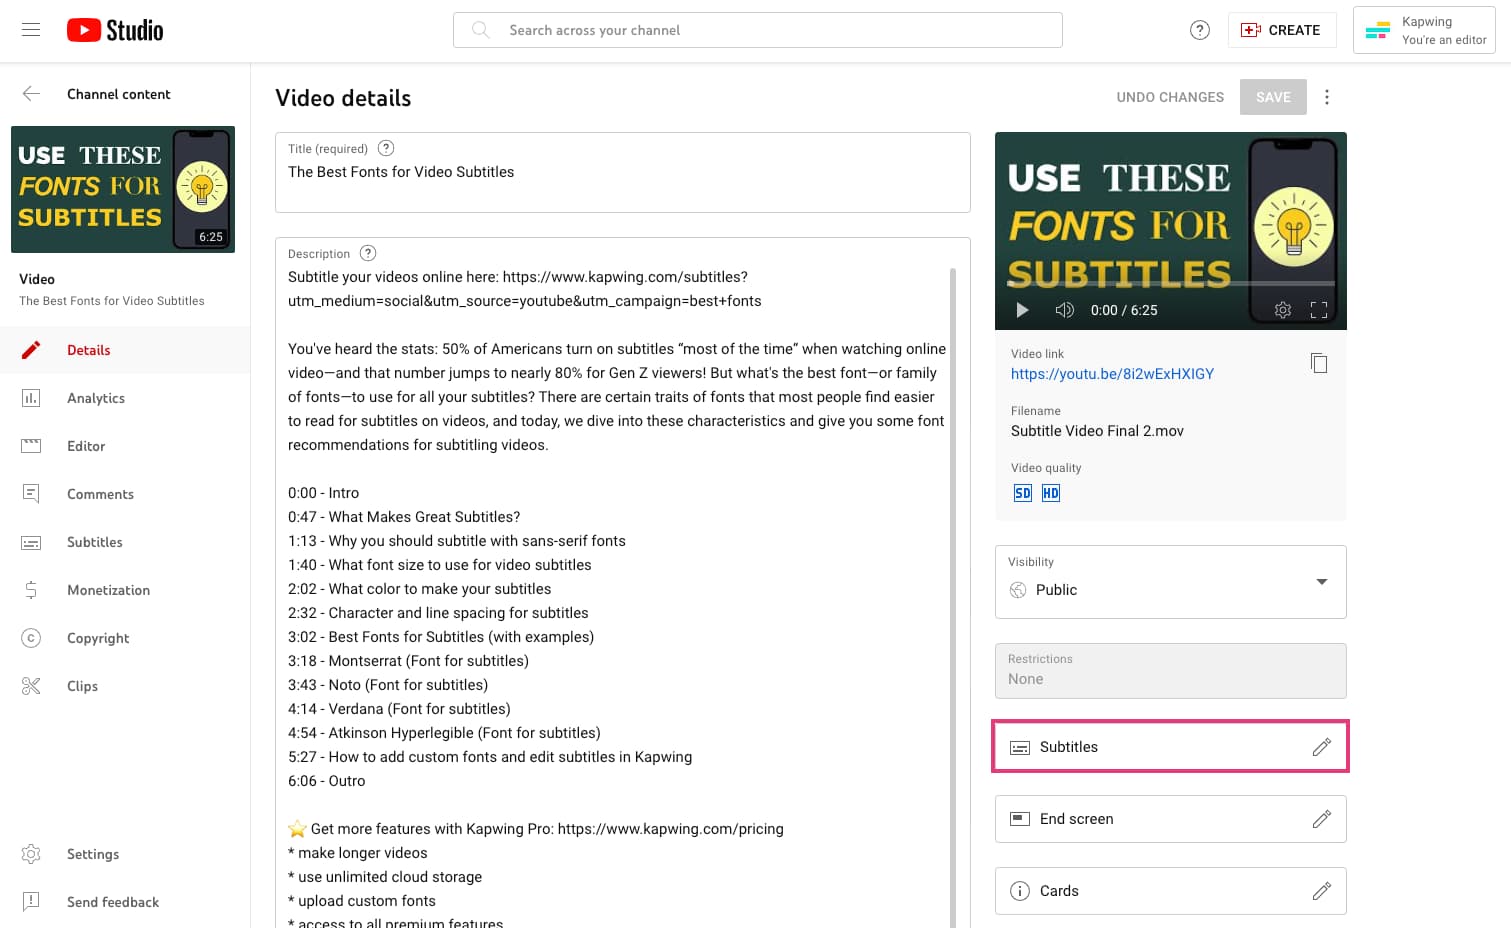
If YouTube has finished processing the video’s auto subtitles, you will be able to edit them here in a text window.
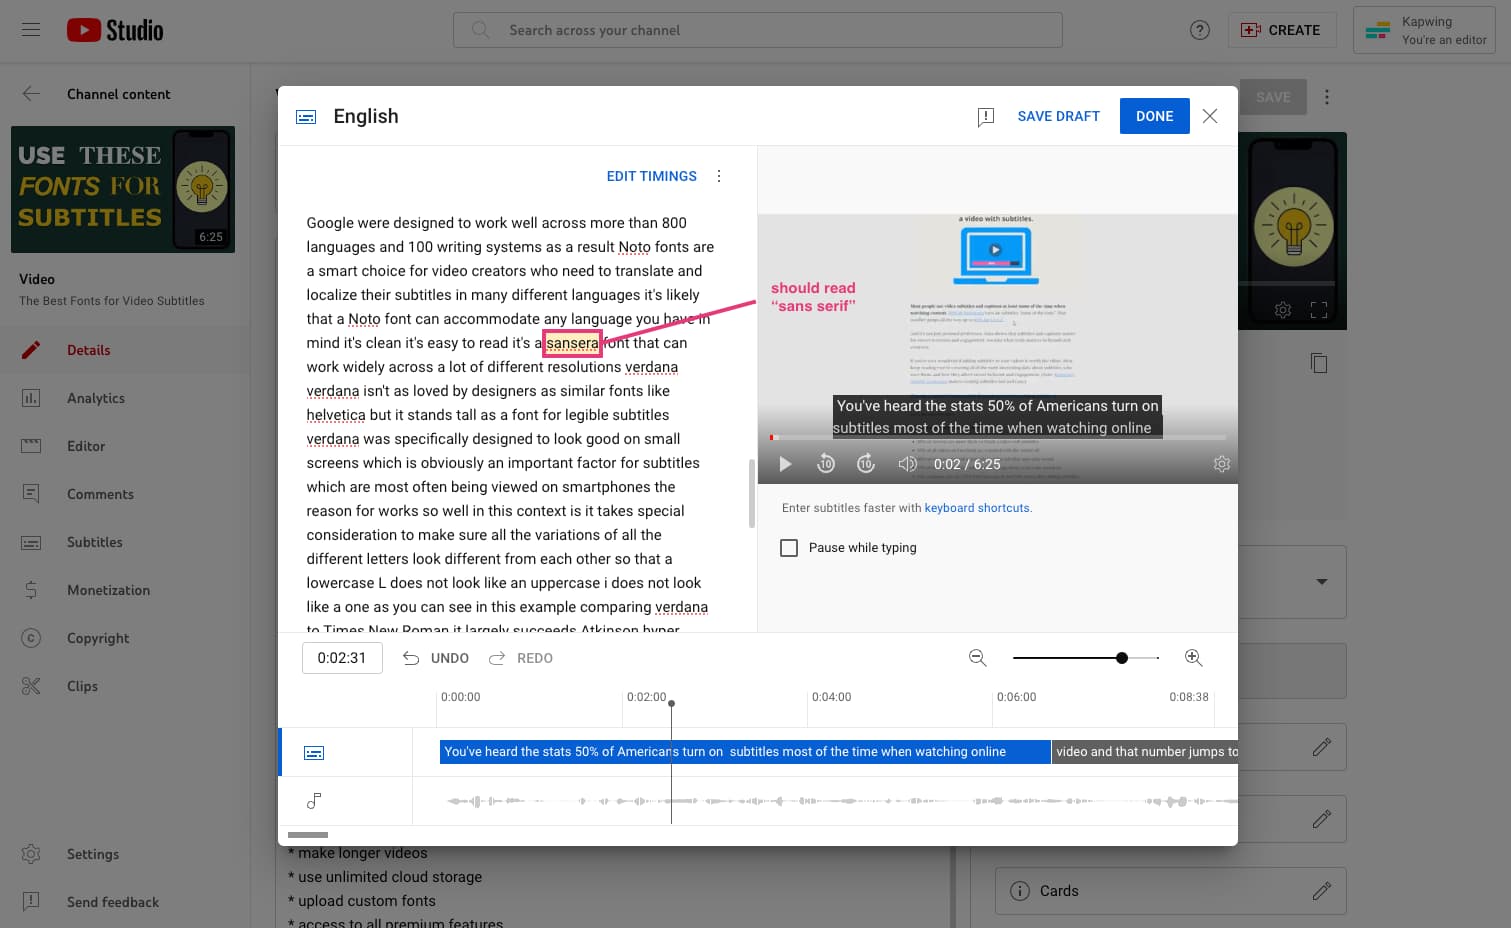
As you can see from the spelling mistakes in this example, YouTube’s automatic transcription sometimes gets the spelling of words wrong. It also lacks proper punctuation and proper capitalization sometimes, which can make it difficult for viewers to follow along and know when sentences begin and end.
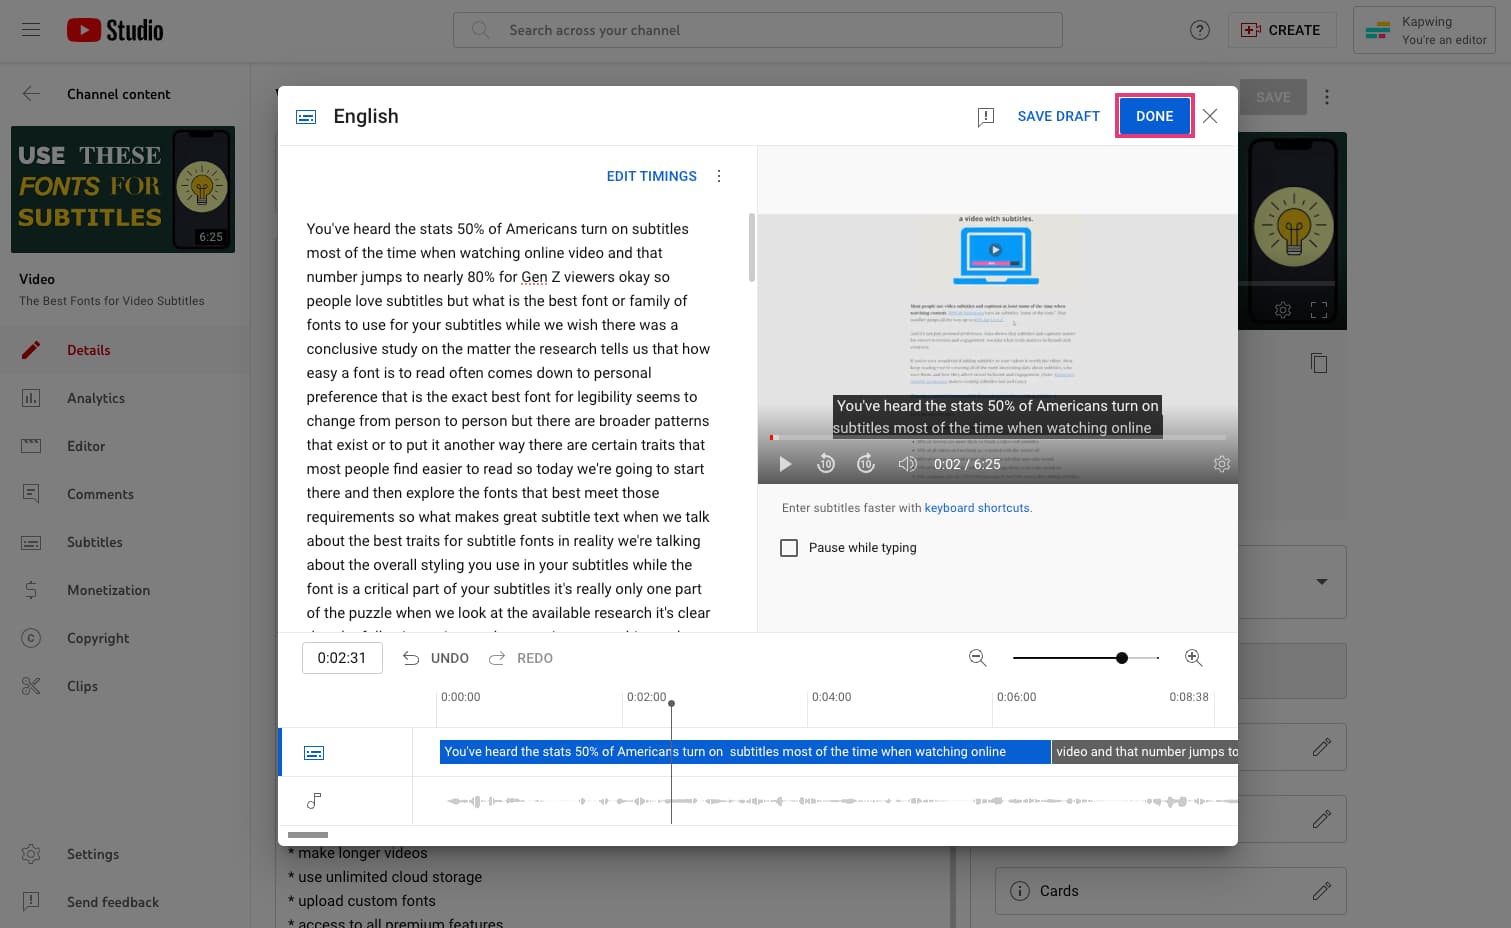
When you are finished, click “Done” to save your edits. YouTube will need to process the new transcript, so changes may not be applied immediately.
If you do choose to use YouTube’s auto subtitling to make closed captioning for your videos, we recommend going through the full video transcript to find and correct these errors for the best viewer experience. It’s much easier, however, to use one of the alternate methods provided earlier in this article to add subtitles to a YouTube video.
Never Forget the Subtitles for Your YouTube Channel
When uploading a video to your YouTube channel, you probably have a checklist of steps. Always make sure that adding closed captions or subtitles is one of them.
With so many methods for how to add subtitles to youtube video, there’s no reason to ever leave captions out. And with auto-generated options like Kapwing’s AI subtitles, you can easily include accurate subtitles in your YouTube videos every time.
YouTube Video Captions FAQ
Can I add subtitles to any video on YouTube?
You can add subtitles to any YouTube videos you have editing and publishing permissions for. To add subtitles to any YouTube video, you can manually add captions, type them in, allow YouTube to auto-generate captions, embed your own captions with a video editor like Kapwing, or upload a subtitle or caption file. Adding subtitles will make viewers more likely to watch your whole video.
You can also turn on YouTube auto-generated subtitles for any video you want to watch that has them enabled in that language.
How do you add subtitles to a YouTube video that's not yours?
It’s easy to add subtitles to YouTube videos. To turn on subtitles on a YouTube video, click the “CC” button at the bottom of the video. As well, you can click the gear wheel to open up further video settings, like displaying subtitles in another language.
How do I generate subtitles?
There are two main ways to generate subtitles. First, you can do it manually, but this is tedious. Alternatively, you can let YouTube generate subtitles on its own or generate them using Kapwing’s AI-powered subtitle and subtitle file generator.
How to add subtitles to YouTube videos?
To add subtitles to YouTube videos, you have several options. You can manually create subtitles and type them in, allow YouTube to auto-generate captions with automatic subtitles, embed your own captions with a video editor like Kapwing, or upload SRT caption files.
Additional Resources:
- The Very Best Software for Editing YouTube Videos in 2023
- The 9 Best Fonts for Subtitles and Video Captions in 2023
- How to Automatically Add Captions to YouTube Shorts