How to Create a Music Video from Scratch with AI (Plus, 6 Tools for Every Skill Level)
Here are two methods to create an AI music video for beginners (no editing) and more advanced video editors with our toolkit recommendations and tutorial.
AI-generated music videos aren’t some future possibility—they’re already here.
The world's first commissioned music video made entirely in OpenAI's Sora was just released. "The Hardest Part", by Washed Out, is equal parts trippy and impressive, following consistent characters through an 80s high school dreamscape with realistic feeling camera movement.
But Sora isn't the only way to make AI music videos. Far from it.
From Billy Joel’s AI-augmented comeback video, “Turn the Lights Back On,” to completely AI-generated music videos like this frog cyborg rock show created by Futurepedia, artists at every level are experimenting with how to incorporate AI into their music video production.
You’ve probably started seeing AI music videos cropping up on your FYPs and recommended videos, but how is everyone making them? Well, it's not with Sora (yet), that's for sure.
At the time of writing this, there are no publicly available all-in-one AI music video generators. That is, tools that make both the song and the visuals all in one place. Instead, the best approach is to create the parts individually then assemble, either in a designated AI tool or with a standard video editor.
And depending on the kind of AI music video you’re trying to create, that assembly process might require a lot of editing work. Let’s look at the different ways to create a music video with AI, as well as the best toolkits, for both beginning editors and more advanced video creators:
- If you’re creating your music video completely from scratch, start here
- If you already have a song and you just need visuals, start here
- AI music video toolkit recommendations
How popular AI music videos were made
Not all AI-generated music videos are created equal.
At the very high fidelity end, you have something like Billy Joel’s “Turn the Lights Back On” music video, which was created using Deep Voodoo, tech developed by the team behind the viral Trump deep fake videos from 2022. The video description credits a further five generative AI artists for their work adding Joel’s younger selves into the video with him.
Futurepedia’s completely AI music video, “Amphibious Uproar,” is more DIY but still highly produced. This video was created using four separate generative AI tools plus significant manual manipulation in Adobe Premiere to get the lip sync effect and layer clips together seamlessly with masks. He does a deep dive into the process in this video, which we highly recommend watching.
Other AI generated music videos fall more into the category of trippy visuals more or less synced to a track. The Hello AI channel on YouTube has a playlist of videos like this with AI-generated instrumentals and relaxing, thematically relevant visuals. These videos don’t tend to tell a linear story like we’re used to seeing in standard music videos but they are less labor intensive.
You can create one of these AI “music videos” by feeding a few AI-generated images into a text-to-video tool and it will fill in the space between frames and sync the image evolution to the beat of your track.
Now let's get into how to make your own AI music video.
How to make an AI music video
The first step in making any music video, AI-generated or not, is the music itself.
Step 1: Create a song with AI
If you already have a song, you can skip this first step and jump right to creating the visuals, but if you want to create an entirely AI music video, you can actually make the music with AI as well.
There are a few tools on the market for this, including a Google AI tool called MusicFX which is currently still in a limited release beta. Another option is any text prompt interface music generator, like Udio or Suno, which are both fairly intuitive, produce really musically interesting outputs, and allow for quite a bit of customization, even within their free versions.
For this tutorial, we’ll be using Suno, but the process within Udio is mostly the same.
Type in your text prompt, set some genre and sound parameters, then let the tool generate options for you.
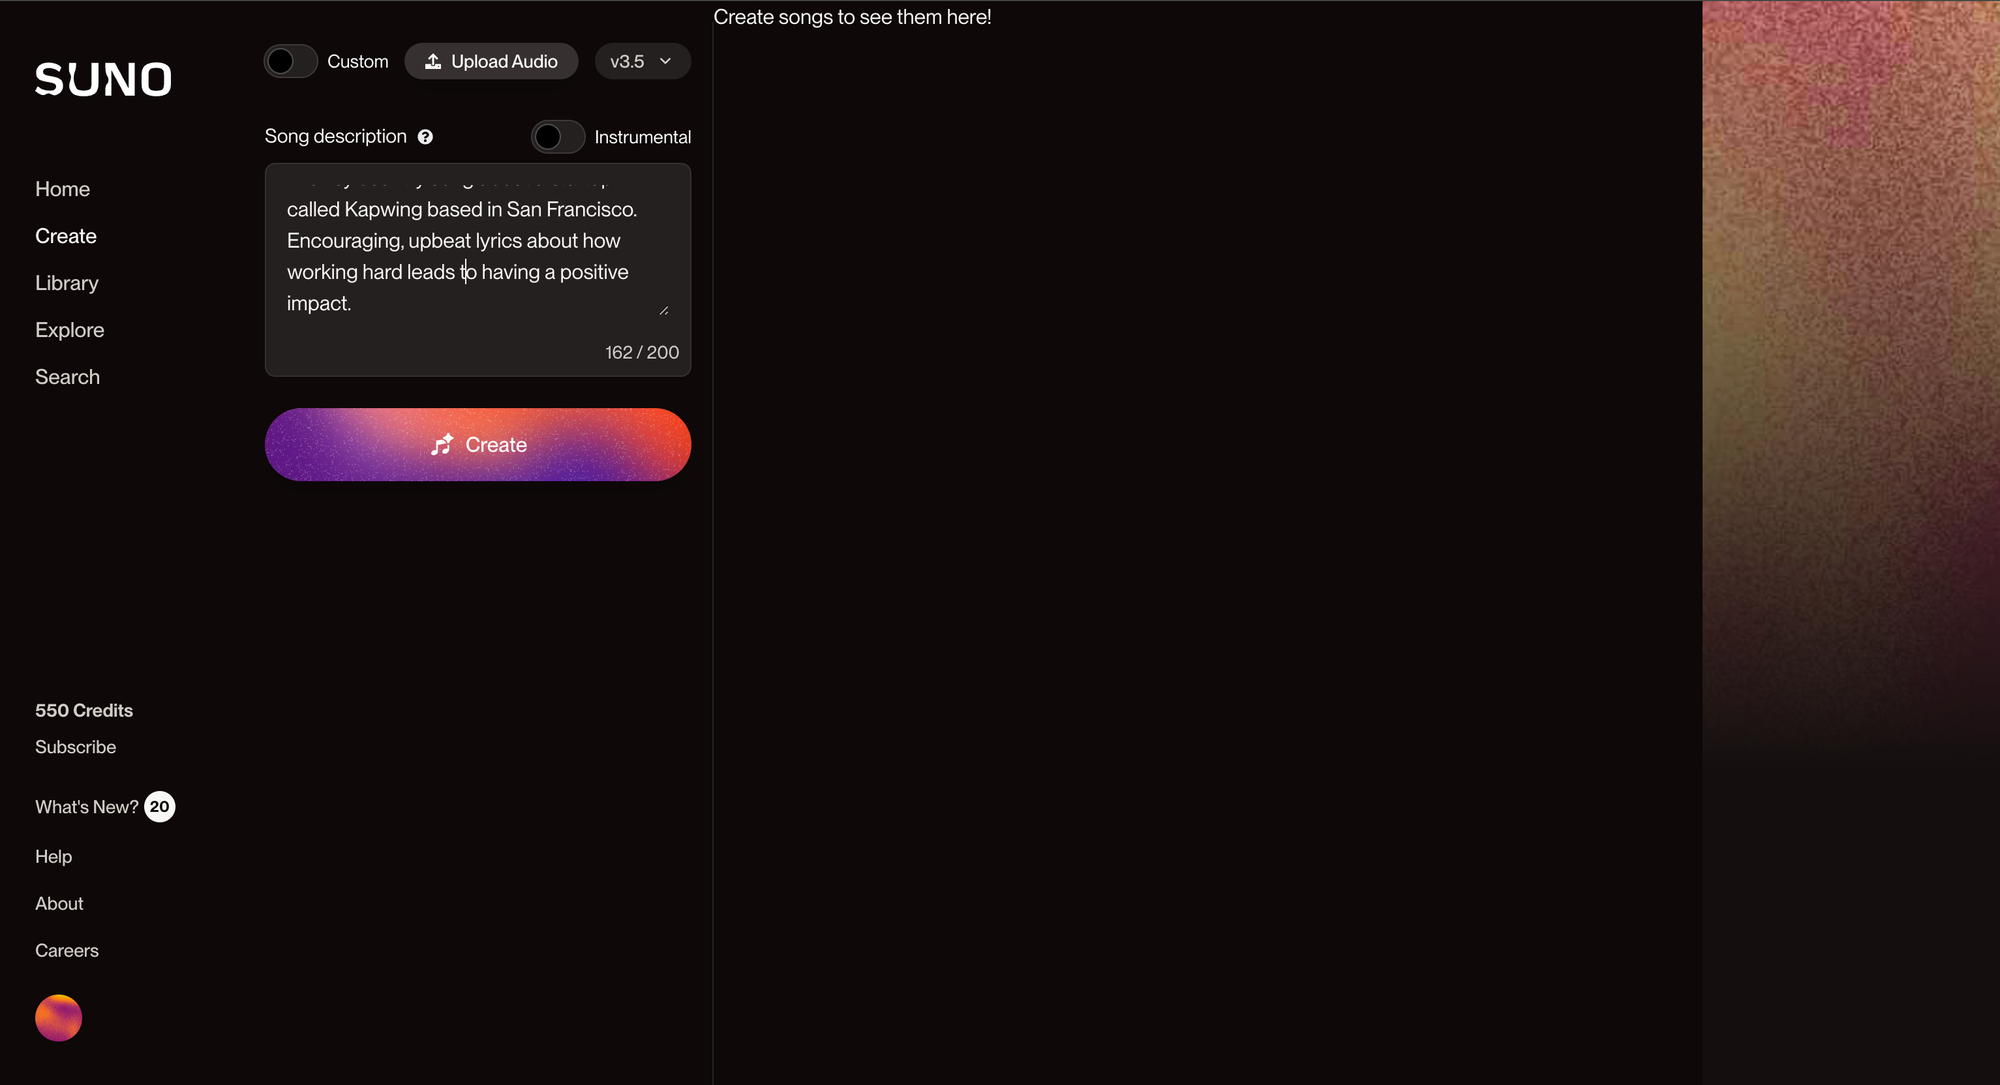
For more control over the output, try Custom Mode. Input your own lyrics entirely or just give Suno a verse or two and let the tool come up with rest. We found this method produced better results for more niche topics as well as more consistent rhyme scheme and song structure.
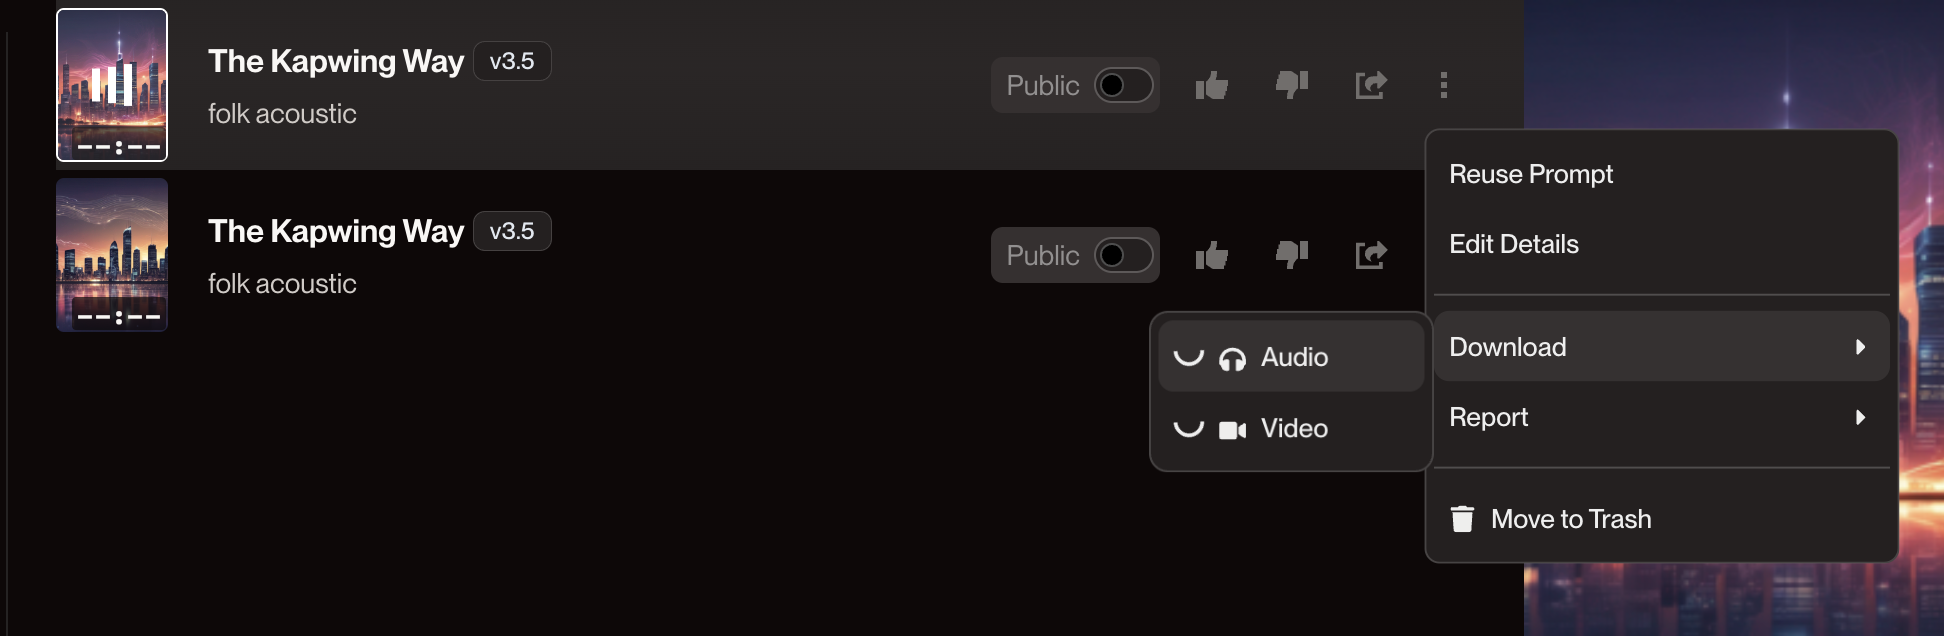
If you’re not quite happy with the song, Suno can regenerate a variant using the same prompt. Click the three dot menu on the song then select “Reuse Prompt” to generate a variant.
If you are happy with the song, you can extend it so that it’s longer than one minute. Click on the three dot menu again, then select “Extend.” Suno will ask you to input the time stamp from which you’d like to extend the video, then it will regenerate an additional 60 seconds or so from that point in the original track.
If you’ve used Custom Mode, you’ll be able to edit which lyrics you want to show up in any variants or extensions.
Repeat this process until you have a song that you’re happy with. You’ll likely have several clips that will need to be combined together into a single track, which you can do in any video editor.
When you download your MP3 files, make sure to label them so you’ll know what order to put them in when you’re editing them together later.
Now that you’ve got the music part covered, it’s time to create the video part of your AI music video.
There are two main ways to create the visuals for your music video. The method you choose will largely depend on how much video editing you want to do for your final video.
Method 1: Less video editing required.
Use a text-to-video animation tool, like Neural Frames or Kaiber that produce fully animated videos, no editing necessary. You won’t have control over every individual frame of the final video, simply due to the nature of how Stable Diffusion animation works, however both of these tools are audio-reactive. That means that unlike with other AI text-to-animation tools, you can sync these animations to your music and add fine tune details like zoom and camera movement inside as your animations generate.
Here’s an example of a music video made with Neural Frames:
Check out this tutorial from Neural Frames to see if their tool can do what you’re looking for. You can also generate a few seconds of video for free before committing to a paid subscription.
Method 2: More video editing required.
The other method requires several different tools and a certain level of video editing knowledge to be able to combine clips and music tracks.
We’ll walk you through this method below, since it requires a bit more explaining to see how the different tool outputs all come together to form a single video.
Step 2: Create your visuals (characters, backgrounds, etc.)
Using an AI image generator, you can begin to create the visuals you’ll use in your final video. Depending on the vision you have for your final video, these can be characters that will appear in your music video, settings or landscapes, or even just abstract visuals.
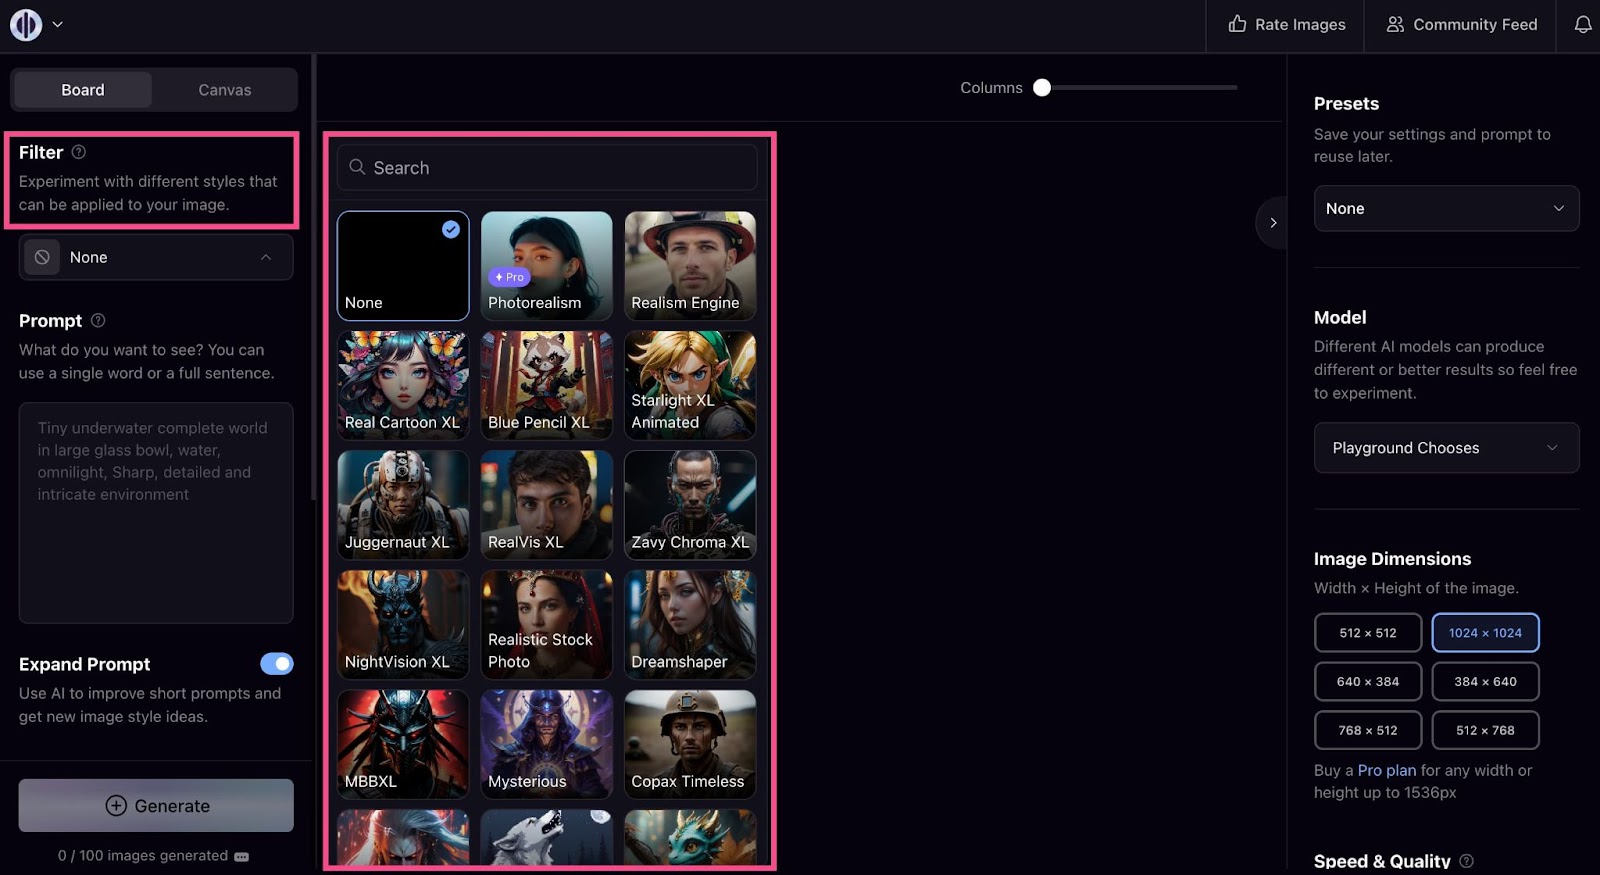
You can use something like Playground AI, which has preset models with distinct artistic styles you can choose from and assists with prompt generation to help you get the best output.
If you're more comfortable with AI prompt writing and image generation, you can use Midjourney or DALL-E instead.
Whichever tool you use, you’ll want to generate several variations of these images. If you’re creating characters for your music video, make sure to get different poses, “camera angles,” and settings. These static images will be the basis of all of your animations.

Not sure what images you’ll need? It can help to storyboard your music video idea out before generating your images.
Once you have all your images, it’s time to animate them.
Step 3: Animate your visuals
Depending on the kind of images you generated, you could need two types of animation. First, general animation to add movement to the background or characters. And second, lip syncing if you want to make it look like your characters are singing the lyrics to the song.
There are tools to automatically add lip syncing, but if you’re using non-human characters like the frogs in Futurepedia’s music video or the cats in our example above, those tools won’t work and you’ll have to do quite a bit of manual editing. We recommend populating your music video with humans only if you want to add lip syncing.
For the following example, we added some general movement to an image using Pika.
You can have Pika generate the visual from a text prompt, but this is often less precise. We recommend uploading the images you created in the previous step and animating them one by one. Type a description of what you want to happen in the animation into the text prompt box.
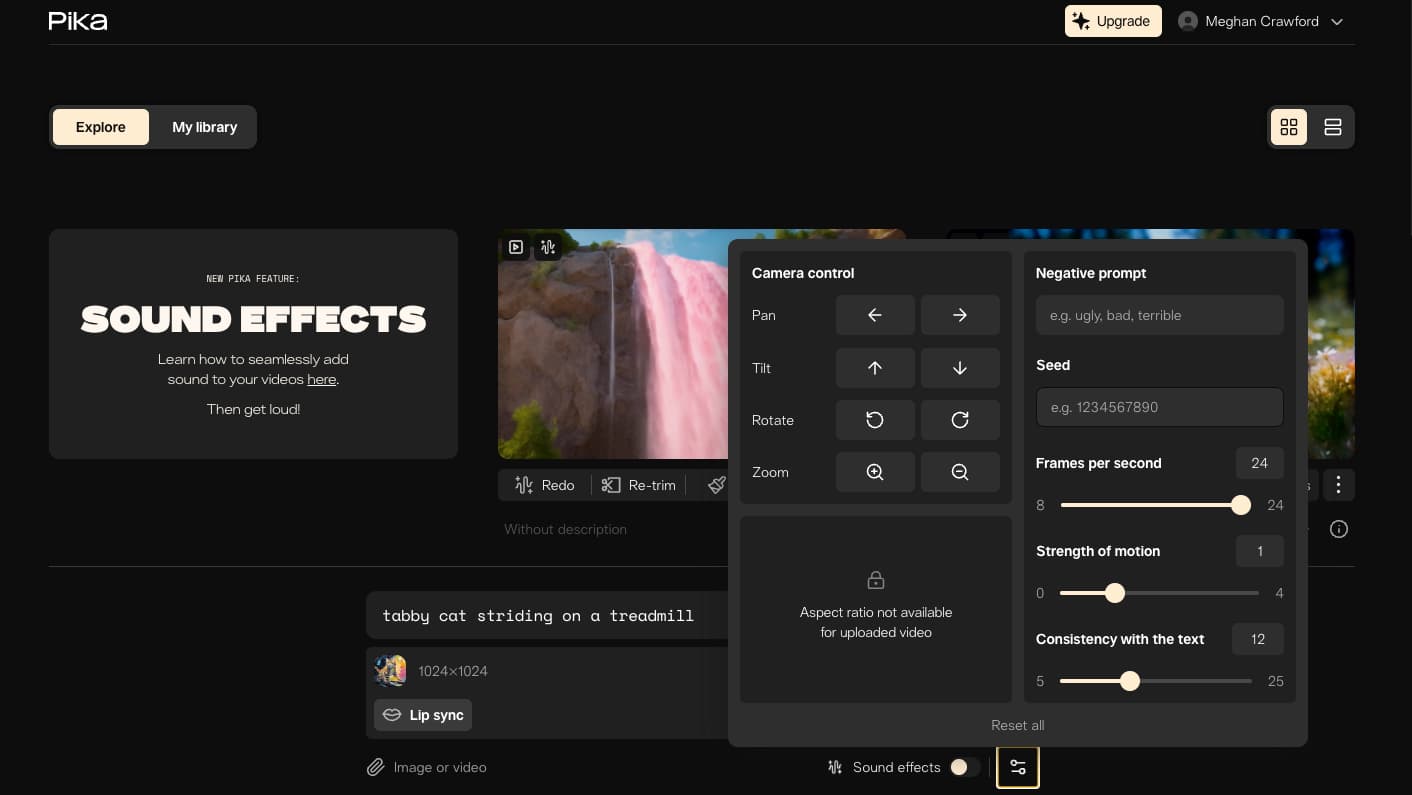
You can also add camera movement, like rotation, tilting, or zooms, as well as negative prompts and other parameters. With the pro version of Pika, you can add an additional 4 seconds of animation to your outputs, which is helpful for maintaining consistency within your music video.
Here’s an example of an animation we created with Pika:
For more fine-tuned control over the animation, try RunwayML’s motion brush tool. You can select the sections of image that you want to animate, leaving the rest still.
Whether you’re using Pika, Runway, or another animation tool, the key to getting something you like here is regenerating the outputs multiple times. You may also need to refine your prompt if you’re still not getting results you love.
Repeat this step for every image in your storyboard.
Step 4: Combine visuals with music
Once you have all of your animations ready, it’s time to combine them with the song you created earlier. You can do this with any timeline-based video editor, including Kapwing.
First, upload all of your animated clips and music tracks to the editor. Hopefully, you’ve used an organized naming convention so you know which order the clips go in to line up with your storyboard.
Once everything is uploaded, you can begin adding layers to the timeline. Try laying down the music tracks first, so that you’ll be able to hear back the song as you place the animated clips.

Next, add your animations to the timeline in the order in which you want them to appear. To have two animations play at the same time, make sure they’re on two separate layers.
Unless you’ve opted to add lip syncing to your music video, that’s pretty much all there is to it.
AI music video toolkit recommendations
We mentioned a few tools earlier in the article, but here is our full breakdown of recommendations for tools to create an AI music video.
We’re dividing this into two parts:
- Tools that require no editing at all but produce far less customizable results
- Tools that are more DIY and require some level of video editing
Toolkit 1: No editing required
With this toolkit, you’ll be able to create a full music video without using a video editor. Simply create your song in Suno, then upload the track to Neural Frames. The final video you export from Neural Frames will be ready to publish, no further editing needed.
🎵 Music generator:

Suno is a free to use AI-powered music generator that offers surprising customization. You can write your own lyrics or let ChatGPT take over. The initial outputs provide a ~1 minute long sample which you can expand and iterate on until you get the final song you want.
For a free tool, we were pleasantly surprised by how much we liked the songs Suno generates. The instrumentals in particular are quite good.
Cost: free
🖼️ Visuals and Animations:
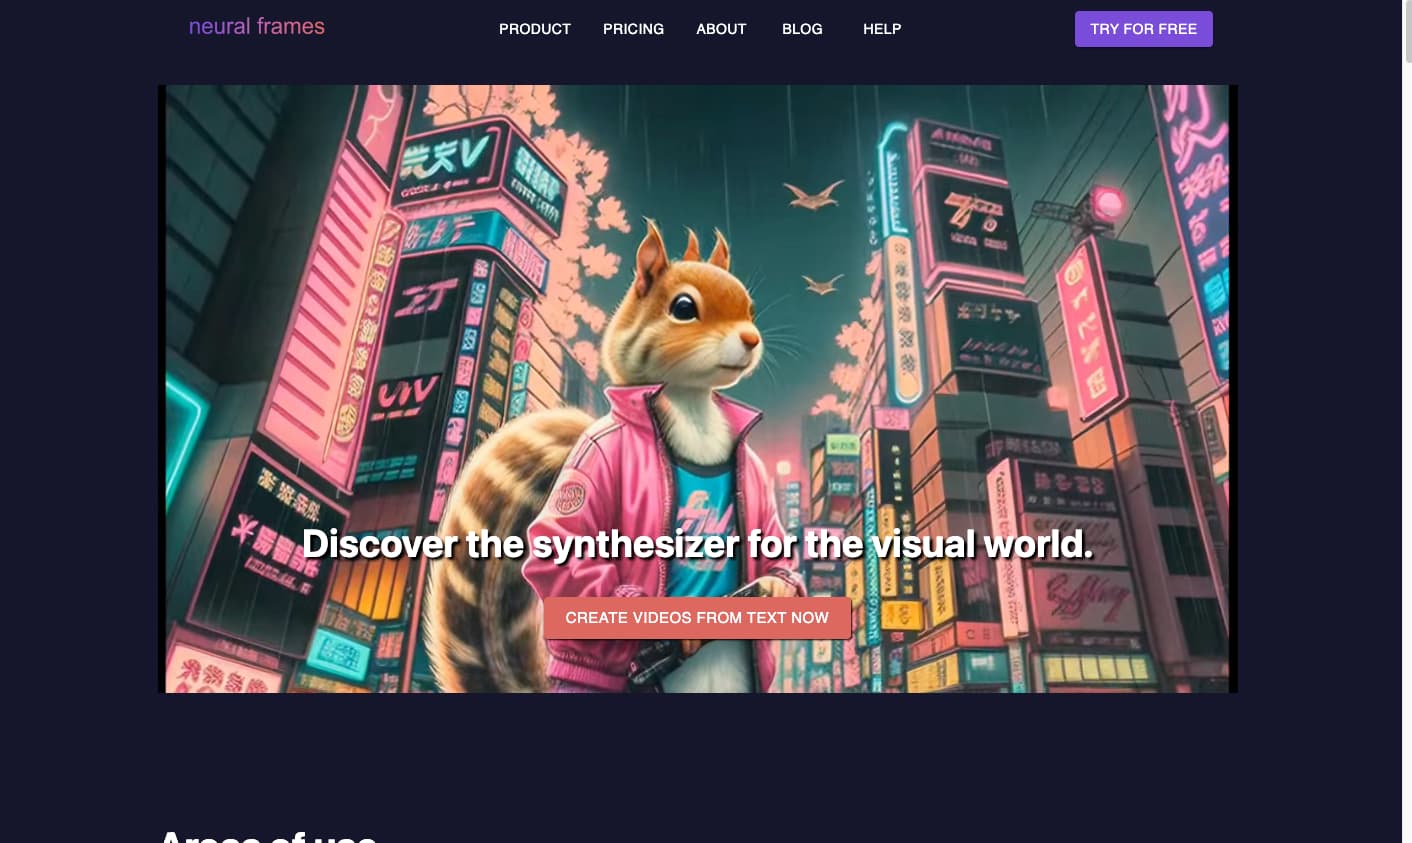
Neural Frames was designed as a way for musicians to quickly and easily create better visuals for their music videos. You can generate images with text prompts and then Neural Frames will use Stable Diffusion to animate frames between the static images.
We really liked how many tutorial videos and articles are available on their website before you buy to help you understand how to use the tool and if it’s right for you. Neural Frames provides a high level of control over animation style and camera movements and even how the animations are synced to your music. For example, you can set the audio source for the modulations as the snare, bass, vocals, etc.
Cost: Starting at $19/month
Toolkit 2: Moderate to advanced editing required
With this toolkit, you will need to assemble all of your animations and audio tracks in one place. And, if you choose to add lip syncing to your clips, there may be some additional, more advanced editing required.
🎵 Music generator:

Udio is another powerful, free-to-use AI-powered music generator. Like Suno, it can generate instrumentals and vocals across a wide range of musical genres with impressive quality and creativity.
Write your own lyrics or use the auto-generated lyric function to allow ChatGPT to write them for you. By default, Udio will rewrite your text prompts to achieve the best outputs. If you’re an expert at prompt engineering, you can turn this off with manual mode to interface directly with the model.
The instrumentals are consistently good and multiple generations will often result in great vocals, too.
Cost: 600 free generations/month while in Beta
🖼️ Visuals:
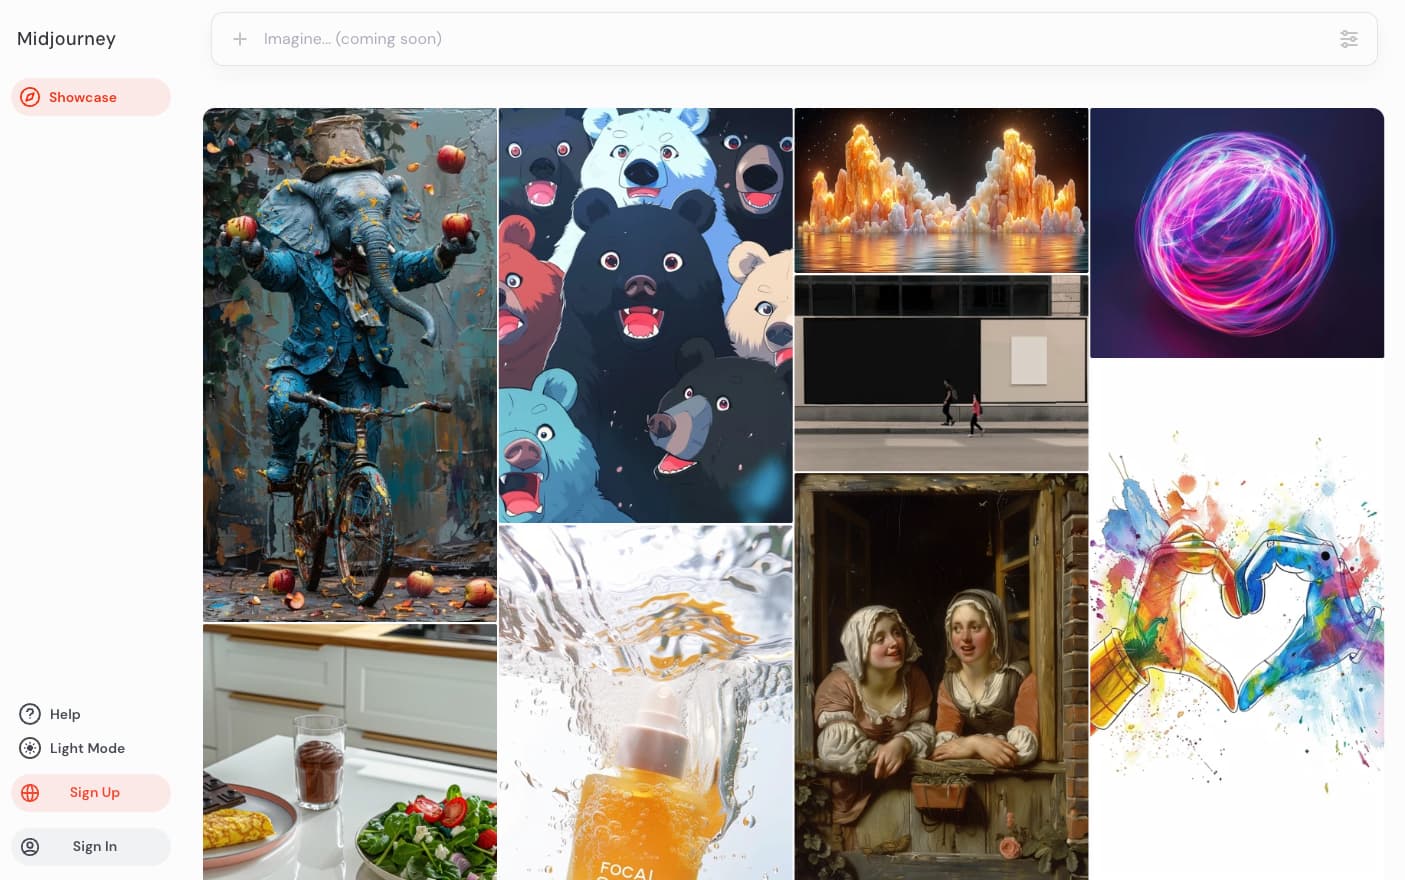
It’s hard to beat Midjourney when it comes to creating stunning visuals in a consistent artistic style. One reason Midjourney works so well for AI music video creation is because it now supports consistent style.
Simply add “--sref [reference image url]” to your prompt to generate multiple prompts with a consistent style. This is a great way to create consistent characters or avatars to use throughout your music video.
One drawback to Midjourney is that there’s currently no desktop version; you have to use it through Discord, which has a bit of a learning curve. But the Midjourney Discord server is also a great place to find inspiration and hone your image prompt writing skills.
Cost: Starting at $10/month
🎬 Animations:
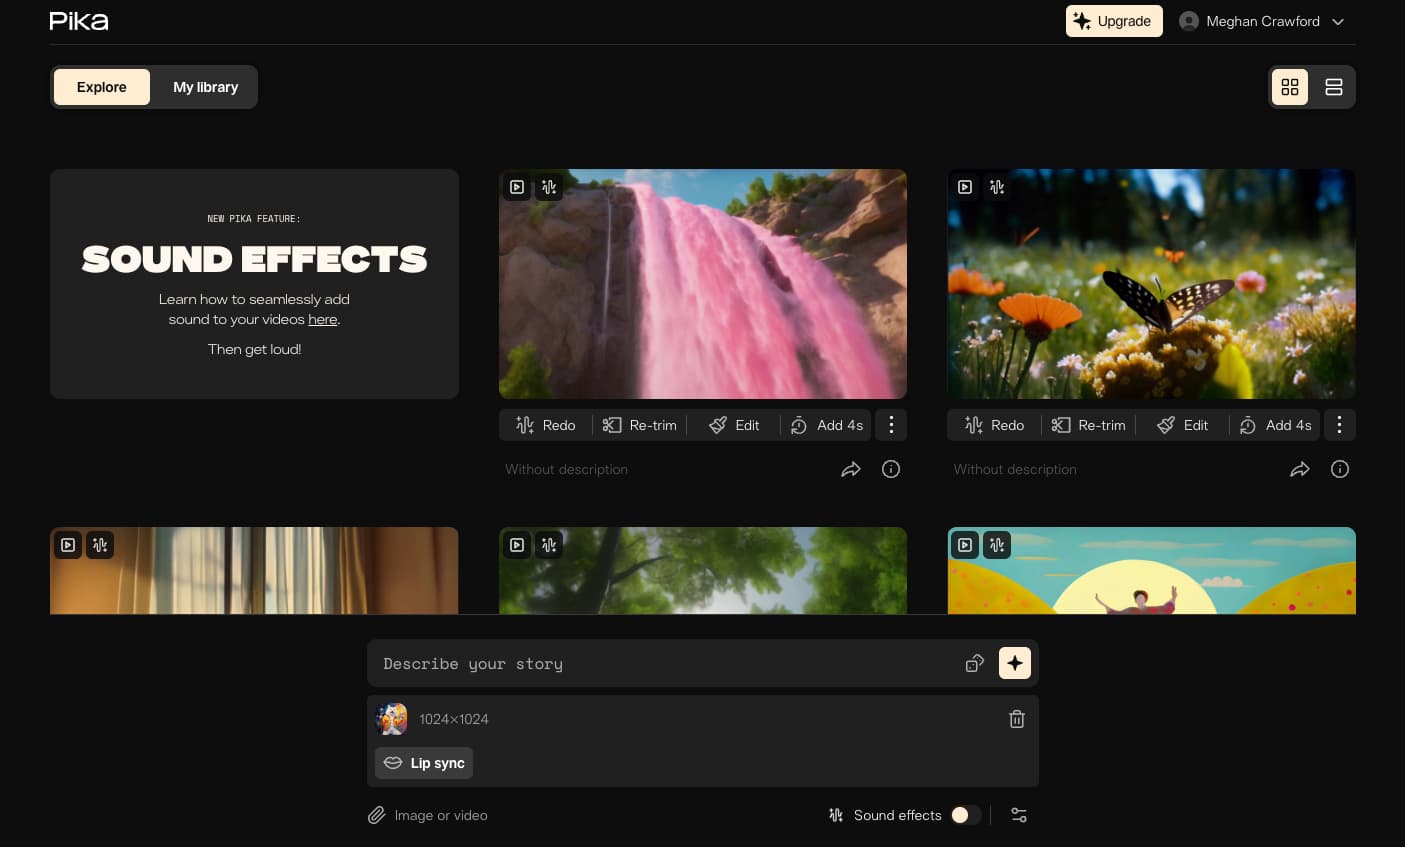
Recently moved from Discord to a desktop experience, Pika is an image to video generator. Simply upload the image you want to animate, enter a text prompt to help guide the animation, and set your parameters (zoom/no zoom, negative prompts, etc.).
With the free version, you can only generate 3-second clips, but if you upgrade you can extend your clips by up to 4 seconds at a time. We found that the key to getting great animated clips from Pika is to just regen the output a bunch of times.
Bonus: Pika does have a built-in lip sync tool, if you’ve rendered human characters with Midjourney and want them to look like they’re singing the lyrics in your music video.
Cost: Free with watermark or starting at $8/month
✂️ Video editing:

Kapwing is an online video editor that is both beginner friendly and more than capable of handling multi-layer music video projects.
With Kapwing, you can sync your audio and video, add subtitles for the lyrics, and easily combine all of your animated clips and your music tracks into a single video without needing to download anything.
Transition animations can help you move smoothly between clips and you can control audio levels and even add a fade to the intro or outro of your song.
Cost: Free with watermark or starting at $16/month
Is AI the future of music video creation?
In one way or another, probably.
Whether it’s high fidelity projects like Billy Joel’s music video or smaller scale, DIY visuals, we’re already seeing AI change how music videos get made. These tools are quickly hurtling us toward an era where:
- Musicians can potentially create their own music videos without a shoot or a studio and
- Video creators can experiment with a new format without worrying about copyrighted music.
Overall, this is just the continuation of a long-standing trend making music creation and distribution easier and more accessible—from the big-budget videos only shown on MTV to a time where literally anyone can dabble in music video creation, we've already come a long way.
Create content faster with Kapwing's online video editor →